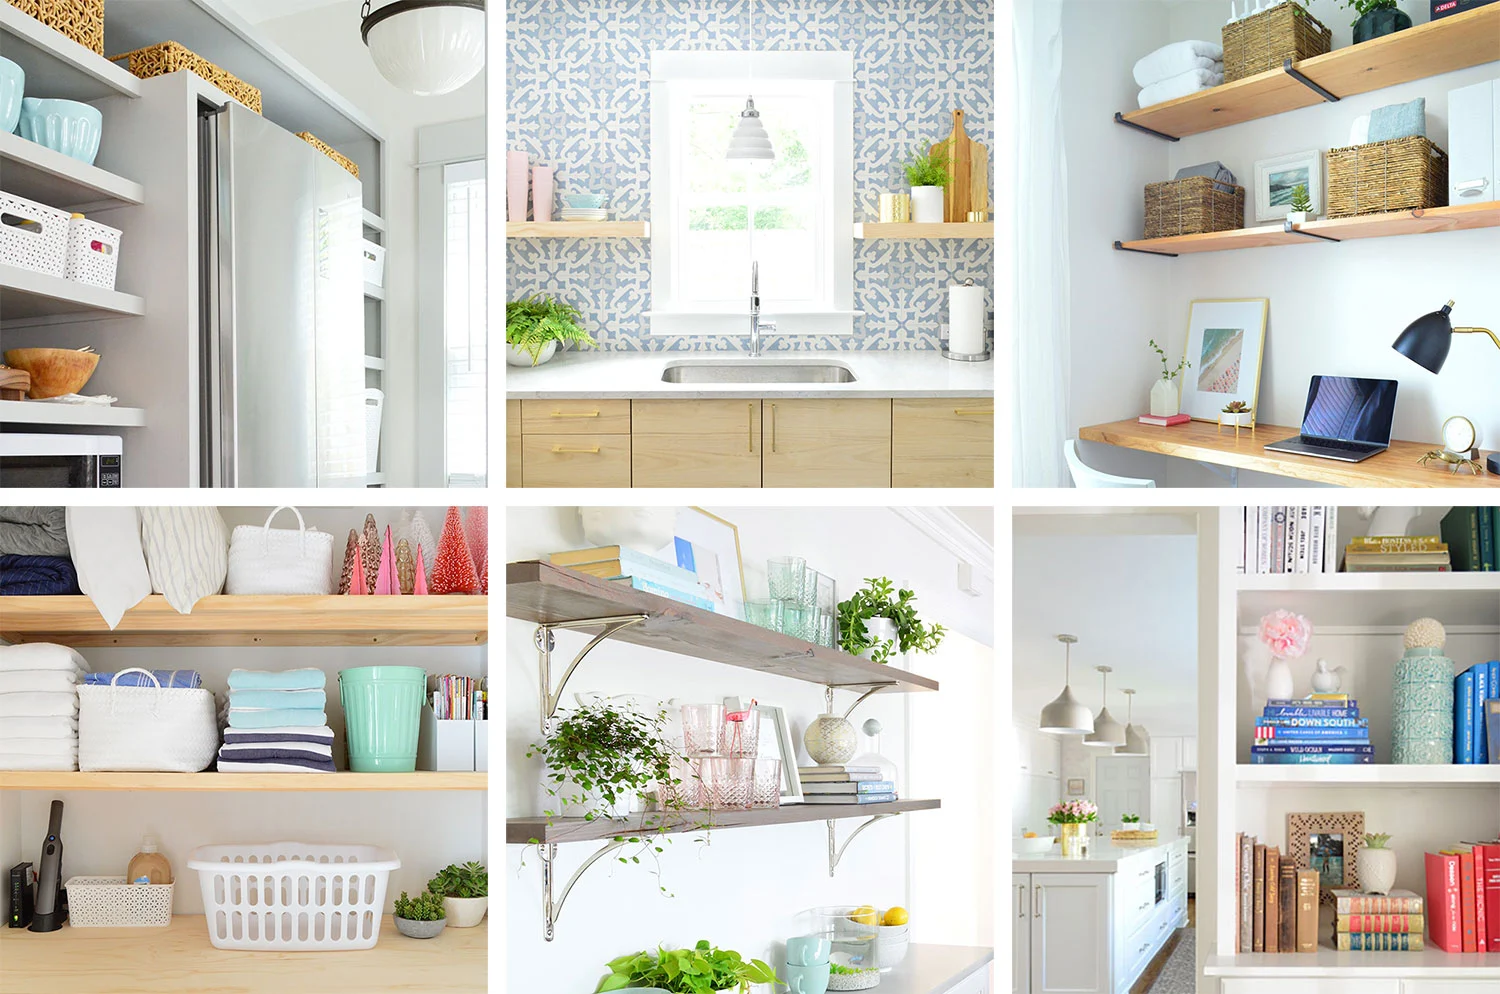
You don’t need expensive custom cabinetry to make your home feel more organized and beautifully decorated. A few thoughtfully designed shelves can transform an empty wall, create extra storage in a small kitchen, or give your favorite books and plants a lovely place to live. With basic materials and a little creativity, even simple DIY shelves can look surprisingly stylish.
These 12 budget-friendly DIY shelf ideas explore rustic floating shelves, industrial pipe designs, hanging basket storage, creative wooden crates, narrow wall shelves, and custom pantry storage. Whether you’re decorating a bedroom, kitchen, bathroom, home office, or small apartment, you’ll find practical project inspiration, affordable materials, styling advice, and important mounting tips to help you make the most of your space.
Affiliate disclosure: As an Amazon Associate, I earn from qualifying purchases. This article contains affiliate links, which may earn us a commission at no extra cost to you.
More Shelf Decorating and Storage Inspiration
- 16 Picture Ledge Layout Ideas You’ll Love – Discover clever arrangements for shallow shelves, framed artwork, and small decorative collections.
- 21 Farmhouse Shelf Decor Ideas for a Cozy, Rustic Home – Find warm styling combinations using wooden shelves, ceramics, books, and greenery.
- 16 Beautiful Bathroom Shelving Styling Ideas – Explore practical and attractive ways to organize small bathroom shelves.
- 12 Genius IKEA Laundry Room Makeover Ideas on a Budget – See how shelves and smart storage can improve compact utility areas.
Quick List: 12 Budget-Friendly DIY Shelf Ideas
- Build Simple Floating Wood Shelves
- Create Industrial Pipe and Wood Shelving
- Add Decorative Hanging Basket Storage
- Turn Wooden Crates Into Rustic Storage Shelves
- Repurpose an Old Ladder Into Creative Shelving
- Transform Vintage Suitcases Into Quirky Display Shelves
- Build Slim Floating Shelves for Awkward Wall Niches
- Install Natural Wood Shelves Above a Kitchen Backsplash
- Customize Affordable Ready-Made Floating Shelves
- Make Chunky Rustic Floating Shelves on a Budget
- Use Metal Brackets for an Easy Floating-Shelf Look
- Build Custom Pantry Shelves With Affordable Boards
How to Build Budget-Friendly DIY Shelves
Before starting a DIY shelving project, decide whether your shelves will be primarily decorative or used for practical storage. A small shelf holding framed photos and a candle requires a different construction approach from a pantry shelf supporting heavy food containers or a kitchen shelf holding stacks of dishes.
Measure the available wall space, identify the wall construction, and choose shelf materials suitable for the intended load. For many beginner projects, a properly sized wooden board, suitable brackets, screws, and an appropriate finish are enough. Shelves installed into studs or structurally suitable supports generally offer a more reliable foundation than decorative hardware alone.
You can personalize your finished project with wood stain, paint, matching brackets, and attractive storage baskets. Keep the styling simple so the shelf remains useful, and never guess its weight capacity. The final load limit depends on the complete system, including the shelf board, supports, fasteners, and wall or ceiling structure.
Simple DIY Shelf Project Formula
Measure Your Space + Choose Suitable Boards + Plan Structural Supports + Sand and Finish + Install Securely + Style Within the Load Limit
For example, create a small wall shelf using a smooth pine board, two appropriately rated metal brackets, suitable structural fasteners, and a warm wood stain. Add two small plants and a framed photograph after confirming the installation is secure.
Best DIY Shelf Styles for Different Rooms
| Style / Area | Best Pieces | Why It Works |
|---|---|---|
| Small Living Room | Floating wood shelves | Adds storage without taking up floor space |
| Rustic Kitchen | Wood shelves with metal brackets | Creates warm, practical storage |
| Home Office | Slim floating shelves and pipe racks | Keeps frequently used items organized |
| Craft Room | Crates, baskets, small cubbies | Separates supplies into accessible groups |
| Farmhouse Bedroom | Rustic planks and ladder-inspired shelves | Adds cozy character and decorative display |
| Narrow Hallway | Shallow shelves or picture ledges | Decorates walls without deep projections |
| Pantry or Storage Closet | Custom built-in boards and supports | Makes better use of available wall dimensions |
12 Budget-Friendly DIY Shelf Ideas to Try at Home
1. Build Simple Floating Wood Shelves
Floating wooden shelves are one of the easiest ways to make a plain wall feel more useful and attractive. Their clean appearance works with farmhouse, modern, minimalist, and cozy cottage interiors. You can install a single long shelf above a sideboard or arrange two shorter shelves in a staggered layout to create a stylish display.
Choose a straight wooden board with appropriate thickness and structural properties, sand the surface smooth, and finish it with paint or stain. Use a hidden-bracket system rated for the board dimensions, wall construction, and expected load. Once installed securely, style the shelf with lightweight artwork, a few books, or small planters. For a custom appearance, choose a finish that relates to your existing floor or furniture.
Budget tip: Look for suitable precut boards to reduce waste and cutting work. A simple stained pine shelf can create a lovely rustic look without expensive hardwood.
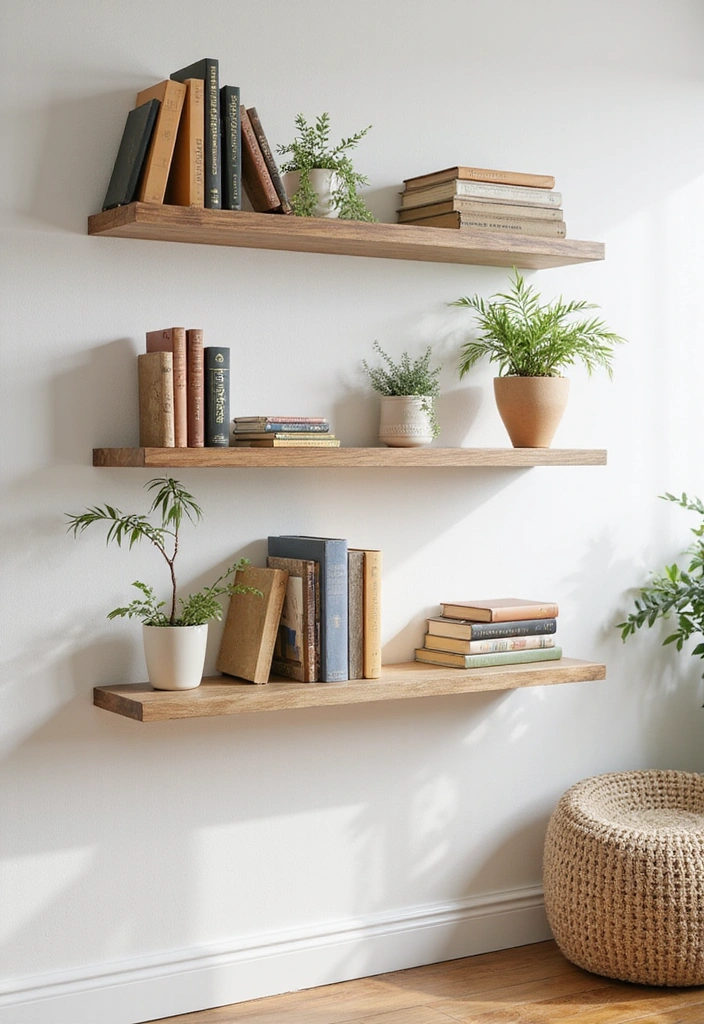
Image credit: @jennhohl0406.com
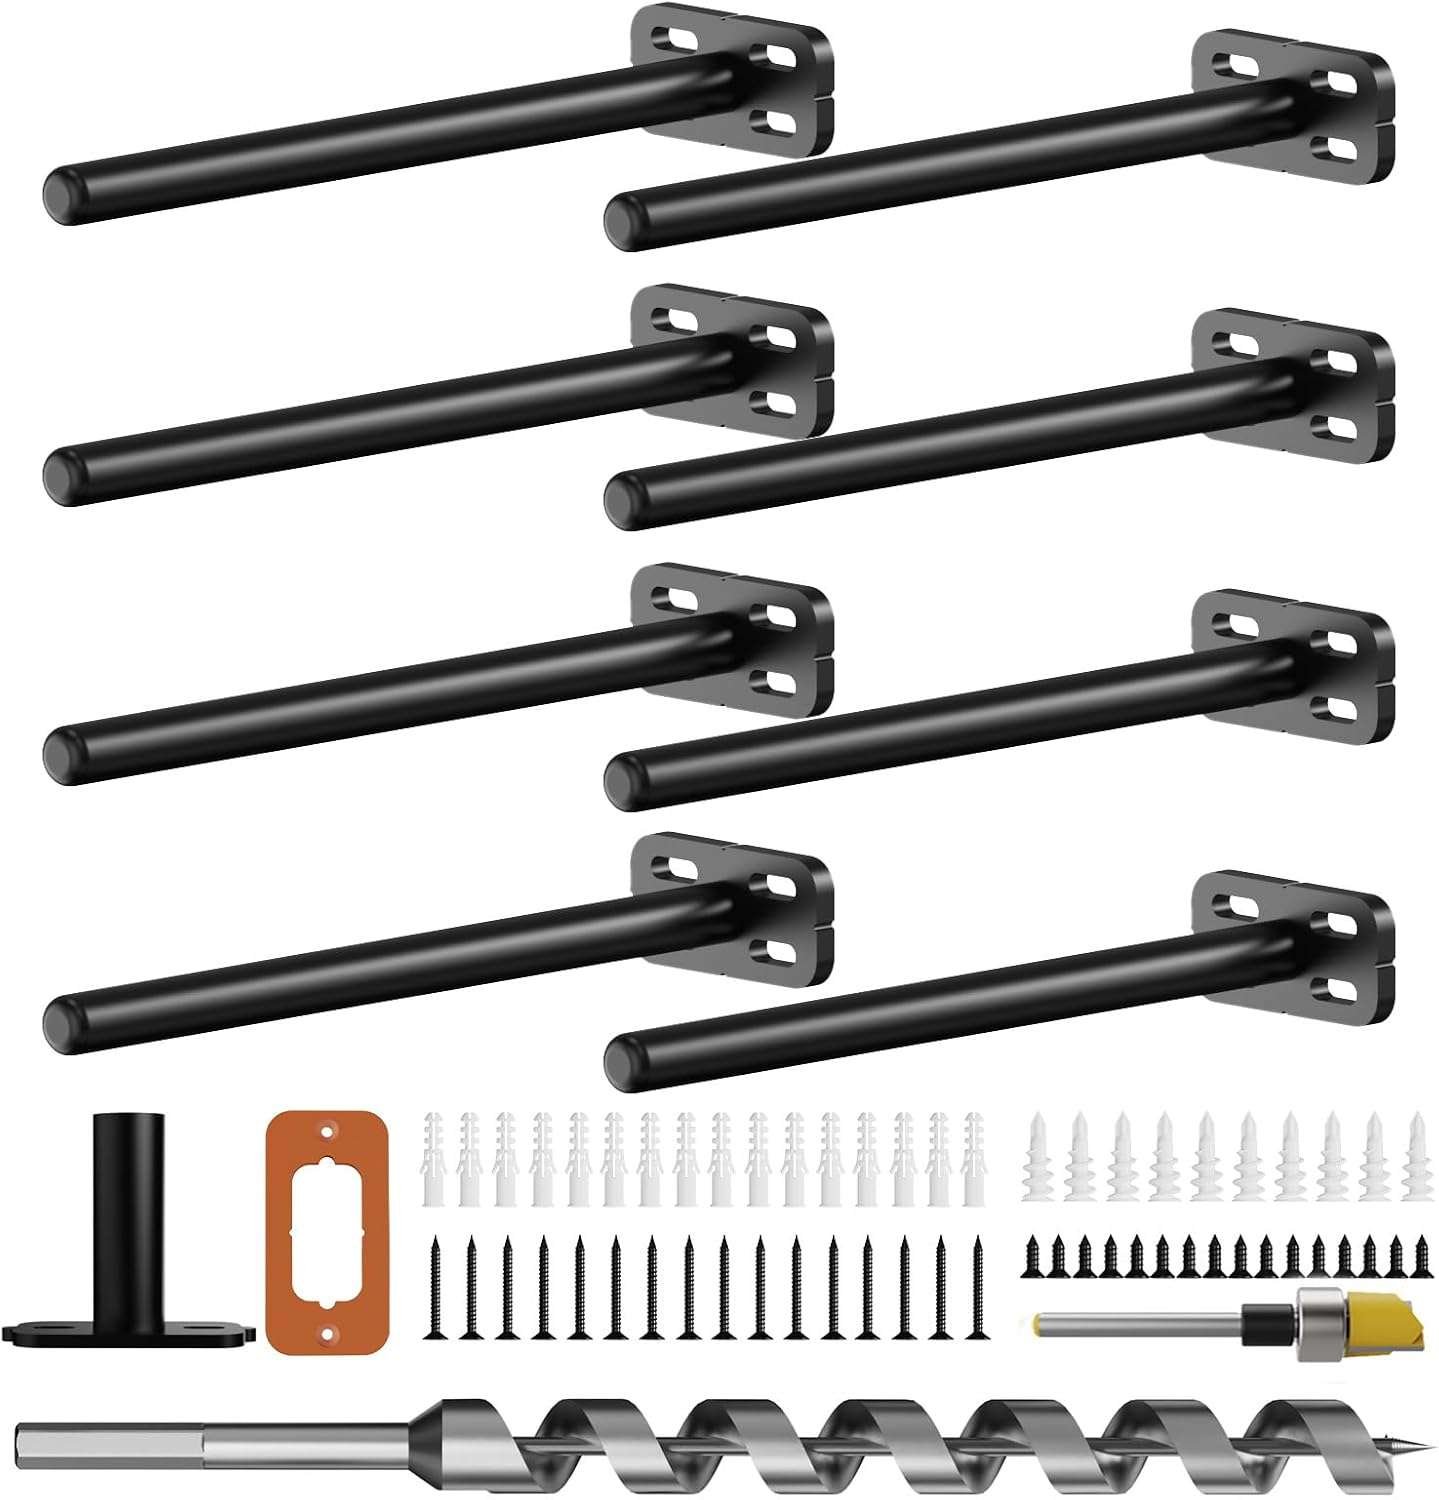
Amazon Find: Floating Shelf Mounting Brackets
Explore concealed shelf-support systems suitable for DIY floating shelves.
2. Create Industrial Pipe and Wood Shelving
Industrial pipe shelving brings a bold mix of wood and metal into your home. The dark metal supports contrast beautifully with warm wooden shelves, creating a look that suits a modern farmhouse kitchen, creative home office, or rustic living room. The exposed structure is part of the design, so you don’t need to hide every bracket or connection.
Choose decorative metal pipe brackets or a properly engineered shelving kit and pair them with smooth wood boards. For a wall-mounted project, plan the support positions around suitable structural attachment points and check the manufacturer’s load information. Stain the boards walnut or medium oak, then arrange lightweight books, ceramics, and organized storage boxes. A fully suspended ceiling-mounted pipe rack is a more advanced structural installation and should not be treated like an ordinary beginner shelf.
Styling tip: Repeat the black metal finish in a desk lamp, cabinet pull, or picture frame to make the industrial shelving feel connected to the room.
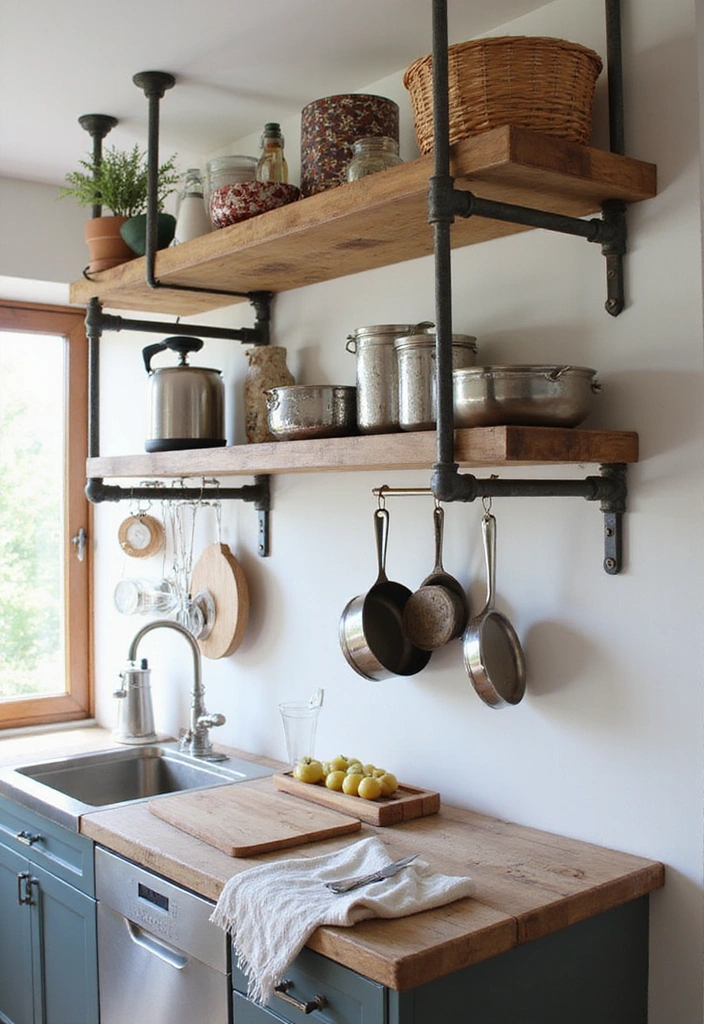
Image credit: @jennhohl0406.com
3. Add Decorative Hanging Basket Storage
Hanging baskets provide a charming alternative to traditional solid shelves. They are especially useful for keeping lightweight accessories organized while adding woven texture to a kitchen, craft corner, or small bedroom. A few coordinated baskets can make an empty vertical area feel more personal and welcoming.
Choose lightweight woven baskets with secure handles or a purpose-made hanging basket system. Mount them only from properly rated supports using hardware suitable for the structure and intended load. For an easier option, attach small storage baskets to a securely mounted wall rail rather than suspending several containers overhead. Use the baskets for lightweight craft supplies, soft accessories, or other suitable items, not heavy books or breakable objects.
Safety tip: Don’t rely on ordinary decorative hooks for ceiling storage. Keep suspended objects away from beds, seats, walking routes, and children’s play areas.
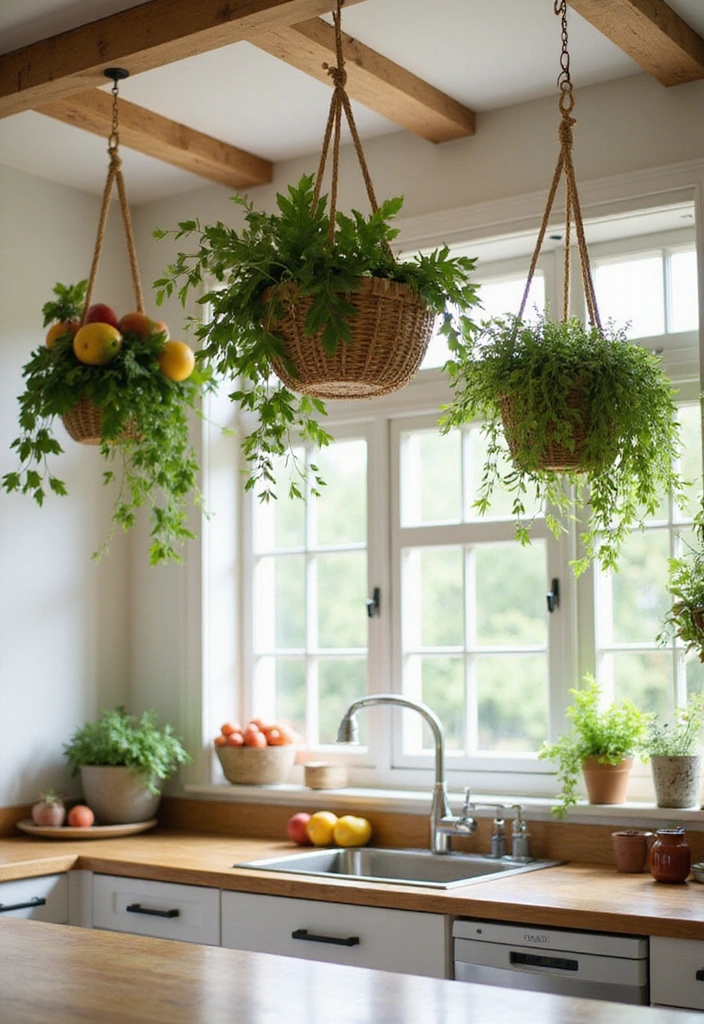
Image credit: @jennhohl0406.com
4. Turn Wooden Crates Into Rustic Storage Shelves
Wooden crates are perfect for creating budget-friendly farmhouse cubbies. Their open box shape gives small accessories their own compartments, while the natural wooden finish adds character. You can arrange crates vertically, horizontally, or in a staggered wall display to create an interesting alternative to standard rectangular shelves.
Choose sturdy wooden crates and inspect them for cracks, splinters, and loose joints. Sand and stain or paint the surfaces, then arrange the crates on a flat floor to test your preferred pattern. Secure them to a suitable wall structure using mounting hardware that supports both the crates and their contents. Add small baskets, rolled towels, craft materials, or light decorative objects. Ceiling-suspended crate displays need engineered overhead support and are generally less practical for beginner projects.
Budget idea: Use matching unfinished crates and paint them warm white or sage green for a coordinated set of storage cubbies.
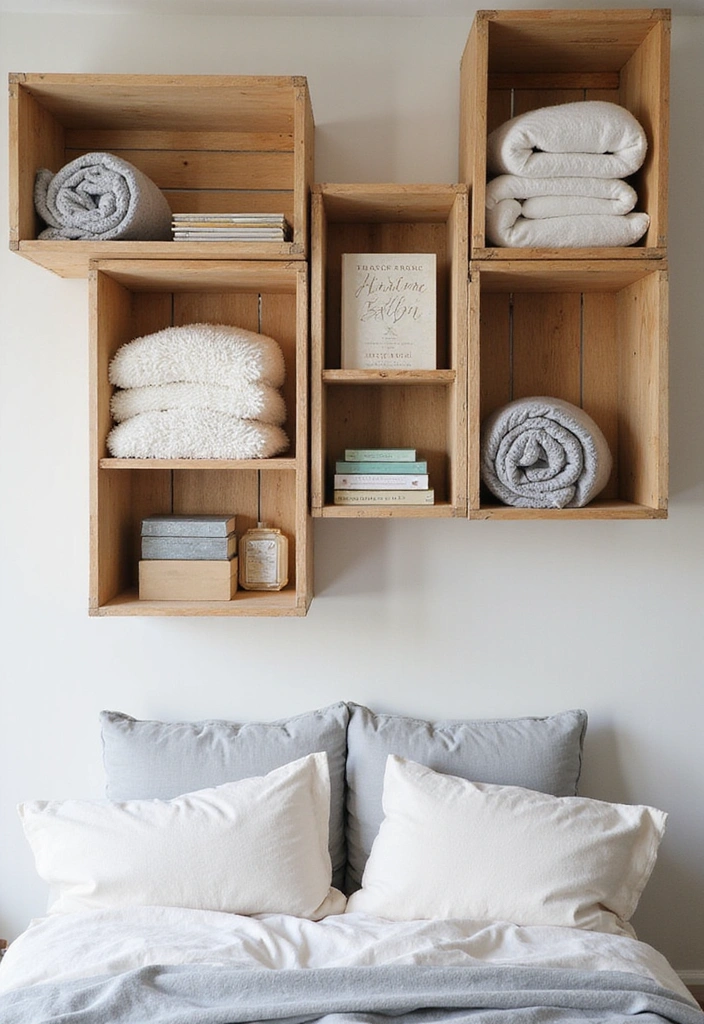
Image credit: @jennhohl0406.com
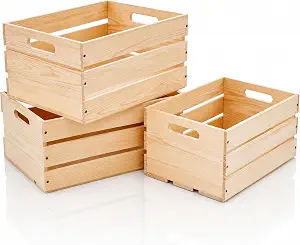
Amazon Find: Unfinished Wooden Craft Crates
Explore wooden crates you can paint, stain, and adapt for decorative cubby storage.
5. Repurpose an Old Ladder Into Creative Shelving
A ladder-inspired shelf brings rustic charm and interesting vertical lines to a room. Its distinctive shape makes a beautiful decorative feature for folded blankets, lightweight baskets, and a small collection of plants. This style works especially well in a farmhouse bedroom, casual living room, or bohemian corner filled with natural materials.
Choose a purpose-built ladder bookshelf or convert a suitable ladder into a freestanding display only when it can be made structurally stable and anchored against tipping. Add appropriately supported wooden shelf boards if the design allows, and use the upper levels for lightweight decorations. Sand any rough areas and finish the wood to coordinate with your room. The overhead suspended-ladder concept is more demanding: a decorative ladder is not automatically rated for ceiling suspension, so avoid hanging one without a professionally designed support system.
Styling tip: Alternate empty sections with simple baskets, folded throws, and a little greenery. Leave heavier items on the lowest supported levels.
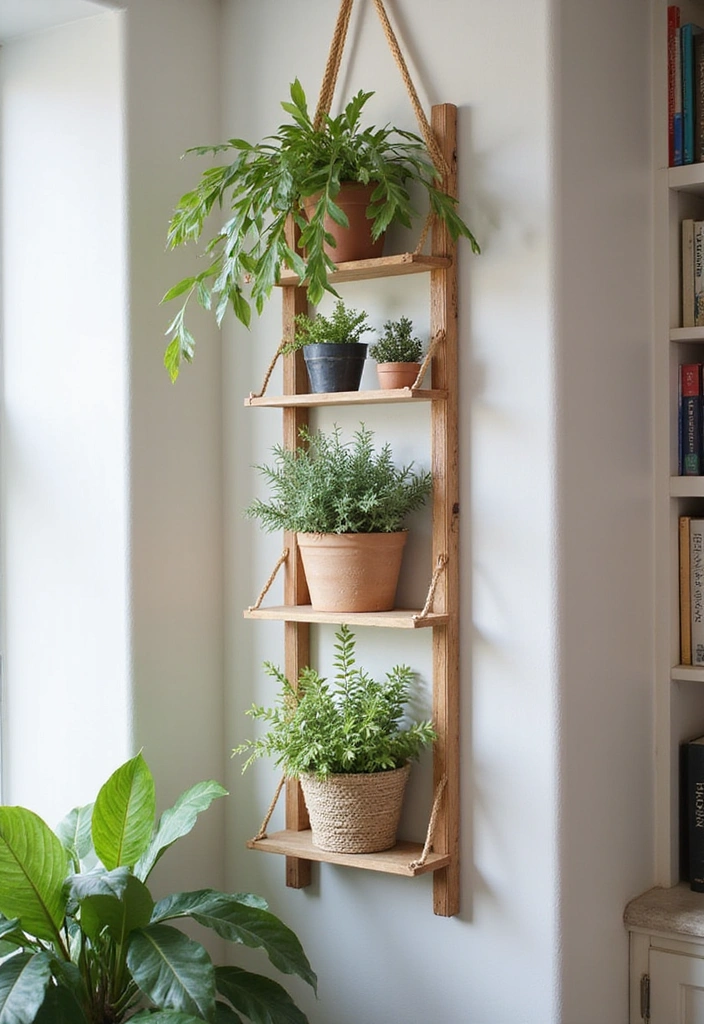
Image credit: @jennhohl0406.com
6. Transform Vintage Suitcases Into Quirky Display Shelves
Vintage suitcases bring an unexpected touch of personality to DIY shelving. Their old-fashioned handles, corners, and travel-inspired details make them wonderful decorative pieces for an eclectic bedroom, creative studio, or hallway. Rather than simply using them as storage boxes, you can create an unusual display that feels full of character.
Look for lightweight decorative suitcases with clean, stable shells and attractive finishes. Place a small suitcase on a securely mounted wall shelf or inside a sturdy open cubby so it becomes part of the display. You can decorate the exterior with vintage-style travel stickers or leave its worn finish visible. If converting the case itself into a shelf, its construction and attachment points must be evaluated carefully. Suspended suitcase shelves should not be improvised with ordinary hooks, since old handles and cases may not be load-bearing.
Budget tip: Check thrift stores for inexpensive decorative cases. Keep sentimental or fragile vintage luggage as display objects instead of modifying them permanently.
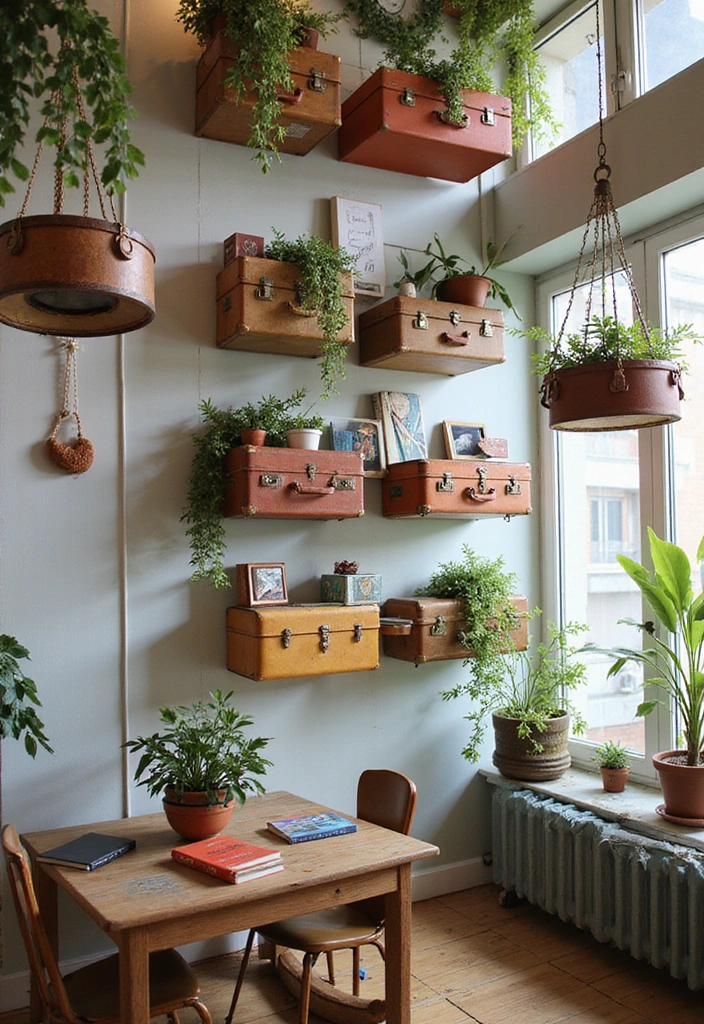
Image credit: @jennhohl0406.com
7. Build Slim Floating Shelves for Awkward Wall Niches
Not every shelving project needs thick, chunky boards. Slim floating shelves can make an awkward wall niche, small alcove, or narrow office corner look organized without dominating the room. Their understated profile allows framed photographs, books, and decorative accessories to remain the focus.
Measure the width and depth of your alcove carefully, then create a shelf using suitable boards and a concealed support design appropriate to the intended load. Paint the finished shelf the same color as the walls for a nearly built-in appearance, or choose pale wood for subtle contrast. Add two or three light objects per level, leaving a little open space between them. Very thin-looking shelves still require adequate structure and support rather than simply thinner materials.
Small-space tip: A pair of short custom shelves can look neater than one oversized shelf that projects awkwardly beyond a wall niche.
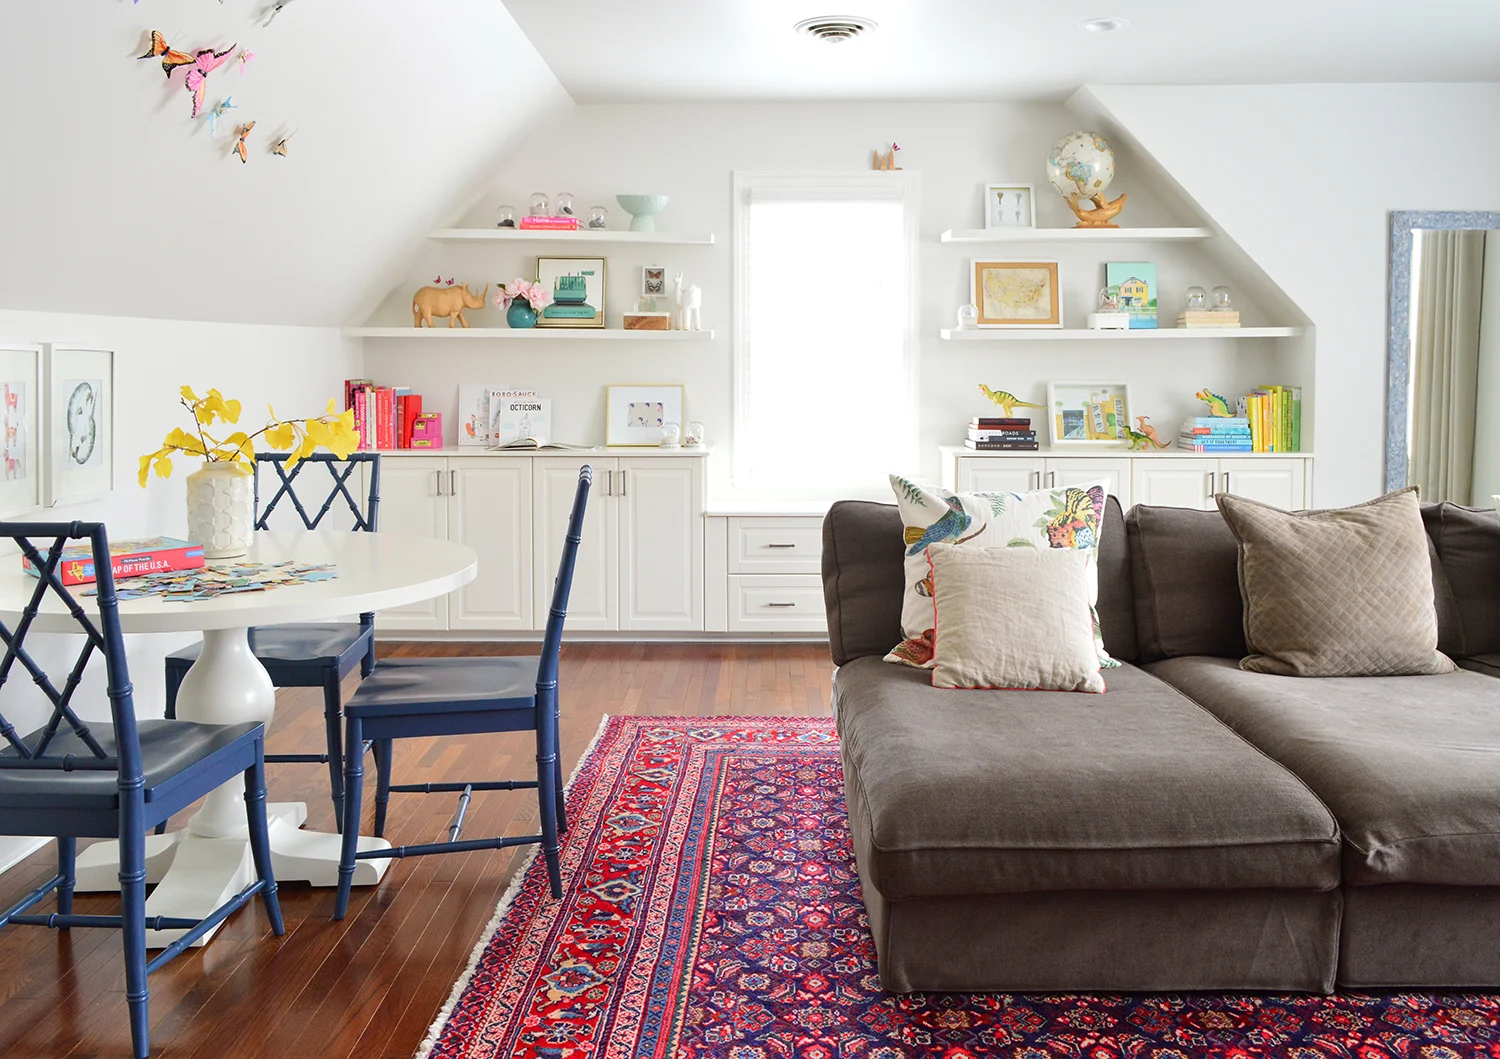
Image credit: @younghouselove.com
8. Install Natural Wood Shelves Above a Kitchen Backsplash
Natural wood floating shelves can soften a tiled kitchen and give everyday dishware a beautiful place to be displayed. The warm wood grain looks especially attractive against white, blue, or subtly patterned backsplash tiles. A pair of sturdy shelves can also create useful storage in a compact kitchen where every cabinet matters.
Choose appropriately rated wooden shelf boards and a mounting system designed for the load you intend to store. Position the shelves away from appliance clearances and areas where heat or moisture would damage the material. Drilling through tile requires the right tools, knowledge of the substrate behind it, and careful attention to hidden plumbing or electrical services. Use qualified help when needed, then style the shelves with regularly used mugs, a few dishes, and one small decorative object.
Practical tip: If you plan to store ceramic plates or heavy dishware, select shelf supports based on the full weight of the items rather than appearance alone.
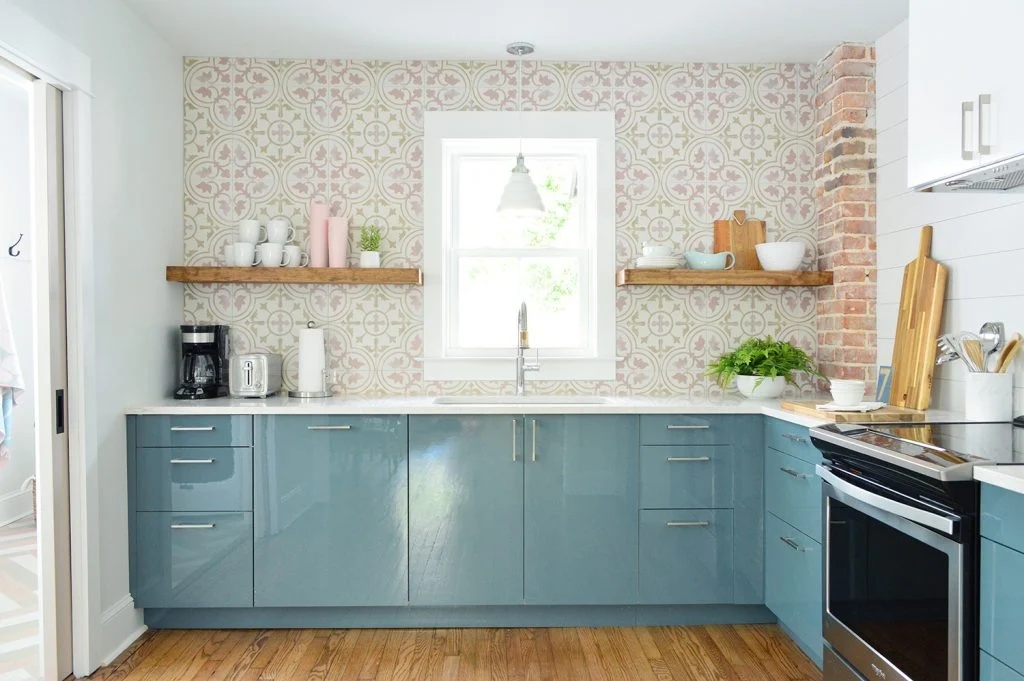
Image credit: @younghouselove.com
Amazon Find: Kitchen Floating Shelf Brackets
Browse suitable shelf brackets and mounting accessories for securely supported wooden kitchen shelves.
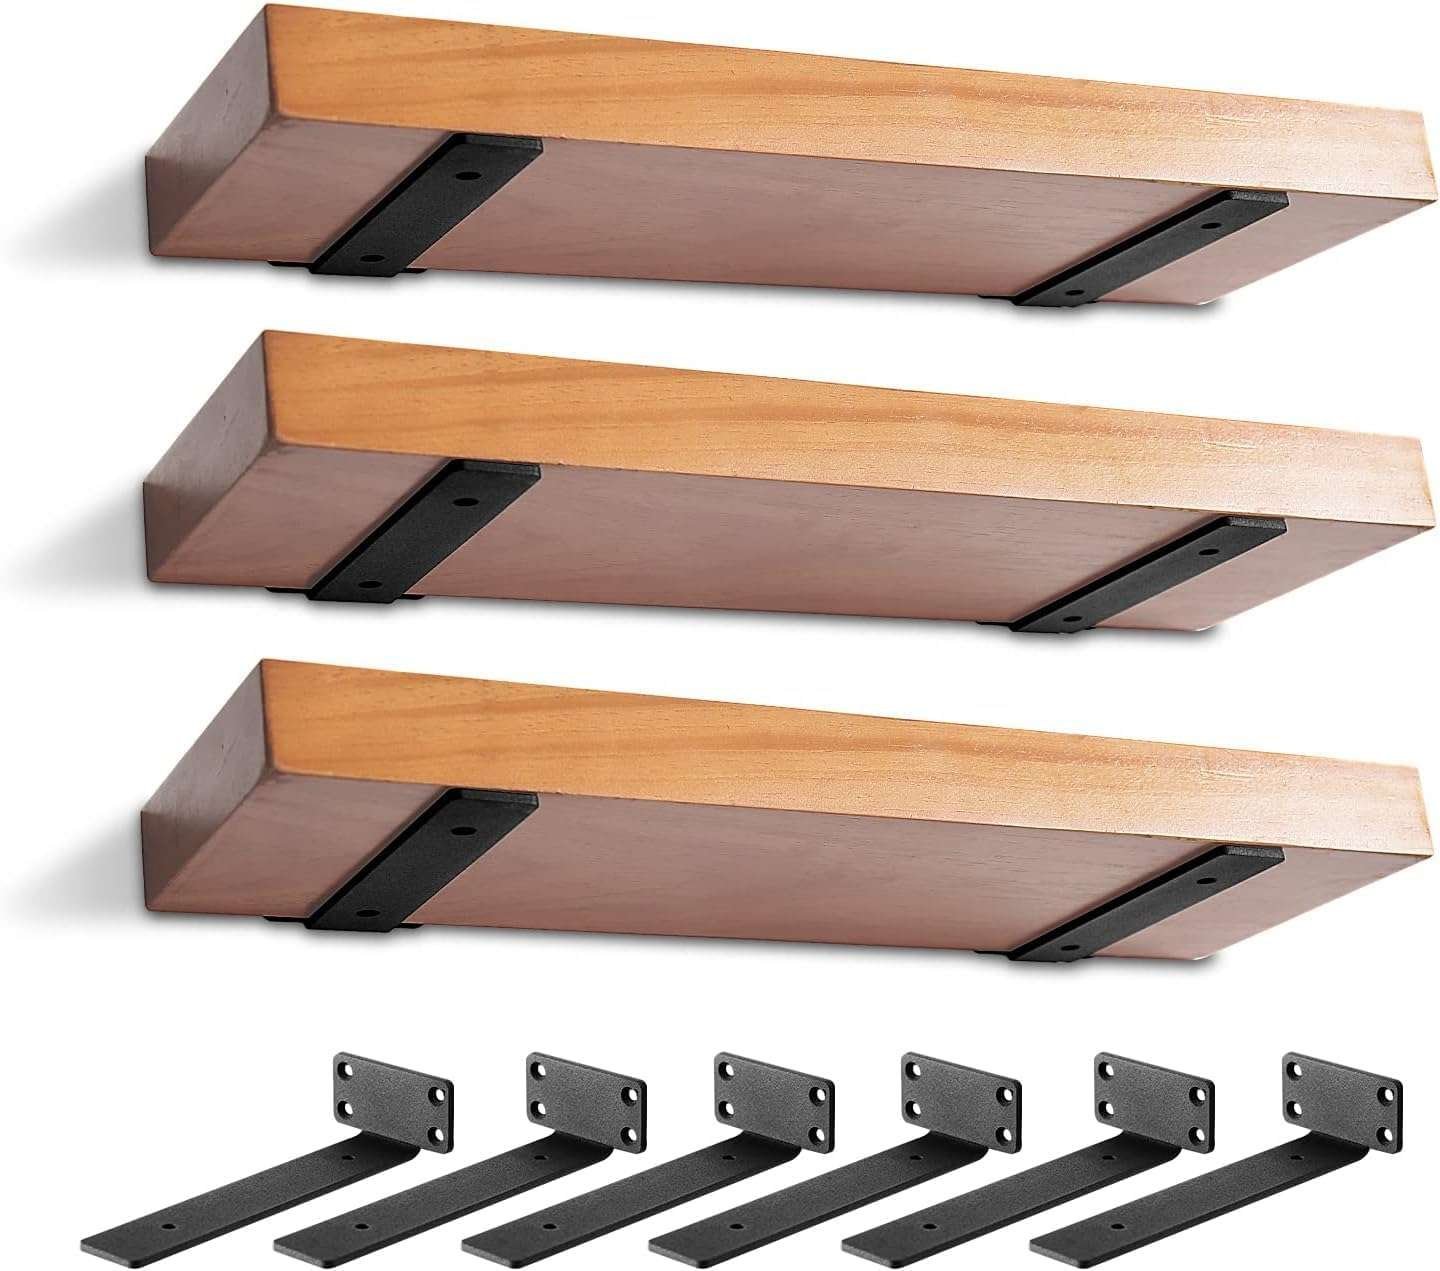
9. Customize Affordable Ready-Made Floating Shelves
Sometimes the most budget-friendly DIY approach is to personalize an affordable ready-made shelf rather than construct the entire unit yourself. Simple floating shelves with clean rectangular profiles suit modern bedrooms, kitchens, dining rooms, and small living spaces. A few styling choices can make inexpensive shelving feel much more thoughtful and custom.
Choose ready-made shelves with dimensions and load ratings appropriate for your wall and intended use. Install them exactly as directed by the manufacturer, using suitable fixings for the wall construction. If the surface material allows, personalize the appearance with compatible paint or decorative trim without altering structural components. Try a pair of pale wood shelves in a dining room, or choose white shelves against a muted green bedroom wall. Leave space between objects so the display feels balanced.
Budget tip: Save on carpentry by choosing a ready-made shelf, then create a custom appearance through thoughtful placement and color-coordinated accessories.
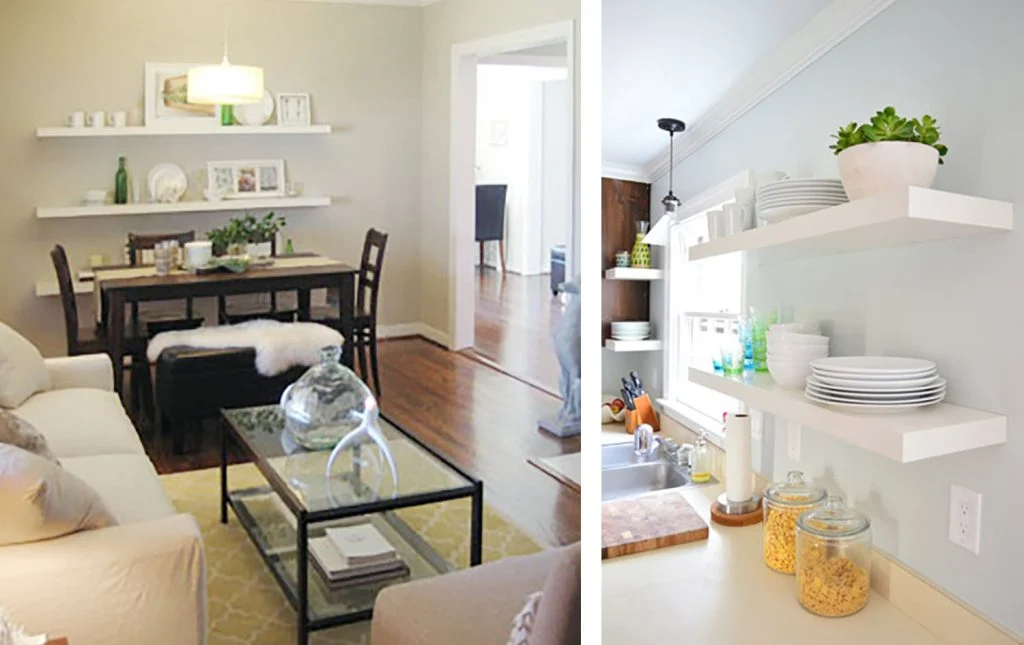
Image credit: @younghouselove.com
10. Make Chunky Rustic Floating Shelves on a Budget
Chunky floating shelves bring beautiful farmhouse texture to a kitchen, living room, or entryway. Their thick profile creates a strong architectural feature, especially when finished in warm walnut or natural oak. A larger-looking shelf can also balance substantial furniture, tall ceilings, and wide empty walls.
For a more affordable version, consider building a hollow box-style shelf using properly supported lumber and suitable facing boards, rather than purchasing an expensive solid hardwood beam. Finish the visible surfaces with a wood stain or paint that suits the room. Use a concealed support system specifically designed for the shelf’s construction and expected load. Style it with simple ceramics, a framed landscape print, or a small trailing plant, keeping heavier items away from unsupported edges.
Styling tip: A chunky wooden shelf looks beautiful when paired with just a few larger items. Too many tiny decorations can make its strong shape feel visually crowded.
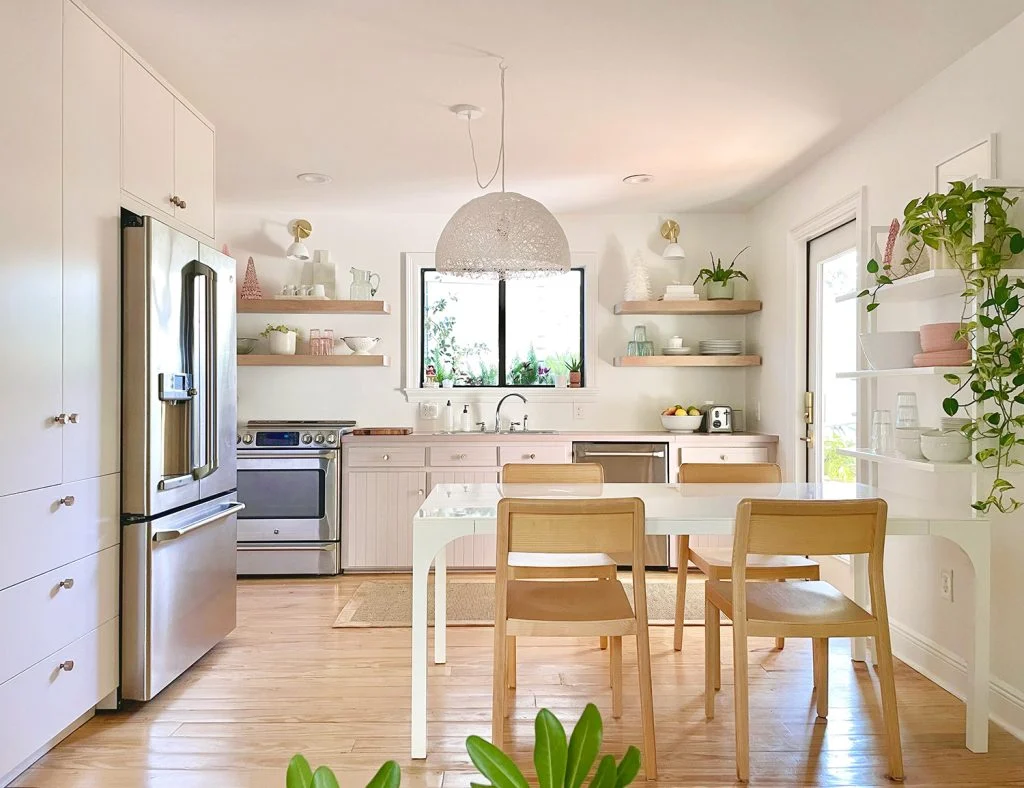
Image credit: @younghouselove.com
11. Use Metal Brackets for an Easy Floating-Shelf Look
If you love the appearance of floating shelves but want a simpler supported construction, shelves with understated metal brackets are a practical alternative. When the brackets are compact, placed carefully, or partly concealed by decorative objects, the shelves can create a similar lightweight look without requiring a hidden structural system.
Choose a smooth wooden board and two or more appropriately rated metal brackets based on the span and load requirements. Secure the brackets to suitable wall structure and confirm they are level before attaching the shelf. Try warm wood with black brackets for a modern industrial office, or natural oak with white brackets for a bright laundry room. Arrange books, small baskets, and decorative objects so the visible hardware complements the display.
Beginner tip: This design can be easier to understand and assemble than a completely concealed floating support. However, the support ratings, wall attachment, and shelf span still determine what it can safely hold.
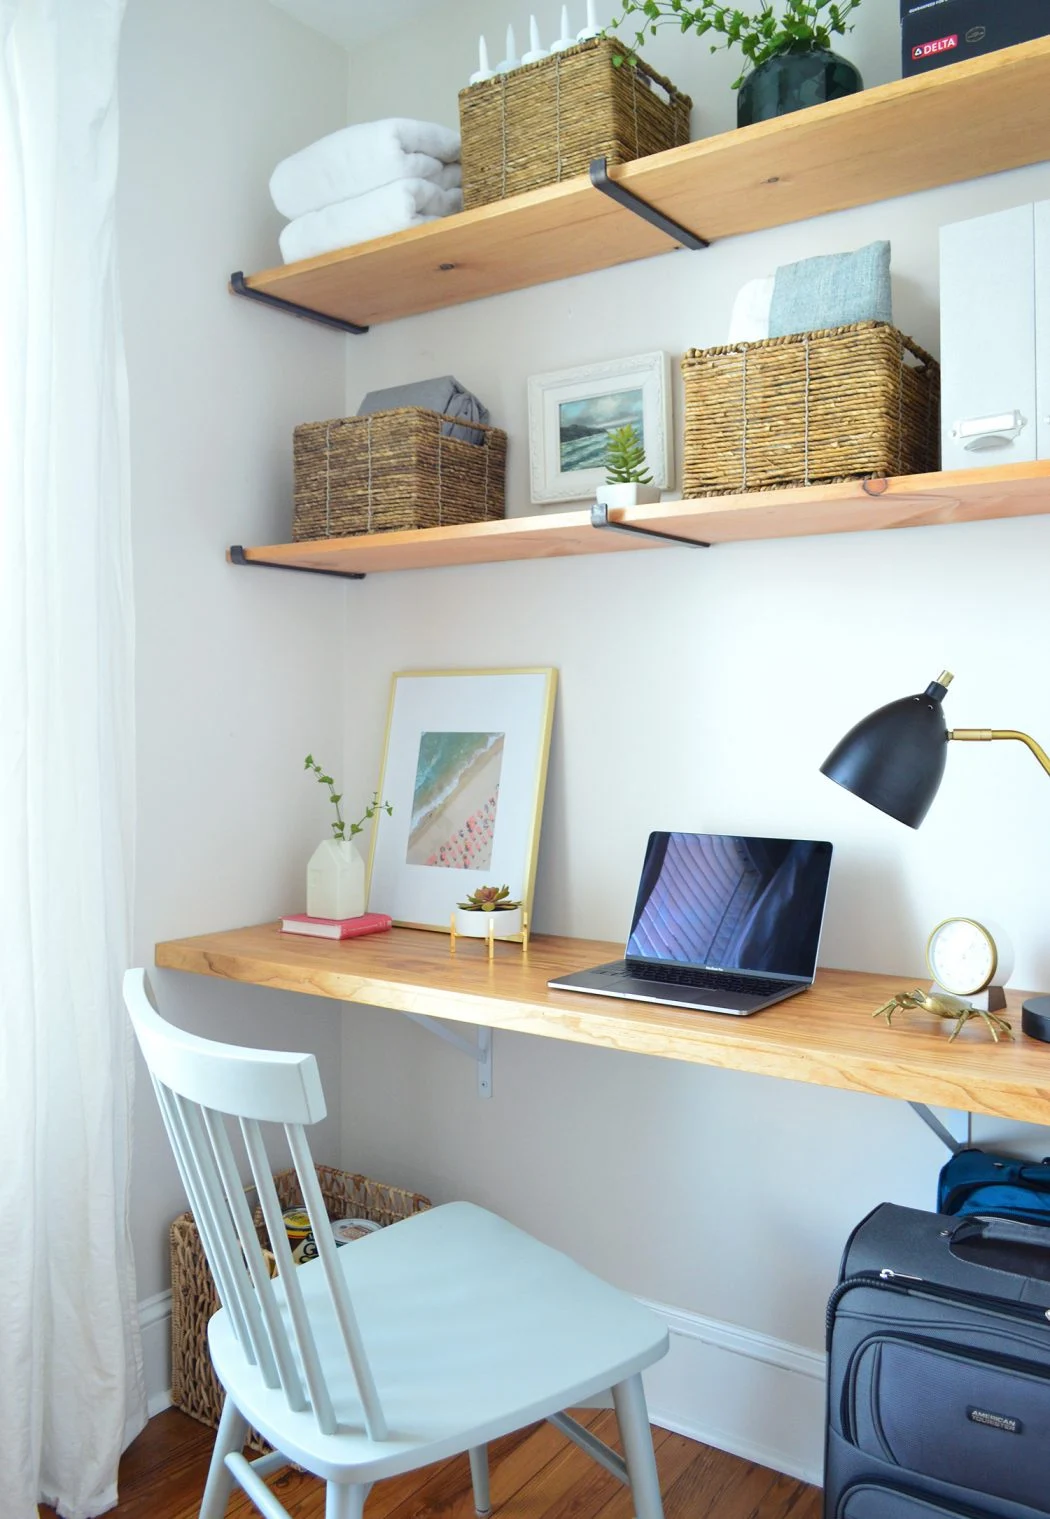
Image credit: @younghouselove.com
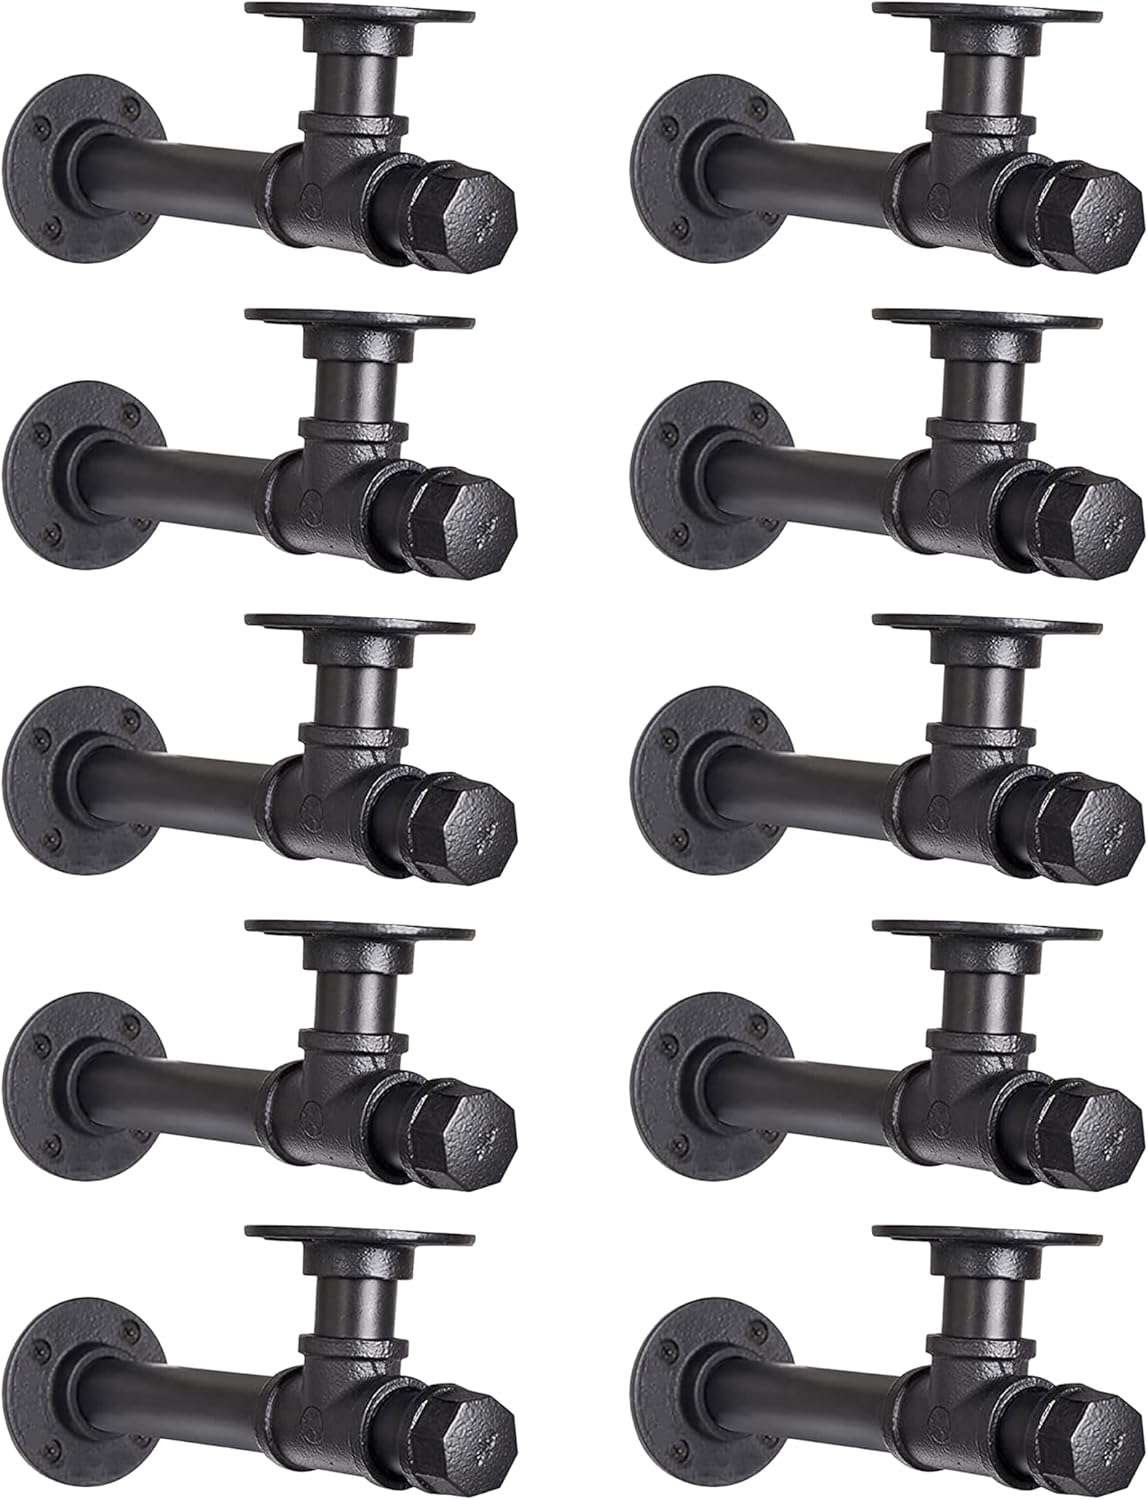
Amazon Find: Decorative Metal Shelf Brackets
Simple black or white metal brackets can create practical, attractive wood-and-metal shelving.
12. Build Custom Pantry Shelves With Affordable Boards
Custom pantry shelves can make a small storage closet much more useful by fitting the exact dimensions of the space. Unlike standard freestanding organizers, built-in shelves can make better use of narrow side walls and awkward corners. With simple paint and neatly arranged storage containers, affordable shelving can look like part of the original kitchen design.
Measure the closet width, depth, and height, then plan shelf spacing for food containers, baskets, and small appliances. Depending on the load and moisture conditions, properly supported plywood or suitable engineered boards can be used, with pine facing strips to create a thicker finished edge. Secure the supports to appropriate structural backing and account for shelf spans and expected loads. Paint the shelving white, sage, or another kitchen color, then group smaller pantry items in labeled containers.
Organization tip: Store heavier appliances and bulk items on lower shelves. Keep everyday ingredients at reachable heights and avoid loading long, unsupported boards with heavy containers.
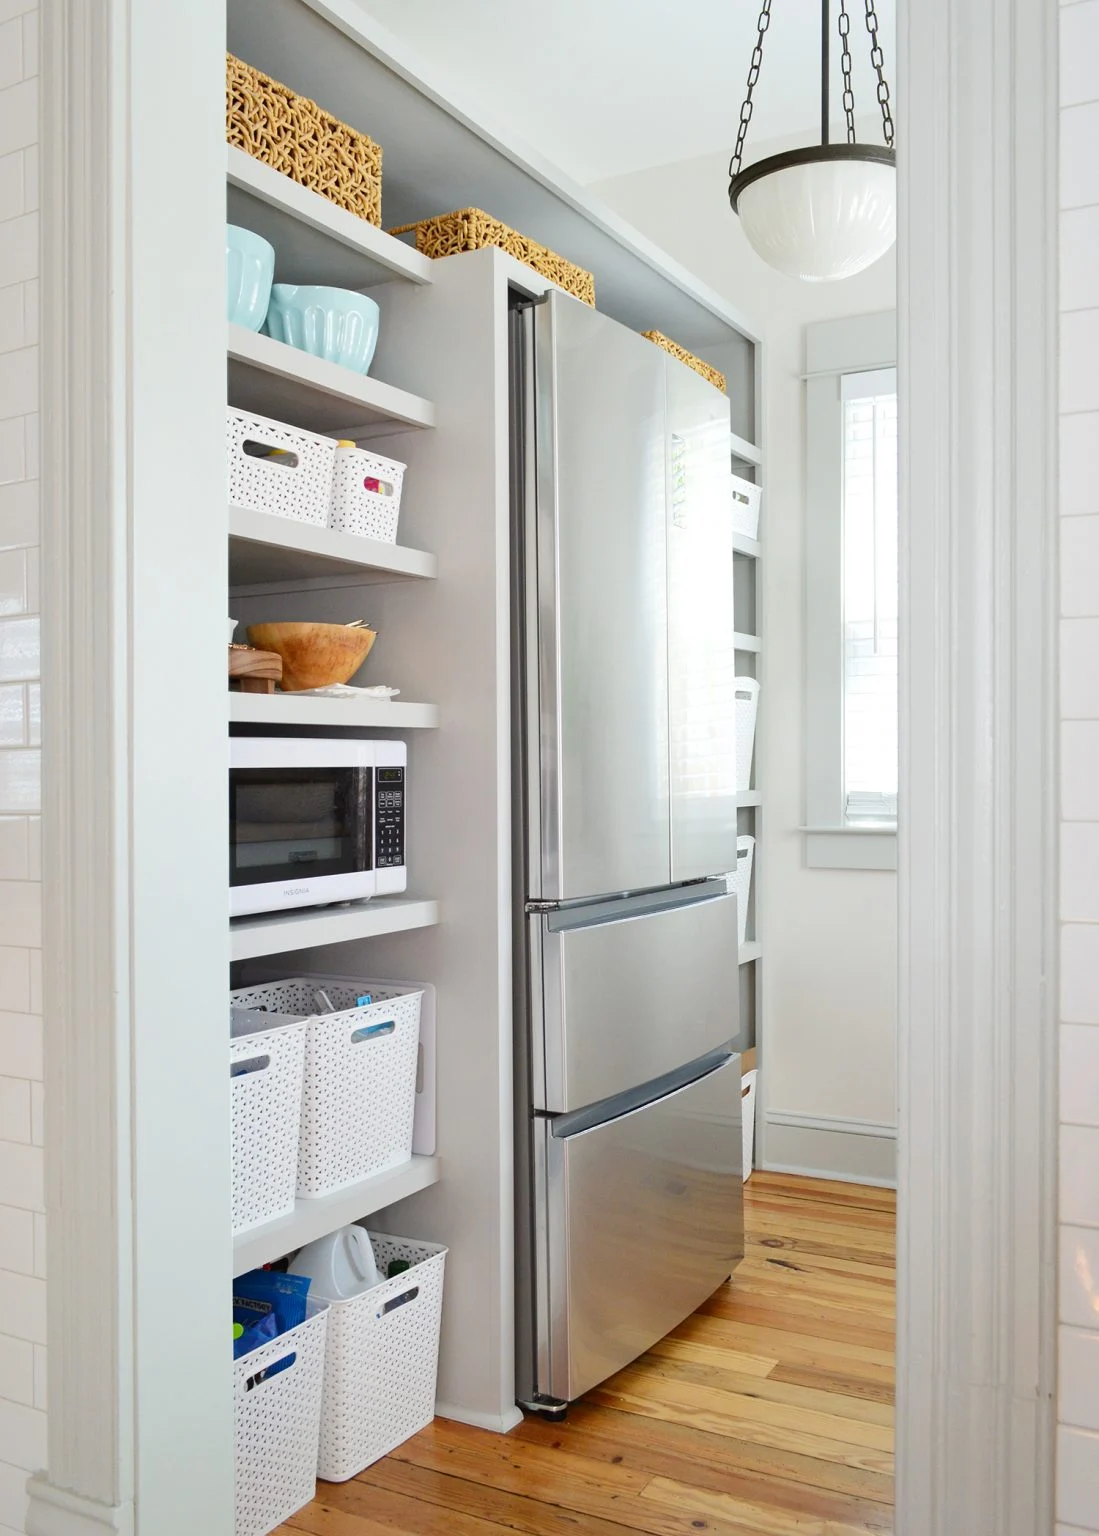
Image credit: @younghouselove.com
Essential Tools and Materials for DIY Shelves
The materials you need depend on the type of shelf, the wall construction, and the items you plan to display. These are common supplies for basic wall-mounted shelving projects, not a complete structural specification for every design.
- Measuring tape: Helps determine shelf width, depth, spacing, and available clearance.
- Level: Keeps shelves straight and improves the finished appearance.
- Suitable wood boards: Pine, plywood, or other shelf-rated materials may work for different projects.
- Shelf brackets or support system: Choose hardware specifically rated for the expected load and installation method.
- Appropriate fasteners: Select screws and anchors based on the wall or structural support material.
- Stud finder and service detector: Useful where appropriate for identifying framing and avoiding concealed hazards.
- Sandpaper: Smooths wood surfaces and edges before painting or staining.
- Paint or wood stain: Adds a finished appearance that complements your home.
- Drill and appropriate bits: Required for many fixed installations, with bit types suited to the mounting material.
- Personal protective equipment: Use suitable eye, respiratory, and hearing protection according to the tools and materials involved.
How to Make DIY Shelves Look Expensive on a Small Budget
Affordable materials can look beautiful when they’re finished neatly and coordinated with the room. Consistent dimensions, attractive wood tones, and thoughtful decoration often matter more than buying premium lumber or elaborate hardware.
- Use matching wood tones: Repeat the shelf color in a desk, picture frame, or coffee table.
- Finish cut edges neatly: Sand rough surfaces and apply compatible edge trim where needed.
- Choose one hardware finish: Black, brass-look, or white brackets can tie multiple shelves together.
- Paint shelves the wall color: A tone-on-tone approach can create a quiet built-in appearance.
- Style in small groups: Combine books, pottery, and a plant rather than filling every inch.
- Use baskets for clutter: Small matching baskets can conceal craft supplies and accessories.
- Reuse safe materials: Suitable leftover wood can be useful, provided it is structurally sound and free of contamination.
- Plan before cutting: A clear measurement plan helps reduce wasted material and unnecessary purchases.
Once your shelves are installed, explore these farmhouse shelf decorating ideas for beautiful combinations of books, ceramics, greenery, and natural textures.
Best Color Palettes for DIY Shelves
- Natural Oak + Warm White + Black: A versatile combination for modern farmhouse shelves.
- Walnut Brown + Charcoal + Cream: Beautiful for industrial pipe shelves and home offices.
- Sage Green + Pale Wood + Ivory: A calming palette for kitchens and craft rooms.
- Soft Greige + Brushed Brass + White: Elegant for minimalist and transitional interiors.
- Terracotta + Honey Wood + Oatmeal: Creates a cozy bohemian display with natural texture.
- White + Pale Blue + Light Oak: Fresh and airy for bathrooms, guest rooms, and coastal interiors.
- Forest Green + Walnut + Antique Gold: Adds rich color to traditional bookshelves and reading nooks.
Common DIY Shelf Mistakes and Safety Tips
Mounting Shelves With the Wrong Hardware
Different walls require different fastening methods. Drywall, masonry, wood framing, and tile-backed walls cannot all be treated the same way. Choose supports and fasteners compatible with the substrate, shelf type, and actual load, and follow the hardware manufacturer’s instructions.
Treating Decorative Ceiling Hooks as Structural Supports
Ceiling-suspended crates, ladders, suitcases, and pipe racks involve overhead loads and potentially serious falling-object hazards. Do not hang them from decorative hooks, unsupported drywall, or hardware without an appropriate engineered load path. Use professionally designed suspension systems where an overhead installation is essential, or choose wall-mounted alternatives.
Overloading Long Shelf Boards
A long shelf may bow or fail if the material is too thin, the supports are too far apart, or heavy objects are concentrated in the middle. Plan shelf thickness, support spacing, and load ratings before construction. Pantry shelves and book storage generally need more structural support than lightweight decorative displays.
Drilling Without Checking for Hidden Services
Walls and ceilings may contain electrical cables, plumbing, ventilation, or other concealed systems. Assess the installation area before drilling, use appropriate detection methods where suitable, and consult a qualified professional when the location is uncertain.
Using Damaged or Contaminated Reclaimed Materials
Reclaimed wood, pallets, and old crates may have splinters, hidden fasteners, pest damage, or unknown chemical exposure. Inspect materials carefully and avoid using questionable timber, especially for kitchens or children’s spaces. Old decorative suitcases may also have weak shells or handles that aren’t suitable for supporting weight.
Placing Heavy or Fragile Objects Above People
Avoid placing heavy pottery, glass objects, or overloaded shelves above beds, sofas, desks, and children’s play areas. Position shelves thoughtfully and use retaining features where appropriate. Attach tall freestanding shelving securely to prevent tipping.
Ignoring Wood Finish and Moisture Conditions
Shelves in kitchens, bathrooms, and utility rooms may encounter steam or moisture. Select appropriate materials and finishes, keep shelves away from heat sources, and follow ventilation and curing instructions for paints and stains. Not every engineered board or wood finish is suitable for damp conditions.
Forgetting About Everyday Accessibility
A shelf might look beautiful but be frustrating if the stored items are difficult to reach or if it blocks a cabinet door or walkway. Test the proposed shelf height and projection before mounting. Keep frequently used items within comfortable reach and reserve high storage for suitably lightweight belongings.
Frequently Asked Questions About DIY Shelves
What is the cheapest way to make DIY shelves?
A simple wall shelf made from a suitable precut wooden board and appropriately rated brackets can be a cost-effective starting point. Reusing sound wood or choosing affordable ready-made shelves can also reduce costs. Always include proper mounting hardware in your budget.
What kind of wood is best for budget shelves?
Pine and suitable plywood are common choices for affordable shelving projects. Engineered boards can work for certain built-ins when used with appropriate supports and environmental conditions. The best choice depends on the shelf span, expected weight, moisture exposure, and desired finish.
Can I build floating shelves without advanced woodworking skills?
Yes, some small floating-shelf projects are beginner-friendly, particularly when using purpose-made brackets or ready-made shelves. However, secure mounting and load limits remain essential. Bracket-supported shelves may be simpler than building a custom concealed-support system.
Are ceiling hanging shelves safe for beginners?
Overhead suspended shelving requires careful structural design and is not generally a beginner installation. The ceiling structure, suspension points, hardware, movement, and expected loads must all be assessed. For a simple home project, appropriately secured wall-mounted shelves are usually a more practical alternative.
How do I decorate DIY shelves without making them look cluttered?
Choose a limited color palette and group small items together. Try combining a framed photograph, two or three books, and one decorative plant or ceramic item. Leave a little empty space so the shelf and displayed objects can be appreciated. Keep everything within the shelf’s weight rating.
Final Thoughts: Make Beautiful DIY Shelves Without Overspending
DIY shelves are a wonderful way to create useful storage while adding personality to your home. Whether you love rustic floating boards, industrial metal brackets, repurposed crates, slim alcove shelves, or custom pantry storage, there’s a project for almost every room and budget. The best shelves combine attractive materials with a layout that makes everyday life easier.
Start with one of these 12 budget-friendly DIY shelf ideas that matches your experience, available space, and storage needs. Measure carefully, choose suitable materials, prioritize secure supports, and finish the shelves in colors that complement your home. With thoughtful construction and simple styling, you can transform an empty wall into practical, beautiful storage without spending a fortune.
