IKEA cabinets, shelves, countertops, and storage accessories can help a small laundry area work much harder. The smartest makeovers plan around appliance ventilation, plumbing, door clearance, and daily sorting before choosing finishes.
These 12 ideas follow clear makeover concepts—from shaker cabinets and butcher block to raised machines, hidden hampers, custom fronts, closets, and floating shelves—so every section is easy to match with a reference image.
Related Ideas You May Love
Quick List
- 1. Install Classic Shaker-Style Cabinets
- 2. Add a Warm Butcher-Block Counter
- 3. Mount a Timber Floating Shelf
- 4. Build a Proper Raised Appliance Platform
- 5. Combine a Seamless Platform With a Drying Rail
- 6. Upgrade White Cabinets With Brass Hardware
- 7. Use Custom Wood Fronts on IKEA Cabinet Boxes
- 8. Create Hidden Pull-Out Hamper Storage
- 9. Build a Wall of Baskets and Closed Storage
- 10. Add a Hidden Utility Closet Beside Stacked Machines
- 11. Paint Cabinets Sage Green for a Built-In Look
- 12. Use Floating Wood Shelves and Wire Baskets
How to Plan an IKEA Laundry Room Makeover
Measure the machines, hookups, hoses, valves, doors, vents, and service clearances before designing storage. Appliances must remain accessible for repair and ventilation, and cabinets should never pinch supply or drain lines.
Set the budget by function: closed storage, folding surface, hamper system, drying space, and lighting. Paint, hardware, bins, and shelves can improve appearance, but structural platforms and cabinetry around appliances require accurate installation and may need qualified help.
The Simple Formula
Accessible appliances + vertical storage + one folding surface + contained laundry. Choose function first, then repeat one cabinet finish, one wood tone, and one metal finish.
At-a-Glance Planning Guide
| Laundry Need | IKEA-Style Solution | Planning Detail |
|---|---|---|
| Closed storage | Wall or base cabinets | Preserve appliance and utility access. |
| Folding space | Butcher-block counter | Support it independently and seal wood. |
| Sorting | Pull-out hampers | Provide ventilation and removable liners. |
| Air drying | Hanging rail | Mount securely and keep clear of doors. |
12 Genius IKEA Laundry Room Makeover Ideas
1Install Classic Shaker-Style Cabinets
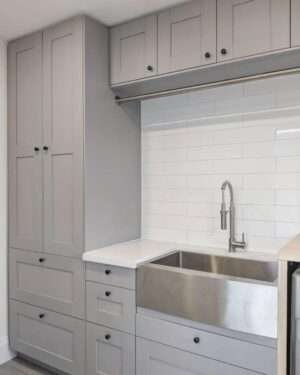
Soft gray or white shaker doors can make a laundry room feel like custom cabinetry. Extend storage upward for bulk paper goods, spare linens, and supplies used less often.
Use lower, reachable cabinets for daily detergent and stain tools. Black knobs, a white backsplash, and consistent door alignment create a timeless finish.
Amazon pick: Shaker Cabinet Hardware Set
Consistent hardware gives budget cabinetry a more finished look.
2Add a Warm Butcher-Block Counter
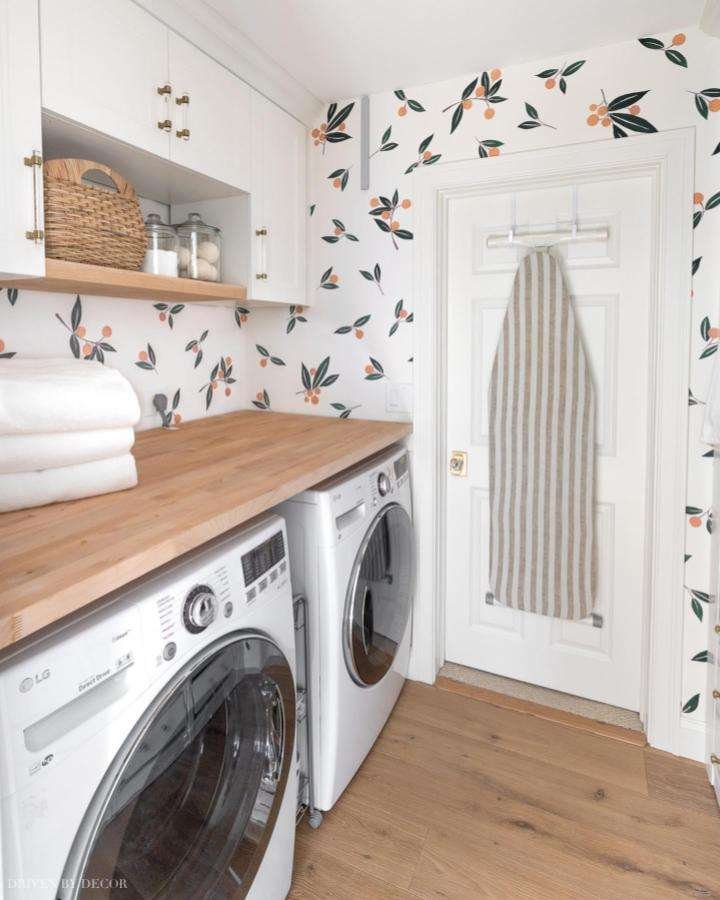
A wood countertop over supported base cabinets or beside machines creates a welcoming folding station. It also balances white appliances and cabinetry.
Seal every exposed edge according to the product directions and protect the surface from standing water. The counter must not rest on or obstruct vibrating appliances unless the installation is designed for it.
Amazon pick: Butcher Block Countertop Oil
Proper conditioning helps a wood worktop resist everyday moisture.
3Mount a Timber Floating Shelf
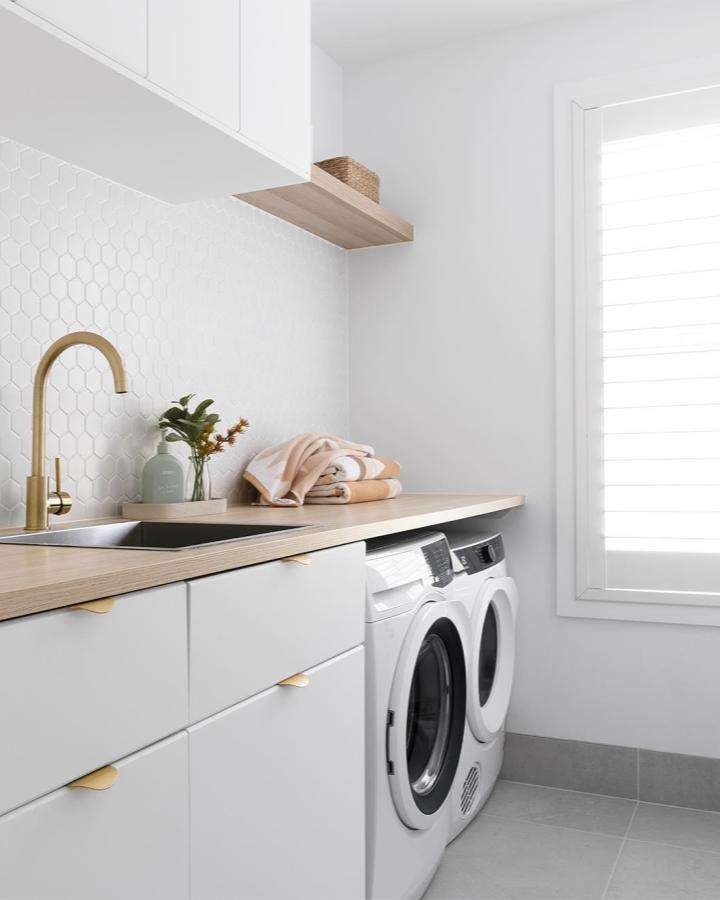
A wood shelf above a sink or side-by-side machines can hold baskets, towels, and light laundry supplies without taking floor space.
Mount into studs or wall-specific heavy-duty anchors and keep the shelf shallower than appliance access requires. Place heavy detergent lower whenever possible.
Amazon pick: Heavy-Duty Floating Shelf Brackets
Strong concealed or low-profile brackets support a cleaner storage line.
4Build a Proper Raised Appliance Platform
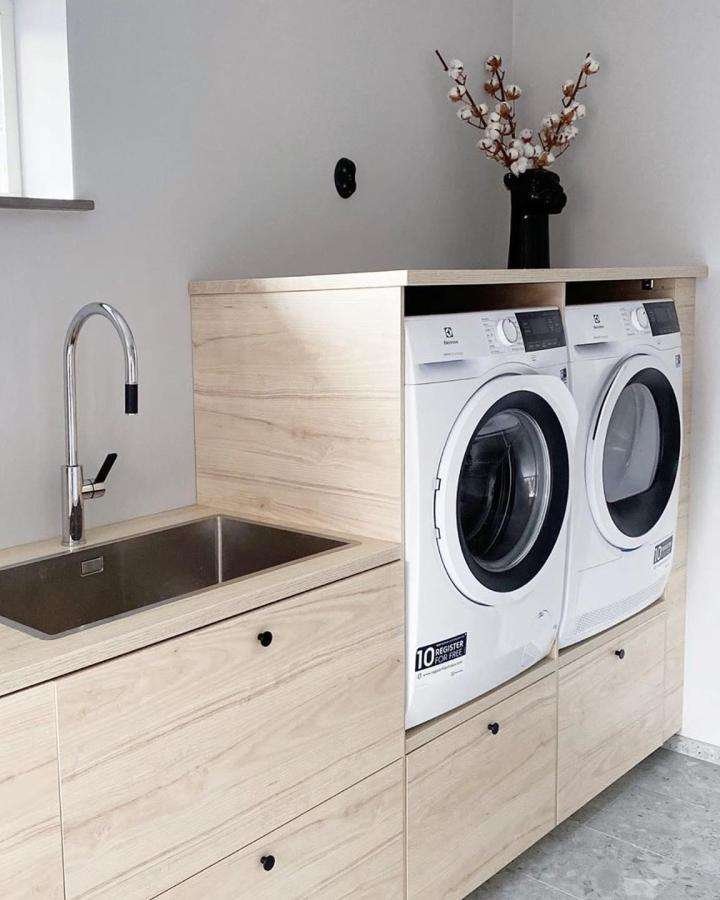
A professionally designed base can raise front-loading machines and provide drawers below for supplies. The concept improves reach and captures otherwise unused lower space.
Washers and dryers are extremely heavy and vibrate, so the platform must be engineered for the appliances, floor, load, and manufacturer requirements. Standard cabinets are not automatically suitable.
Amazon pick: Anti-Vibration Washer Pads
Compatible pads can reduce movement and protect the floor when used correctly.
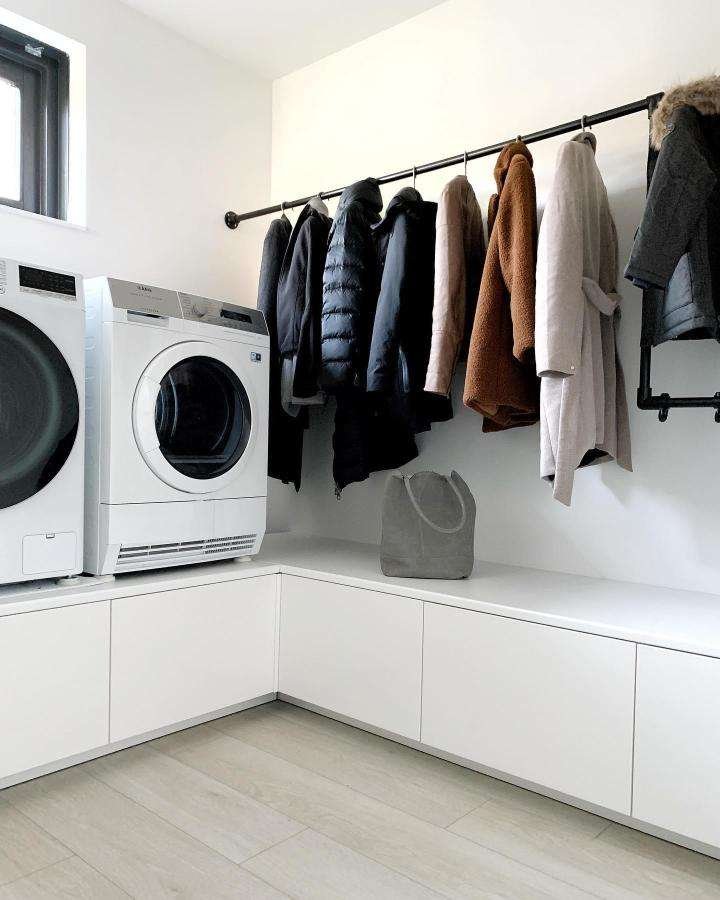
5Combine a Seamless Platform With a Drying Rail
A clean white base with closed drawers can be paired with a black ceiling- or wall-mounted rail for air-drying shirts and delicates.
Keep the rail high enough for garments but clear of cabinet doors and appliance lids. Mount it into solid structure and do not overload it with wet, heavy items.
Amazon pick: Wall-Mounted Laundry Drying Rack
A folding rack adds drying capacity while using minimal floor space.
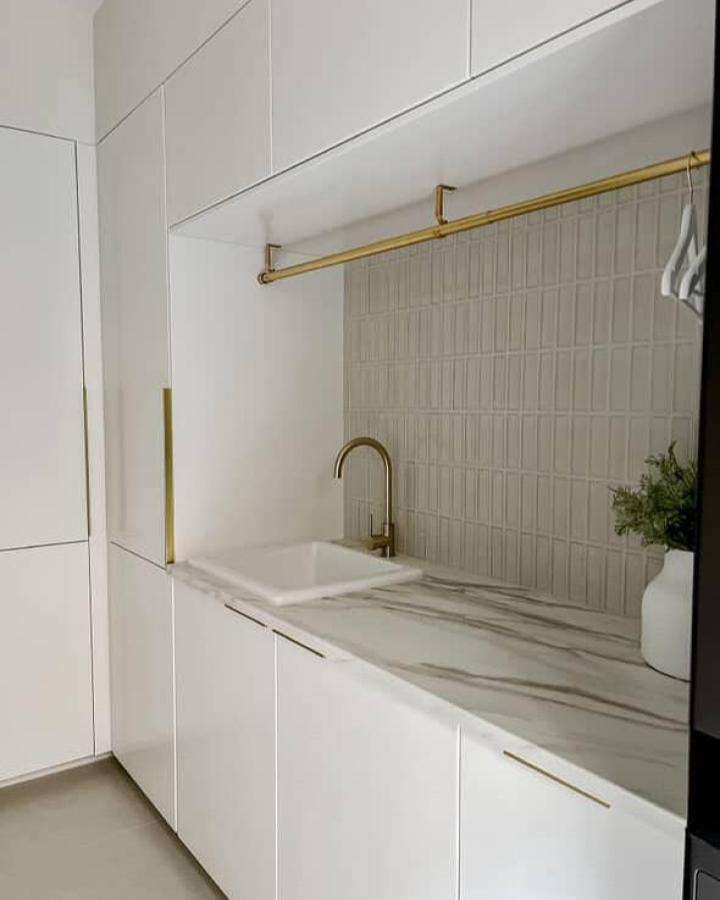
6Upgrade White Cabinets With Brass Hardware
Brass pulls and a matching hanging rail warm up plain white cabinet fronts. A marble-look counter or pale green backsplash can make the room feel more polished.
Select one brass tone and repeat it consistently. This is a high-impact budget change because it updates the visible touch points without replacing cabinet boxes.
Amazon pick: Brushed Brass Cabinet Pulls
A coordinated multipack gives doors and drawers a unified finish.
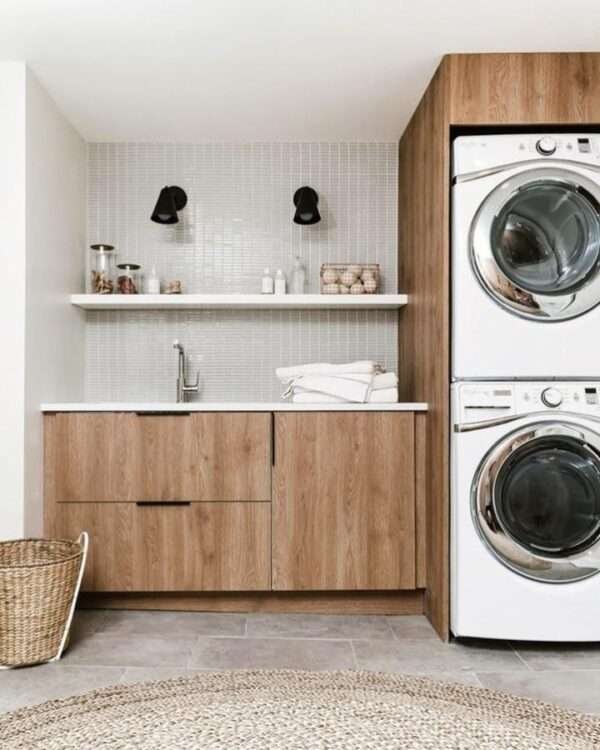
7Use Custom Wood Fronts on IKEA Cabinet Boxes
Warm oak-look doors and drawer fronts can make modular cabinetry resemble built-in millwork. A continuous grain direction gives the strongest custom effect.
Order samples before committing and confirm every front is compatible with the exact cabinet system. Keep the counter and backsplash simple so the wood remains the feature.
Amazon pick: Oak Peel-and-Stick Cabinet Samples
A sample or removable finish test helps confirm the tone before a larger investment.
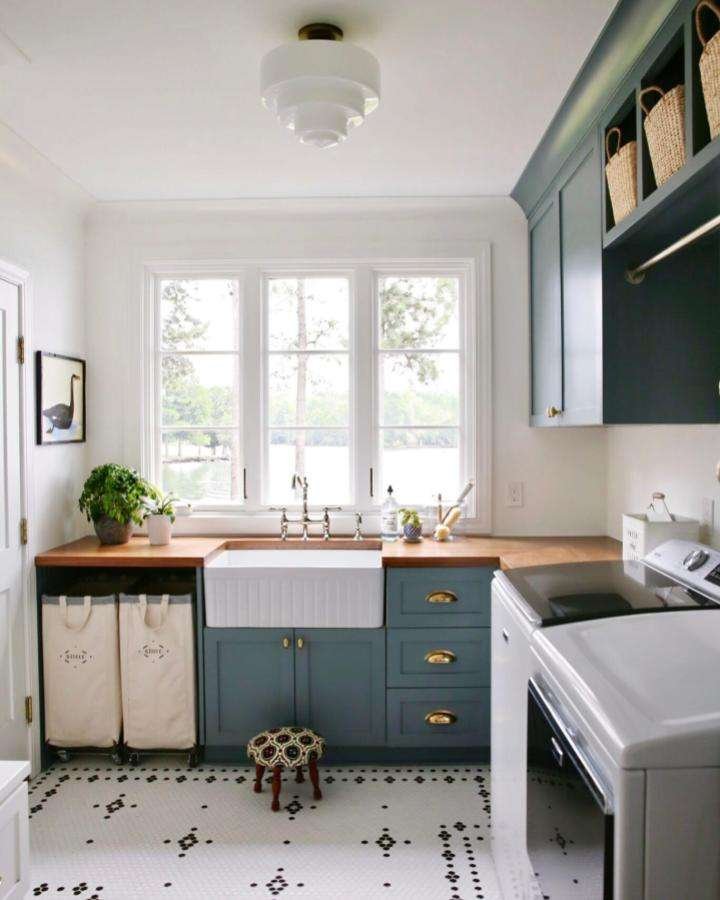
8Create Hidden Pull-Out Hamper Storage
Remove visual clutter by assigning ventilated pull-out or slide-in hampers beneath a counter. Separate lights, darks, and towels before laundry day.
Measure the opening and choose removable washable bags. Leave enough clearance for the hamper to slide out fully without hitting a door or machine.
Amazon pick: Pull-Out Laundry Hamper
A sliding system keeps sorting accessible while hiding piles.
9Build a Wall of Baskets and Closed Storage
Combine modular shelving, drawers, and woven baskets for an organized built-in effect. Reserve matching baskets for categories such as cleaning cloths, linens, and backup supplies.
Keep heavy liquid products low and lightweight baskets higher. Repeating the same basket style helps mixed shelving look cohesive.
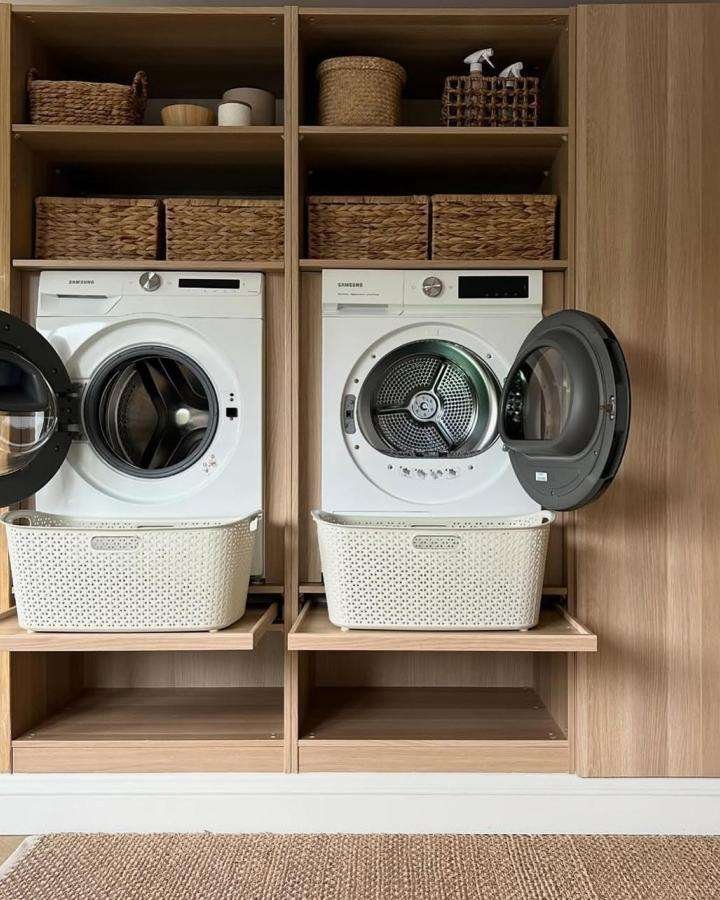
Amazon pick: Woven Shelf Basket Set
Matching baskets conceal irregular supplies and soften cabinet lines.
10Add a Hidden Utility Closet Beside Stacked Machines
A tall cabinet next to stacked appliances can store a vacuum, ironing board, mop, linens, and a short hanging rail. Adjustable shelves let the zone change with household needs.
Keep shutoff valves, outlets, and appliance connections accessible. Provide ventilation where required and avoid packing combustible items near dryer heat.
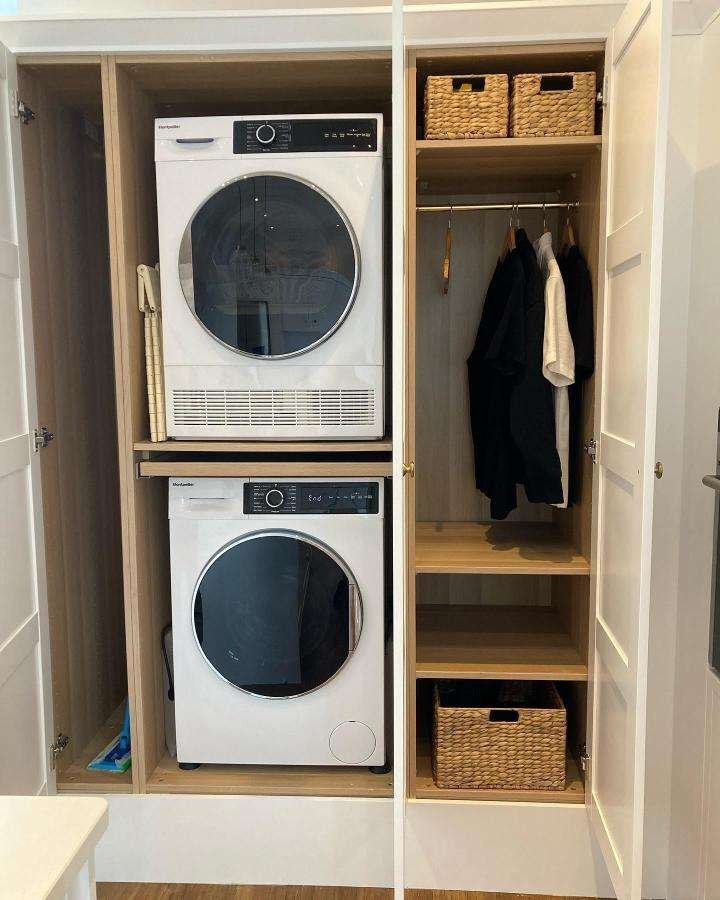
Amazon pick: Wall-Mounted Broom Organizer
A vertical organizer keeps long cleaning tools from tangling.
11Paint Cabinets Sage Green for a Built-In Look
Muted sage cabinets with brass hardware create a calm, custom-looking laundry alcove. Paint the fillers and trim the same color so separate sections read as one unit.
Use a primer and coating compatible with the cabinet surface. Test the color under the room’s actual lighting because small utility rooms can shift green dramatically.
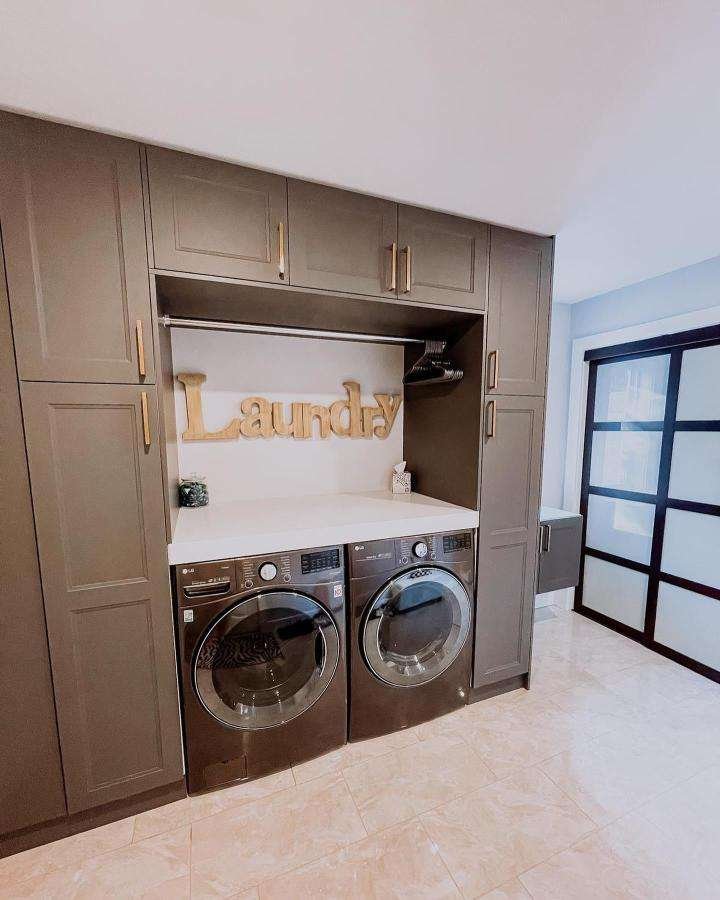
Amazon pick: Cabinet Painting Kit
A coordinated prep-and-paint system can simplify a cosmetic update.
12Use Floating Wood Shelves and Wire Baskets
Two sturdy shelves above the machines can hold labeled wire baskets, towels, and frequently used supplies. The open setup is practical when full cabinetry is outside the budget.
Keep everyday detergent on the lowest accessible shelf and decant only products that can be safely identified. Never remove chemicals from required original packaging.
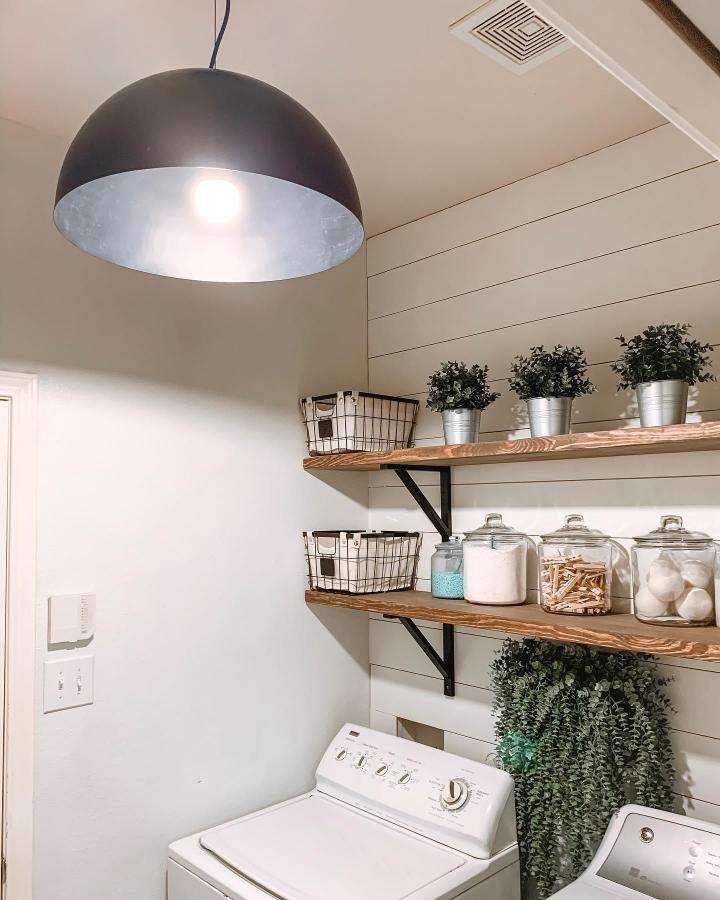
Amazon pick: Wire Storage Baskets With Labels
Open baskets keep small items visible and easier to return.
Best Color and Finish Palettes
- Classic utility: Soft gray, white, black, and warm wood.
- Calm natural: Sage green, oak, cream, and brass.
- Clean modern: Bright white, pale gray, black, and light maple.
- Moody practical: Deep teal, butcher block, brass, and ivory.
Mistakes and Safety Tips
- Do not build cabinets or counters before checking appliance service, door, lid, hose, and ventilation clearances.
- Never place heavy vibrating machines on an unverified cabinet or DIY platform.
- Anchor tall cabinets and shelves and follow all load ratings.
- Store cleaning chemicals in original labeled containers and out of reach of children and pets.
- Use qualified help for plumbing, electrical work, dryer vent changes, or structural support.
Frequently Asked Questions
How far ahead should I plan an IKEA laundry-room makeover?
Start with the date, budget, measurements, and any items that may sell out. Buy reusable basics first, then add fresh or highly specific details closer to the event or season.
Can I do this on a small budget?
Yes. Focus spending on the main focal point and the items that solve a practical problem. Reuse neutral pieces, compare dimensions carefully, and avoid buying filler simply to cover every surface.
How do I keep the finished look from feeling cluttered?
Use a limited palette, repeat a few materials, and leave clear negative space. Group small items together so they read as one arrangement rather than scattered visual noise.
What should I buy first?
Purchase the functional foundation first, followed by the focal decor or activity supplies. Smaller accents should come last, after you know what the setup truly needs.
How can I make the setup feel personal?
Include a favorite color, family tradition, photograph, hobby, or meaningful story. One genuine personal detail usually feels more memorable than many generic decorations.
Final Thoughts
A budget laundry makeover succeeds when it improves the routine before it improves the photograph. Protect appliance access, create a folding and sorting zone, store heavy products safely, and repeat a small set of finishes. IKEA-style modular pieces can look custom when the measurements and installation are correct.

Nikita Rout is a passionate content writer at HowItSee.com, where she explores the wonders of animals, nature, and the curious questions that spark our imagination. With a love for research and a knack for simplifying complex topics, she brings clarity and creativity to every article she writes. When she’s not writing, you’ll likely find her reading about animal behavior or coming up with unique pet name ideas.