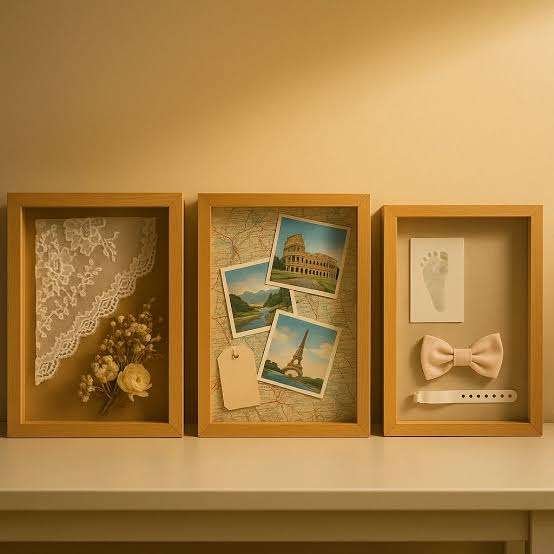
Some memories are too special to leave tucked away in a drawer. A collection of vacation seashells, a wedding invitation, your child’s first keepsakes, or a handful of vintage buttons can become beautiful wall decor with a little creativity. These easy DIY shadow box ideas help you turn meaningful objects and inexpensive craft supplies into personalized displays you’ll enjoy seeing every day.
You don’t need advanced crafting skills or expensive materials to get started. A deep picture frame, decorative backing, and a few carefully arranged objects are often enough. From sentimental memory boxes and romantic paper flower displays to vintage map art and seasonal decorations, these 20 beginner-friendly projects offer something for every decorating style and occasion.
More ideas to explore:
- Gallery Wall Layout Ideas and Sizing Rules – Find beautiful ways to display your finished shadow boxes alongside framed artwork.
- Vintage Halloween Clip Art for DIY Crafts – Explore printable designs that work beautifully in seasonal shadow box projects.
- 21 Spooky Halloween Wall Decor Ideas – Discover creative ways to style handmade seasonal decorations.
Quick List: 20 Easy DIY Shadow Box Ideas
- Create a Military Medal and Uniform Memory Box
- Make a Graduation Cap and Tassel Display
- Preserve Vintage Letters and Family Keepsakes
- Fill a Coastal Shadow Box With Seashells
- Display Wedding Invitations and Dried Bouquet Flowers
- Frame Pressed Flowers and Botanical Treasures
- Create a Sweet Pet Memorial Shadow Box
- Build a Miniature Flower Garden Shadow Box
- Surround a Favorite Couple Photo With Paper Roses
- Arrange Navy Blue Paper Flowers Into a Heart
- Make a White Rose Wreath With a Personal Message
- Create a Thoughtful Teacher Appreciation Shadow Box
- Design a Colorful 3D Scrapbook Collage
- Make a Red Rose Heart Shadow Box for Grandma
- Create Vintage Map Art With Flying Bird Silhouettes
- Display Vintage Sewing Supplies and Notions
- Collect Concert Tickets and Special Event Memories
- Make a Vintage Halloween Shadow Box From Recycled Materials
- Create a Miniature Day of the Dead Memory Shrine
- Decorate a Vintage Printer’s Tray for Christmas
What Do You Need to Make a DIY Shadow Box?
A shadow box is a deep frame that allows you to display three-dimensional objects behind a clear front or inside an open display compartment. Unlike a standard picture frame, it provides room for layers, small keepsakes, and decorative arrangements.
For your first project, begin with a ready-made shadow box frame. Choose one that opens easily and has enough depth for your largest object. Then decide on a background color, arrange your decorations, and select an appropriate method for attaching them.
| Material | Best Use | Budget Alternative |
|---|---|---|
| Deep Shadow Box Frame | Displaying layered objects | Thrifted deep frame or shallow wooden box |
| Cardstock or Fabric | Creating an attractive background | Leftover scrapbook paper or fabric scraps |
| Foam Board | Supporting lightweight arrangements | Clean, sturdy recycled cardboard for non-archival crafts |
| Craft Glue | Attaching replaceable decorative elements | Existing glue dots or suitable double-sided craft tape |
| Archival Mounting Supplies | Supporting irreplaceable photographs and keepsakes | Use copies of originals with ordinary craft materials |
| Mini Decorations | Creating dimension and detail | Buttons, ribbon, paper scraps, and small objects already owned |
Beginner tip: Arrange everything inside the frame before attaching it. Take a quick photo of the layout so you can recreate it once you start mounting the objects.
20 Creative DIY Shadow Box Ideas to Make at Home
1. Create a Military Medal and Uniform Memory Box
A military shadow box is a meaningful way to display service medals, uniform patches, ribbons, and other keepsakes in one carefully arranged frame. The finished piece can become a treasured family display that recognizes someone’s years of service.
Choose a deep black or dark walnut shadow box with a neutral fabric-covered backing. Arrange the medals in a balanced row, then position a uniform patch or carefully folded fabric piece beneath them. A small photograph or personalized nameplate can complete the display without making it crowded.
Preservation tip: Avoid gluing valuable medals or original uniform fabric. Use suitable archival supports, removable mounts, or professional framing assistance for irreplaceable items.
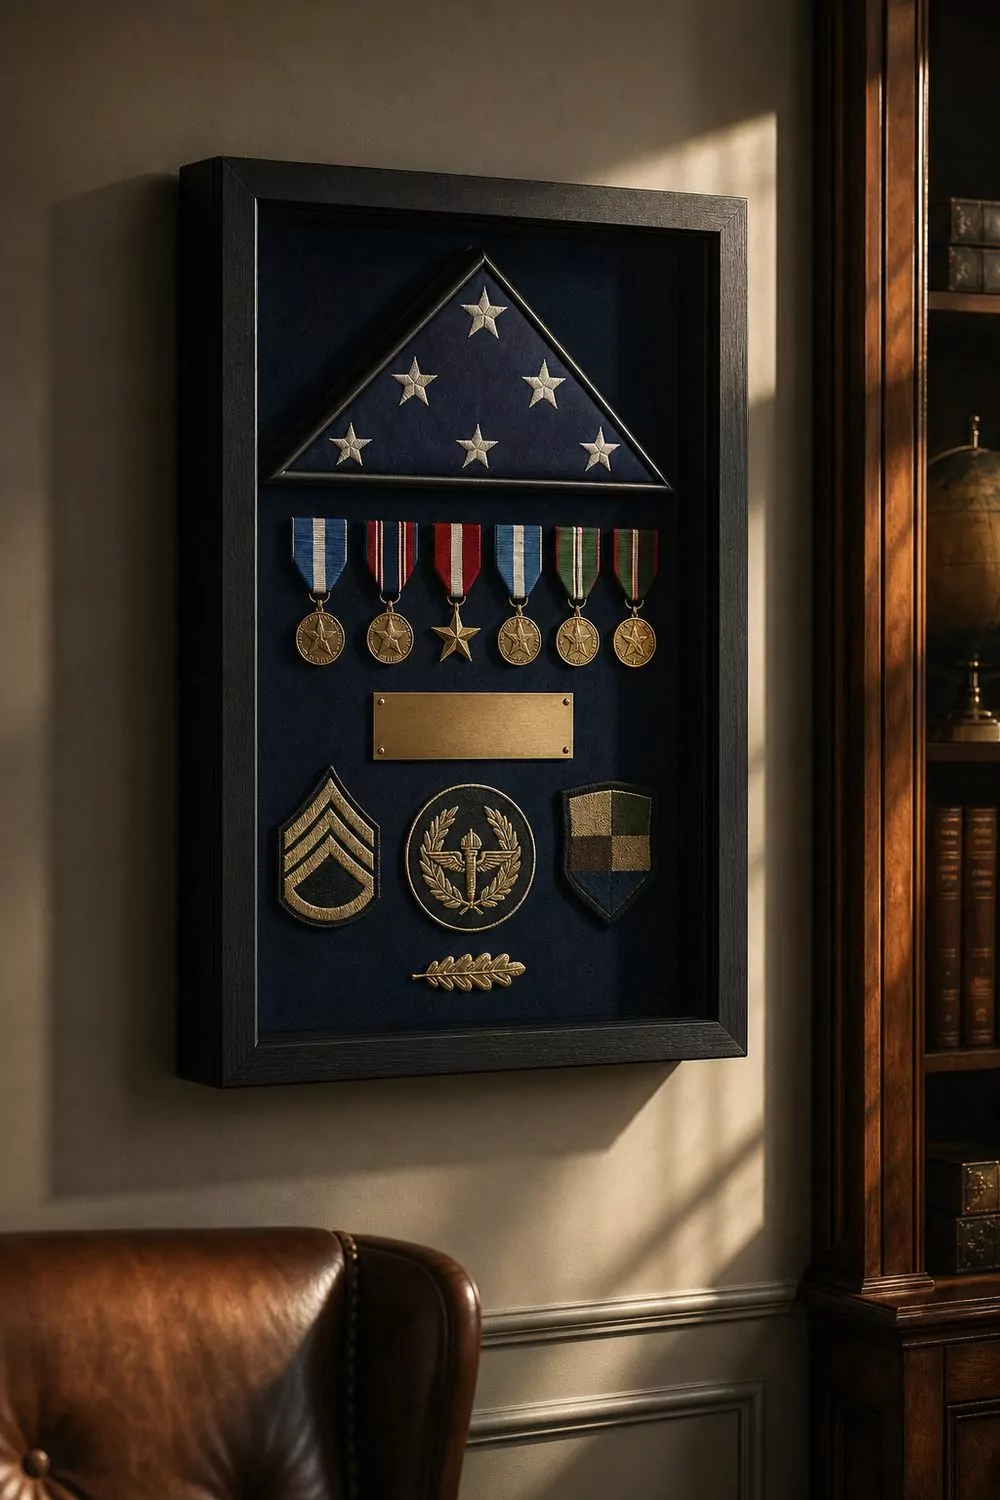
Image Credit: @omnihomeideas.com
Amazon Find: Deep Shadow Box Display Frame
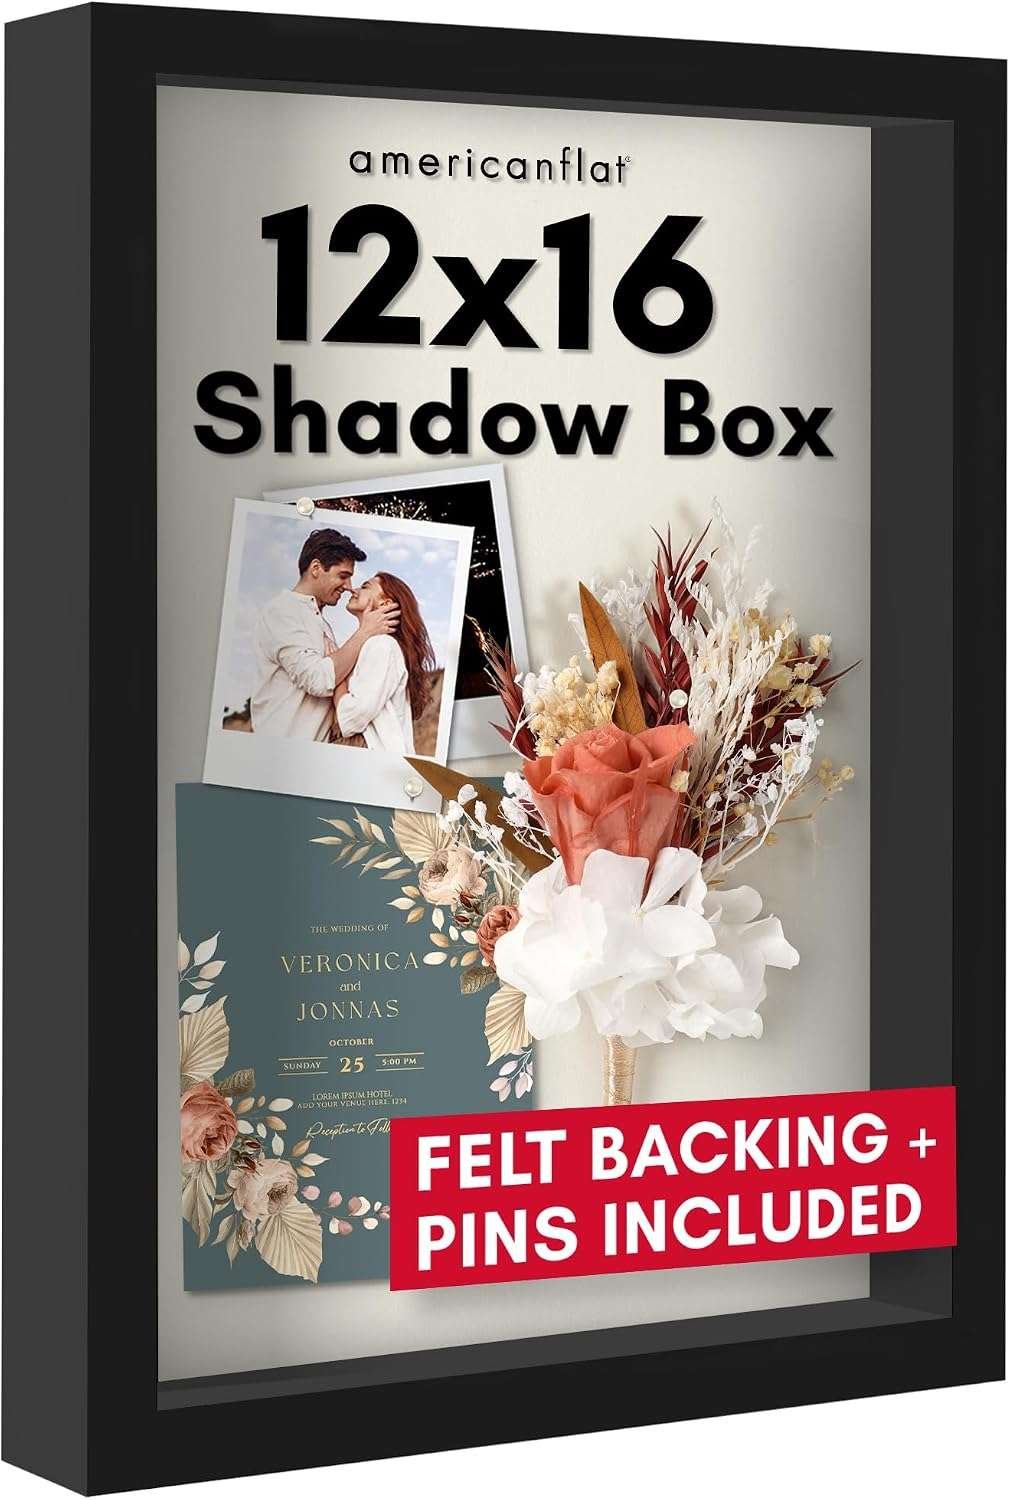
A deeper frame gives medals, ribbons, and layered keepsakes enough space to sit comfortably without pressing against the front cover. Choose a frame with a secure closure and appropriate mounting hardware.
2. Make a Graduation Cap and Tassel Display
Graduation day comes with little reminders worth keeping, especially a tassel, cap, ceremony program, and photographs. A graduation shadow box turns these items into a personalized decoration that can be displayed in a bedroom, study, or home office.
Select a frame deep enough to hold the graduation cap without flattening it. Cover the backing with cream, navy, or another color associated with the school. Place the cap toward one side and arrange the tassel, a graduation photo, and a small printed graduation-year label around it.
Easy alternative: If your frame is shallow, display the tassel, a photograph, and a copy of the diploma rather than trying to squeeze in the entire cap.
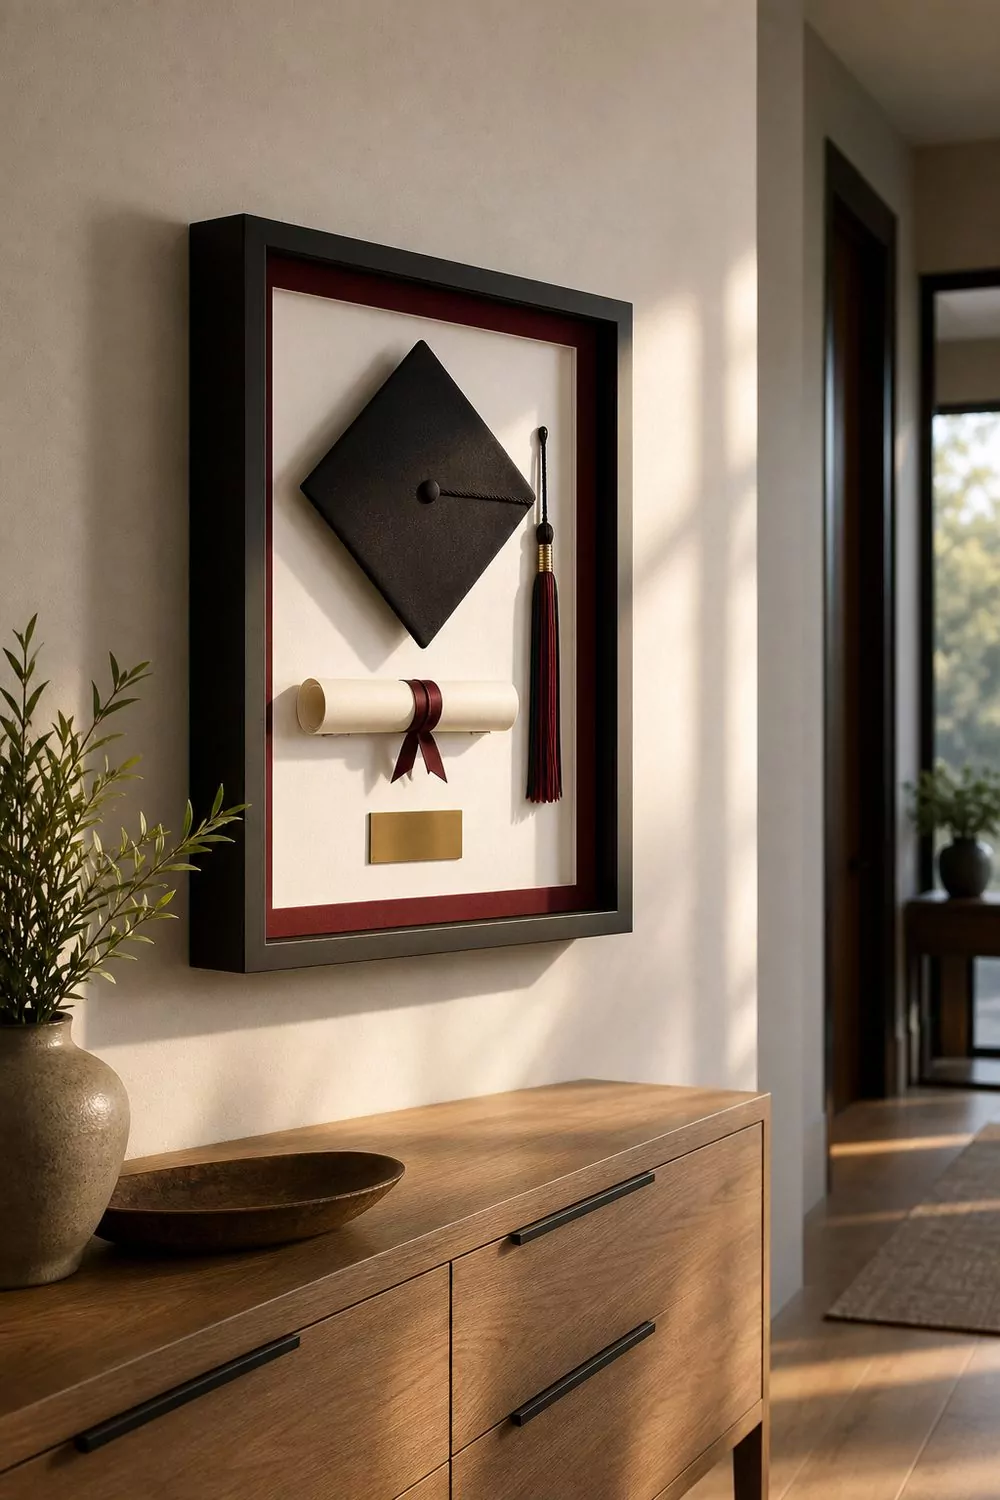
Image Credit: @omnihomeideas.com
3. Preserve Vintage Letters and Family Keepsakes
Old handwritten letters, antique keys, vintage coins, and small inherited objects can make a beautiful family history shadow box. Their different shapes and aged finishes create a collected appearance that works especially well with traditional or rustic home decor.
Line a walnut-colored frame with oatmeal linen or warm beige cardstock. Place a copy of an old letter in the background, then arrange a key, small photograph, and one or two sentimental objects in front. Allow some of the paper to remain visible so the arrangement feels layered rather than crowded.
Preservation tip: Scan fragile letters and photographs before crafting. Display copies when possible, and keep valuable originals in proper archival storage rather than attaching them with tape or glue.
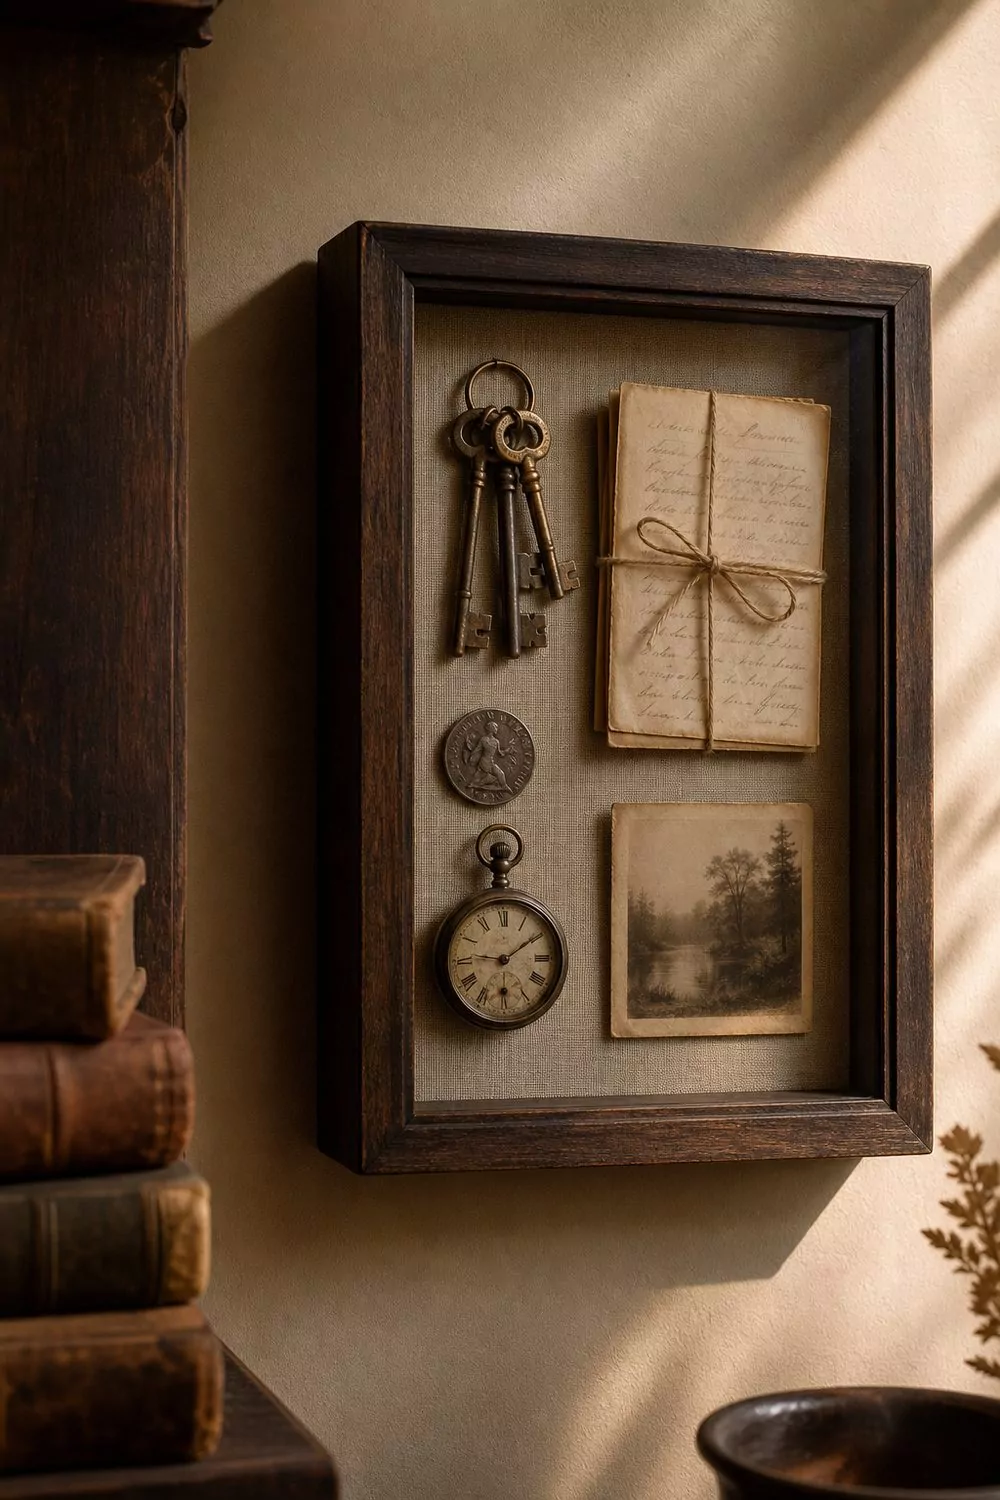
Image Credit: @omnihomeideas.com
4. Fill a Coastal Shadow Box With Seashells
A seashell shadow box brings a little beach vacation charm into your home. It’s a simple beginner craft because shells naturally provide beautiful shapes and textures without requiring much extra decoration.
Begin with a white wooden shadow box and cover the background with pale blue, sandy beige, or light gray paper. Arrange several clean, completely dry seashells around a small piece of driftwood or sea glass. Group similar colors together and leave enough empty space for the natural details to stand out.
Use appropriate removable supports for special shells or a suitable adhesive for inexpensive decorative pieces. A small photograph from the beach can make the finished piece feel more personal.
Styling tip: Keep the colors soft and coastal. A white frame paired with beige shells and a muted blue background looks lovely in a guest bedroom or hallway.
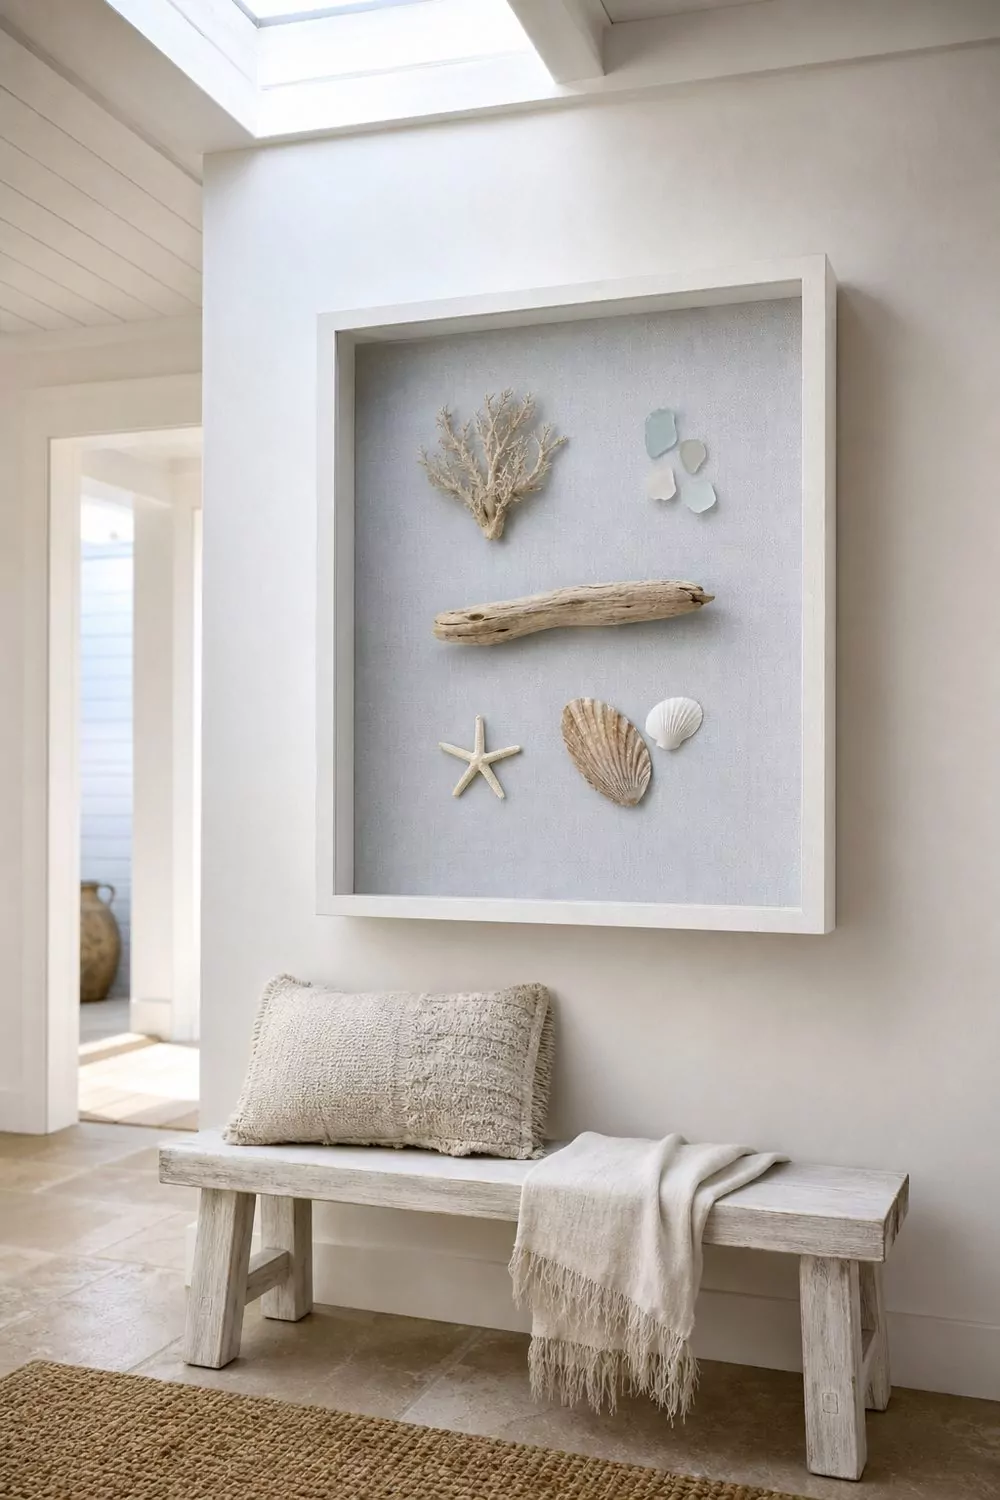
Image Credit: @omnihomeideas.com
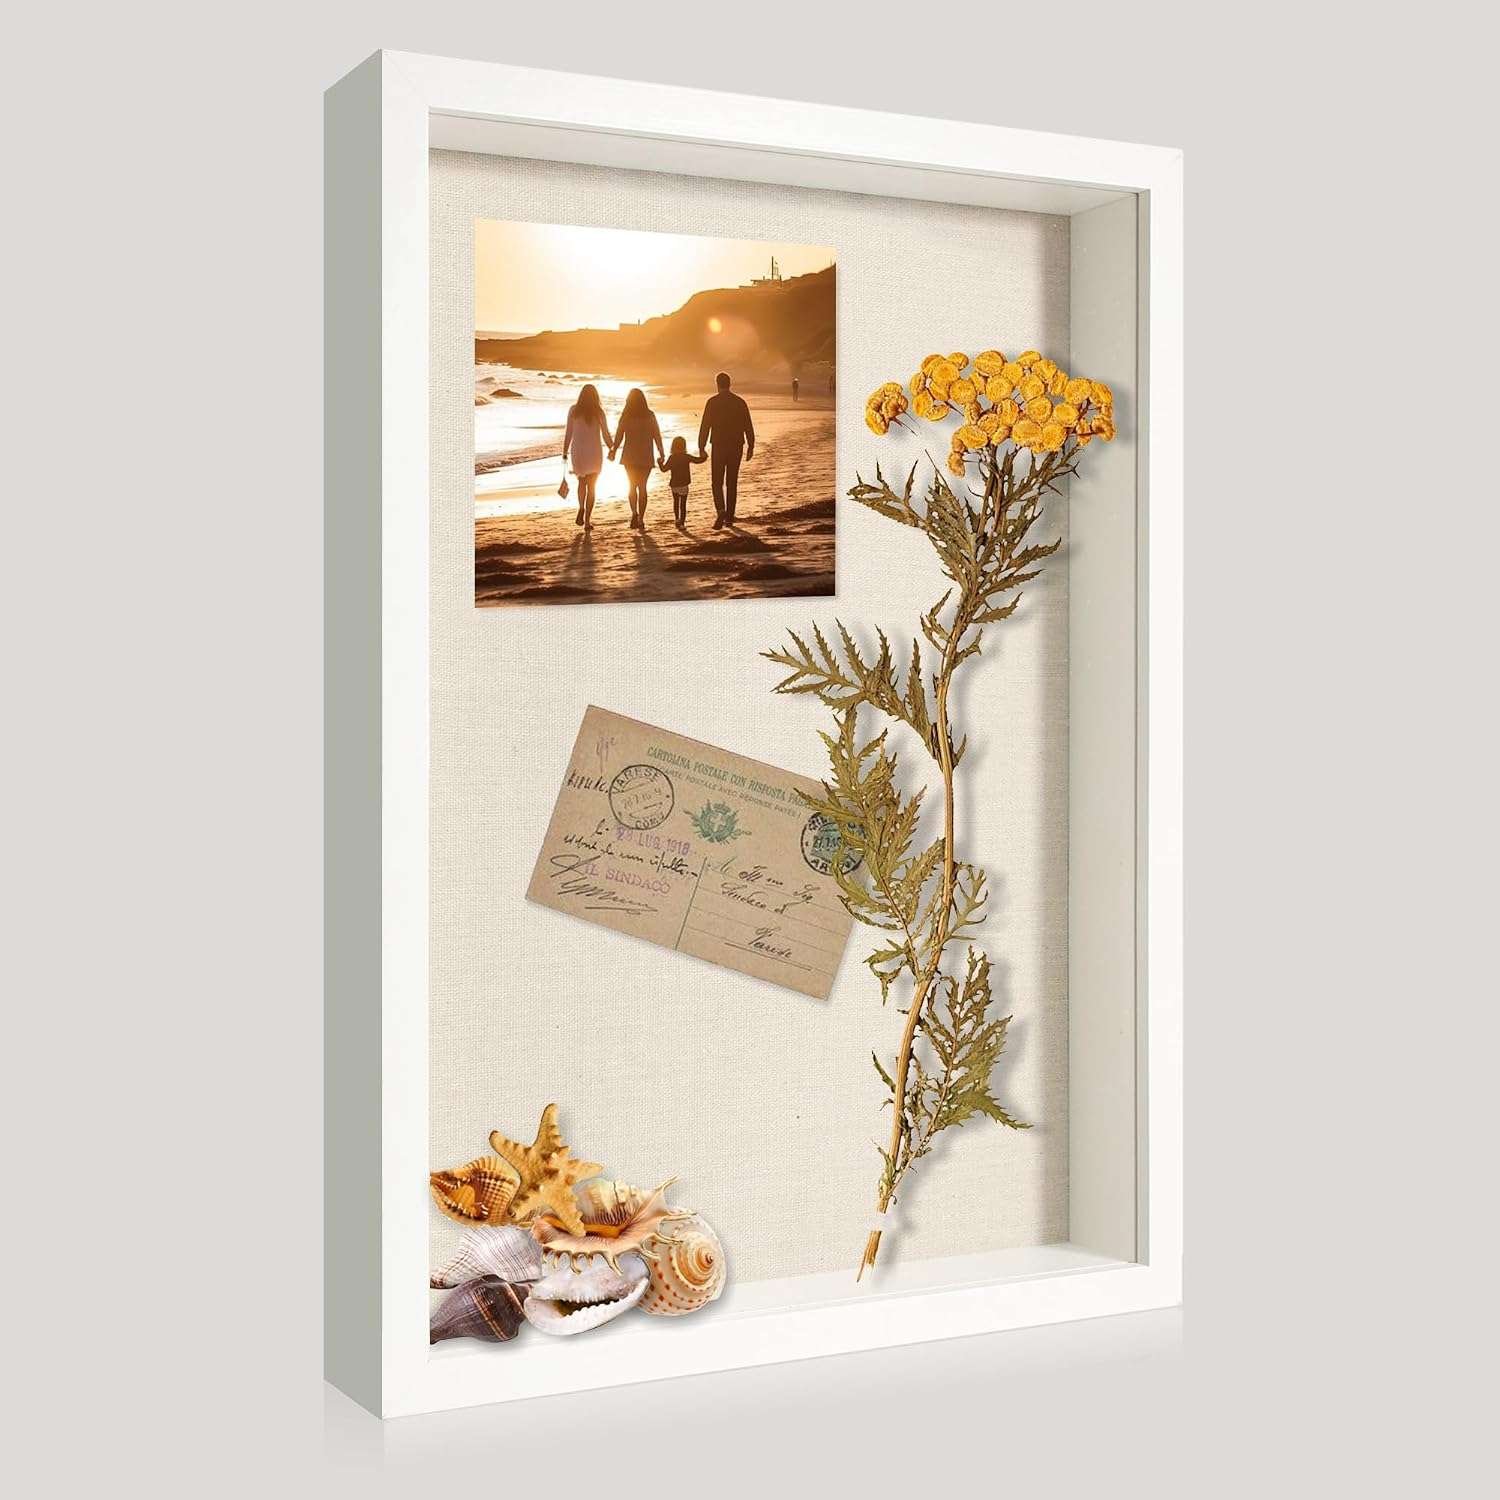
Amazon Find: White Shadow Box Display Frame
A simple white shadow box is useful for coastal crafts, vacation keepsakes, and neutral home decor. Look for enough interior depth to accommodate the largest shell in your arrangement.
5. Display Wedding Invitations and Dried Bouquet Flowers
Your wedding invitation and a few flowers from the bouquet can become a romantic memory display that captures the details of a special day. This project is particularly pretty in a soft gold, cream, or natural wood shadow box frame.
Use the invitation as the main focal point, positioning it against an ivory background. Arrange a few thoroughly dried blooms alongside it and add a small piece of satin ribbon or a copy of a vow card. Keep the flowers to one side so the invitation remains easy to see.
Choose flowers that have been properly dried or preserved before enclosing them. Use a reproduction invitation if the original is irreplaceable, and avoid attaching adhesive directly to delicate paper or floral keepsakes.
Budget idea: Use one or two bouquet blooms rather than the entire arrangement. A small, carefully styled collection can look beautiful in a modest-sized frame.
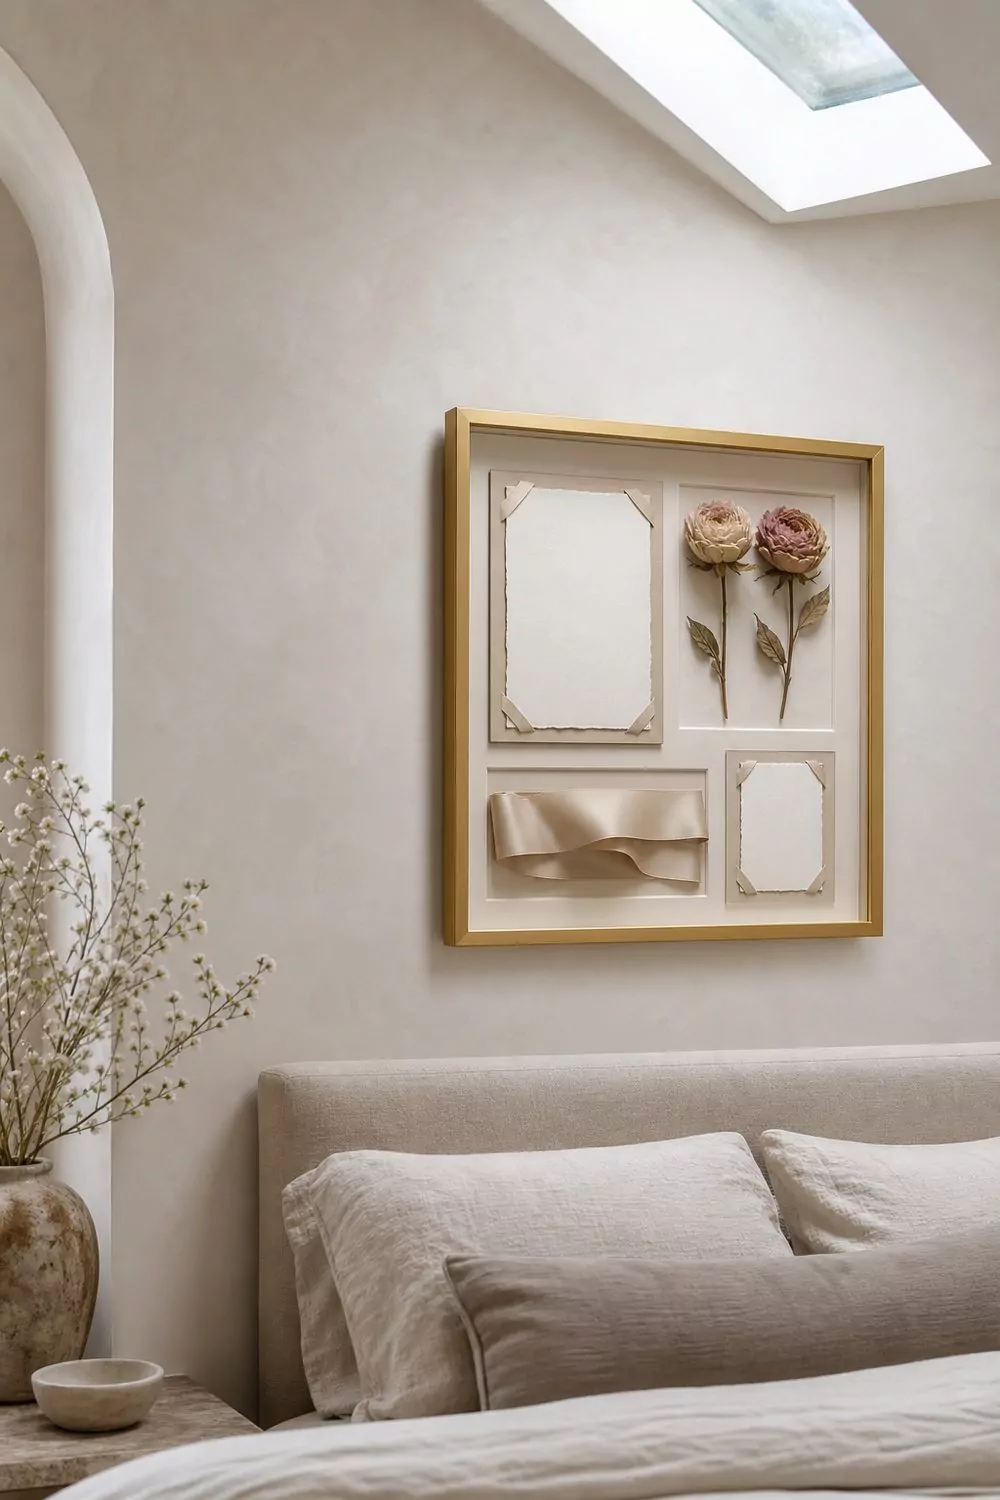
Image Credit: @omnihomeideas.com
6. Frame Pressed Flowers and Botanical Treasures
Pressed flower shadow boxes make delicate wall decorations that fit beautifully in farmhouse, cottage, and nature-inspired interiors. Fern leaves, daisies, small wildflowers, and delicate stems work especially well because their shapes remain recognizable when flattened.
Press your flowers until they are completely dry, then arrange them on acid-free cardstock in a natural oak or light wooden frame. Position a larger fern toward one side and surround it with a few smaller flowers or leaves. Keep the background simple so each stem remains visible.
A cream backing with muted green leaves looks elegant, while pale pink flowers add a softer romantic touch. For delicate originals, use archival mounting methods rather than ordinary glue.
Decorating tip: Make two or three coordinating botanical shadow boxes and hang them together above a dresser or narrow console table.
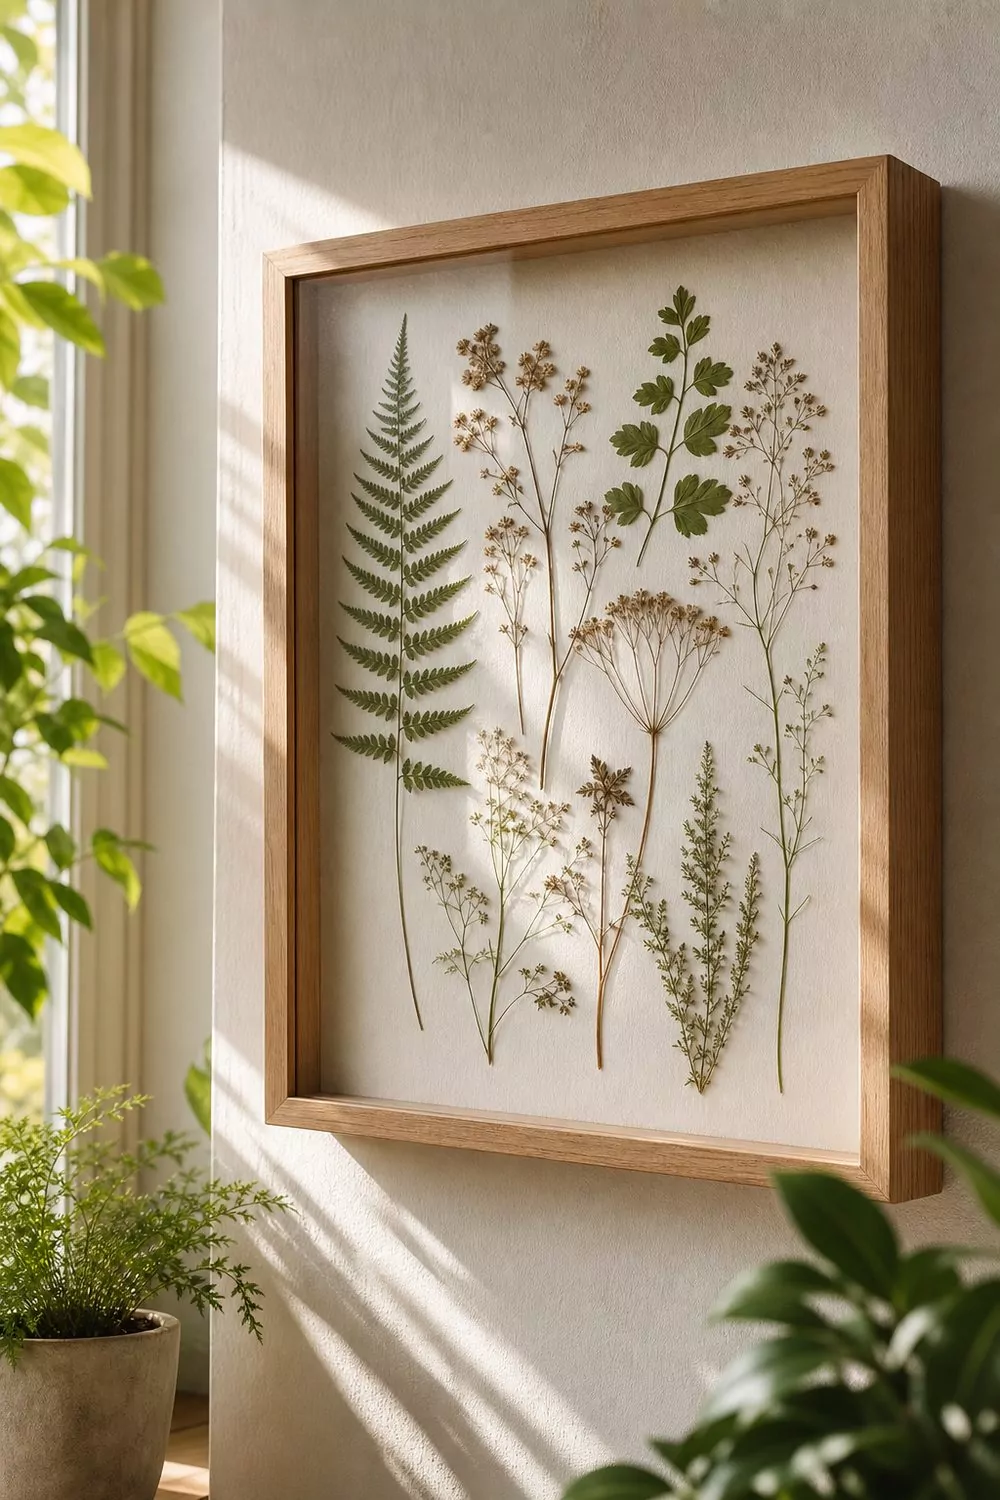
Image Credit: @omnihomeideas.com
7. Create a Sweet Pet Memorial Shadow Box
A pet memorial shadow box offers a gentle way to remember a beloved dog, cat, or other companion. A favorite photograph, name tag, collar, and paw-print keepsake can create a deeply personal display without needing complicated craft techniques.
Choose a natural wood or simple black frame and add a soft neutral backing. Position a favorite photograph in one corner and arrange the collar or a small portion of it beneath the picture. Include the pet’s name on a simple printed card or small wooden label.
Muted sage, warm cream, and soft gray are lovely background colors that keep the display calm and understated. Don’t feel pressured to include every keepsake; a few meaningful objects can tell the story beautifully.
Practical tip: If the collar or tag is especially precious, secure it using reversible supports or display a duplicate while storing the original safely.
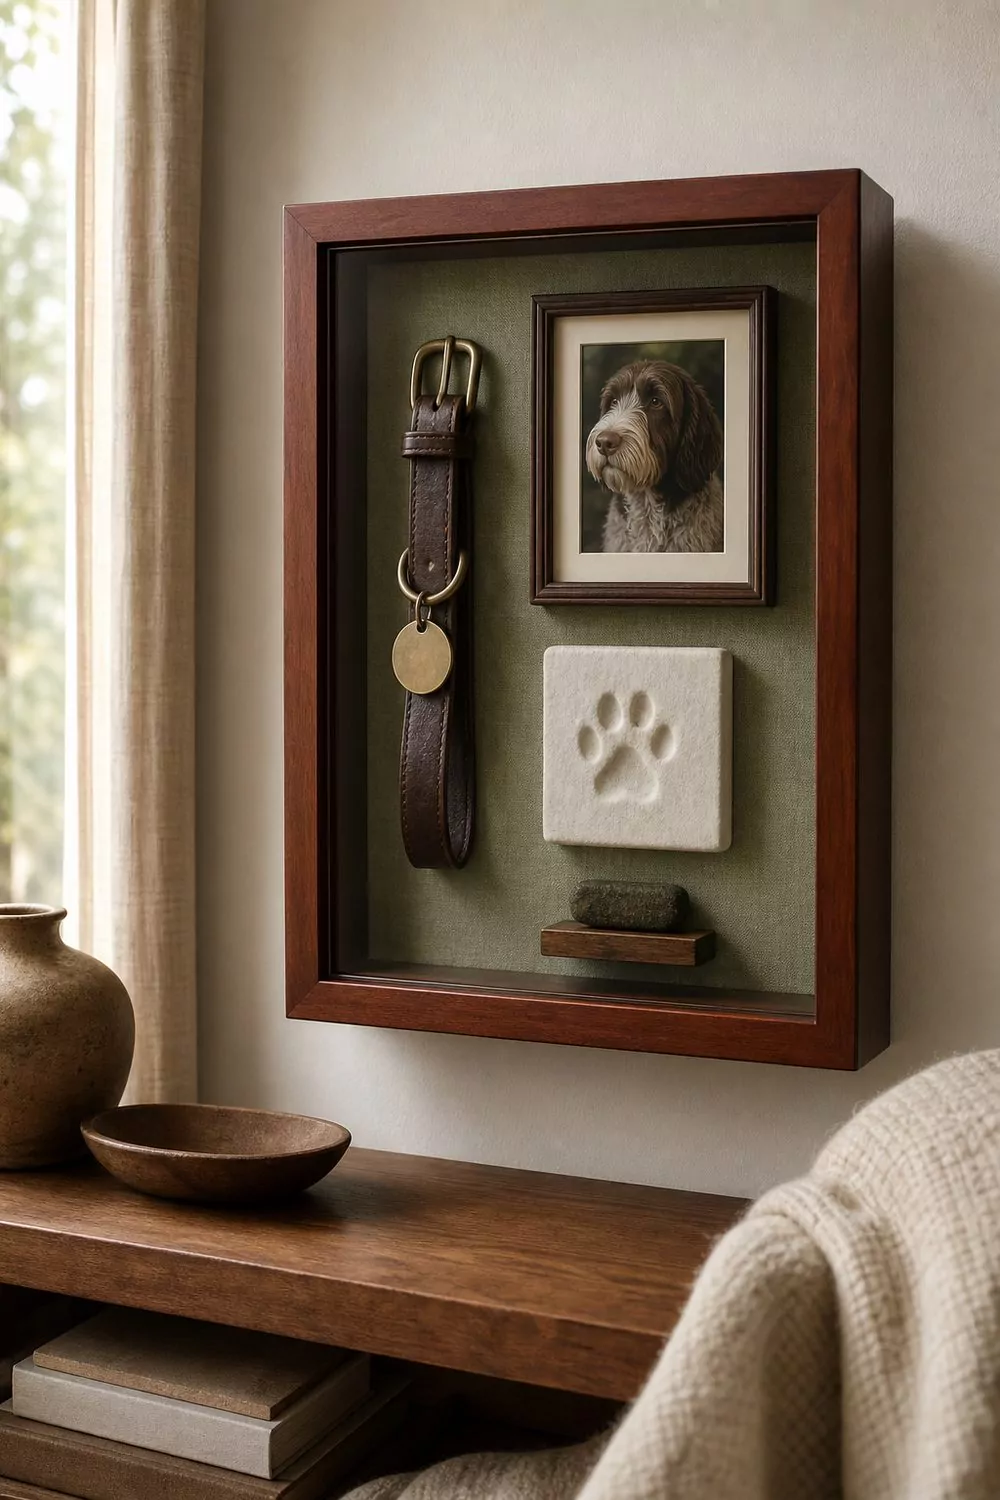
Image Credit: @omnihomeideas.com
8. Build a Miniature Flower Garden Shadow Box
A miniature garden shadow box feels like a tiny storybook scene hidden inside a frame. Small artificial flowers, leafy stems, a white fence, and a few miniature accessories can create a cheerful garden display with plenty of personality.
Line the background with pale blue cardstock or a subtle floral paper. Create a small white fence from craft sticks along the bottom, then arrange miniature pink flowers and greenery behind it. Add one tiny wooden stool or decorative watering can if your frame is deep enough.
Keep the objects different heights to create a sense of depth. Place taller flowers toward the back and shorter decorations closer to the front. Secure all loose pieces before closing the frame.
Beginner tip: Use miniature artificial flowers instead of real plants. They don’t need water, making the display much easier to maintain.
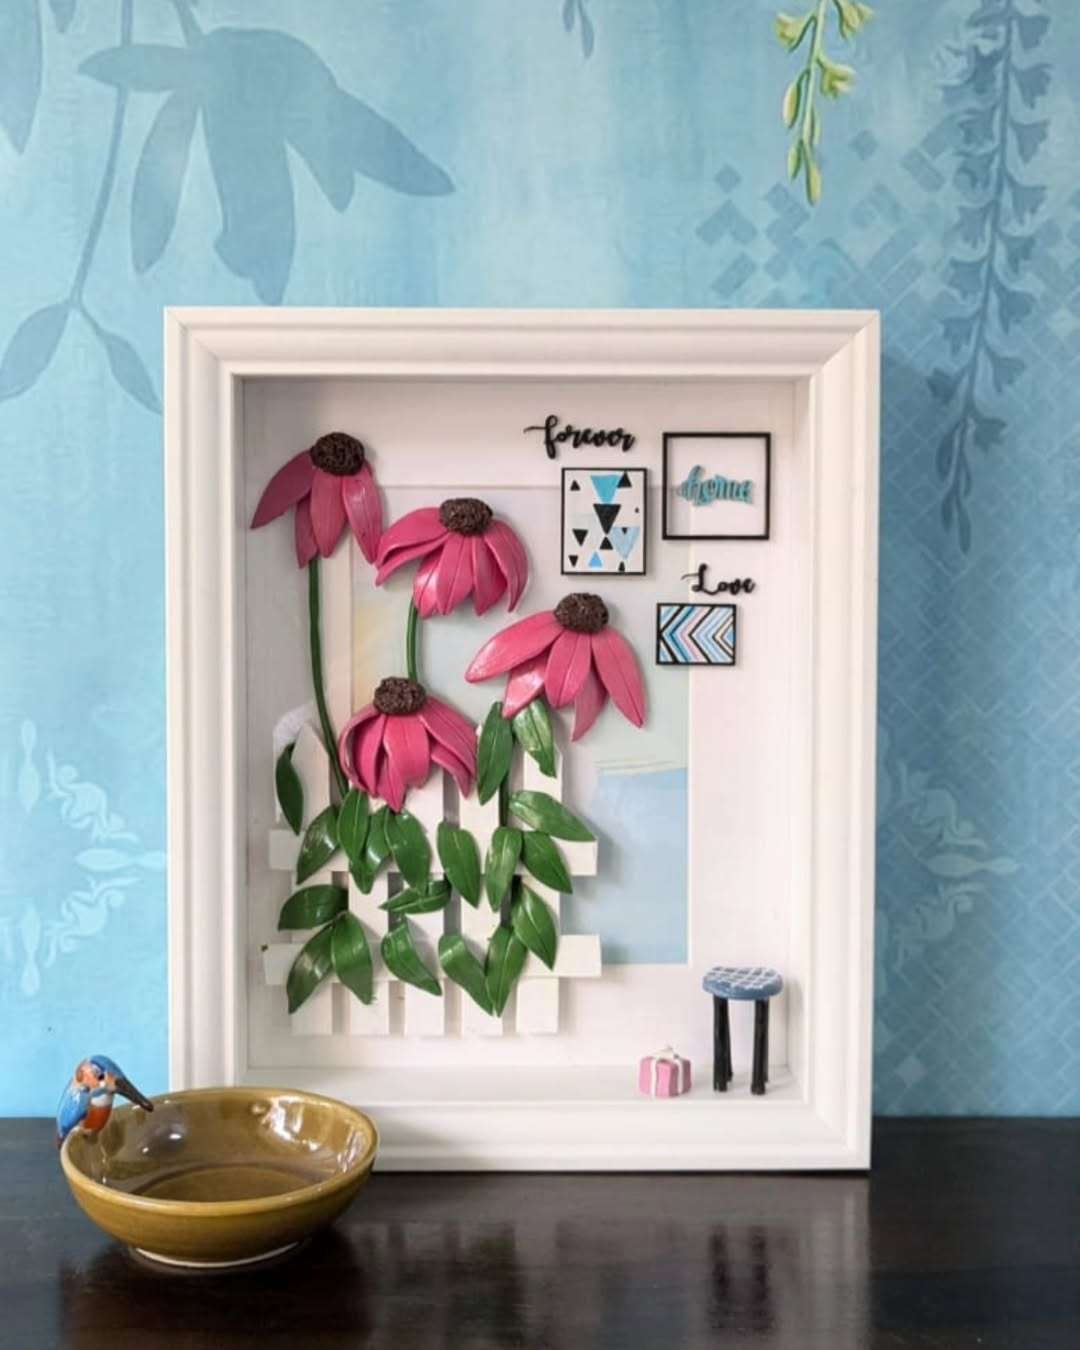
Image Credit: @thecoolist.com
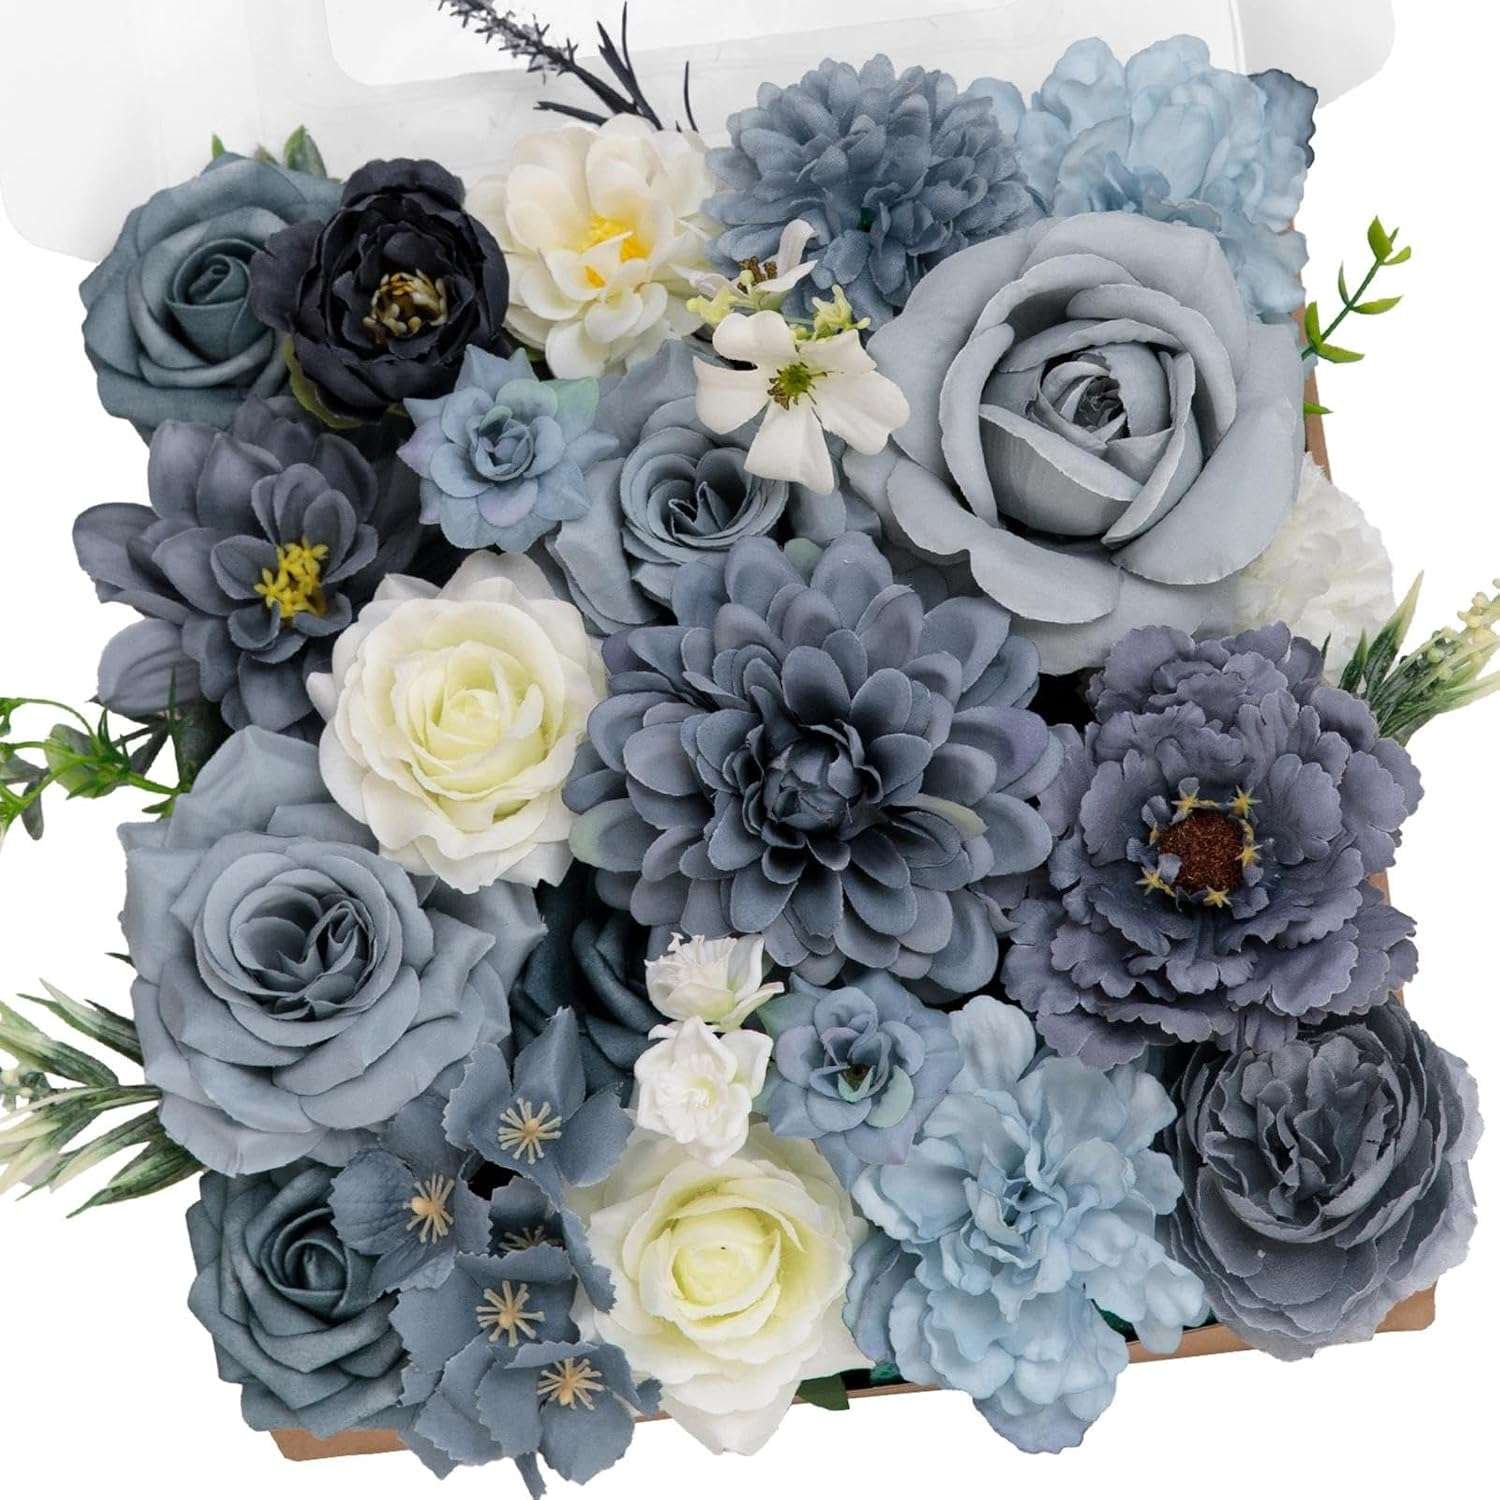
Amazon Find: Miniature Artificial Flowers for Crafts
Tiny artificial flower stems can add color and dimension to miniature garden scenes, floral wreath boxes, and handmade decorative displays.
9. Surround a Favorite Couple Photo With Paper Roses
A photo surrounded by handmade paper roses creates a romantic shadow box that works beautifully as an anniversary or Valentine’s Day gift. The contrast between the flat photograph and dimensional flowers makes the arrangement visually interesting without requiring expensive supplies.
Print a favorite couple photograph and mount it in the center of a deep frame. Make small roses from red, burgundy, or dusty pink cardstock by rolling or layering paper petals. Arrange the flowers around the photograph, leaving the faces and important details fully visible.
Add a small date beneath the photo if desired. Use a cream or pale blush backing to soften the stronger rose colors, and choose a frame deep enough to avoid pressing the flowers against the clear front.
Budget tip: You can make the roses using leftover red scrapbook paper or inexpensive cardstock. Practice with a few flowers before preparing the entire arrangement.
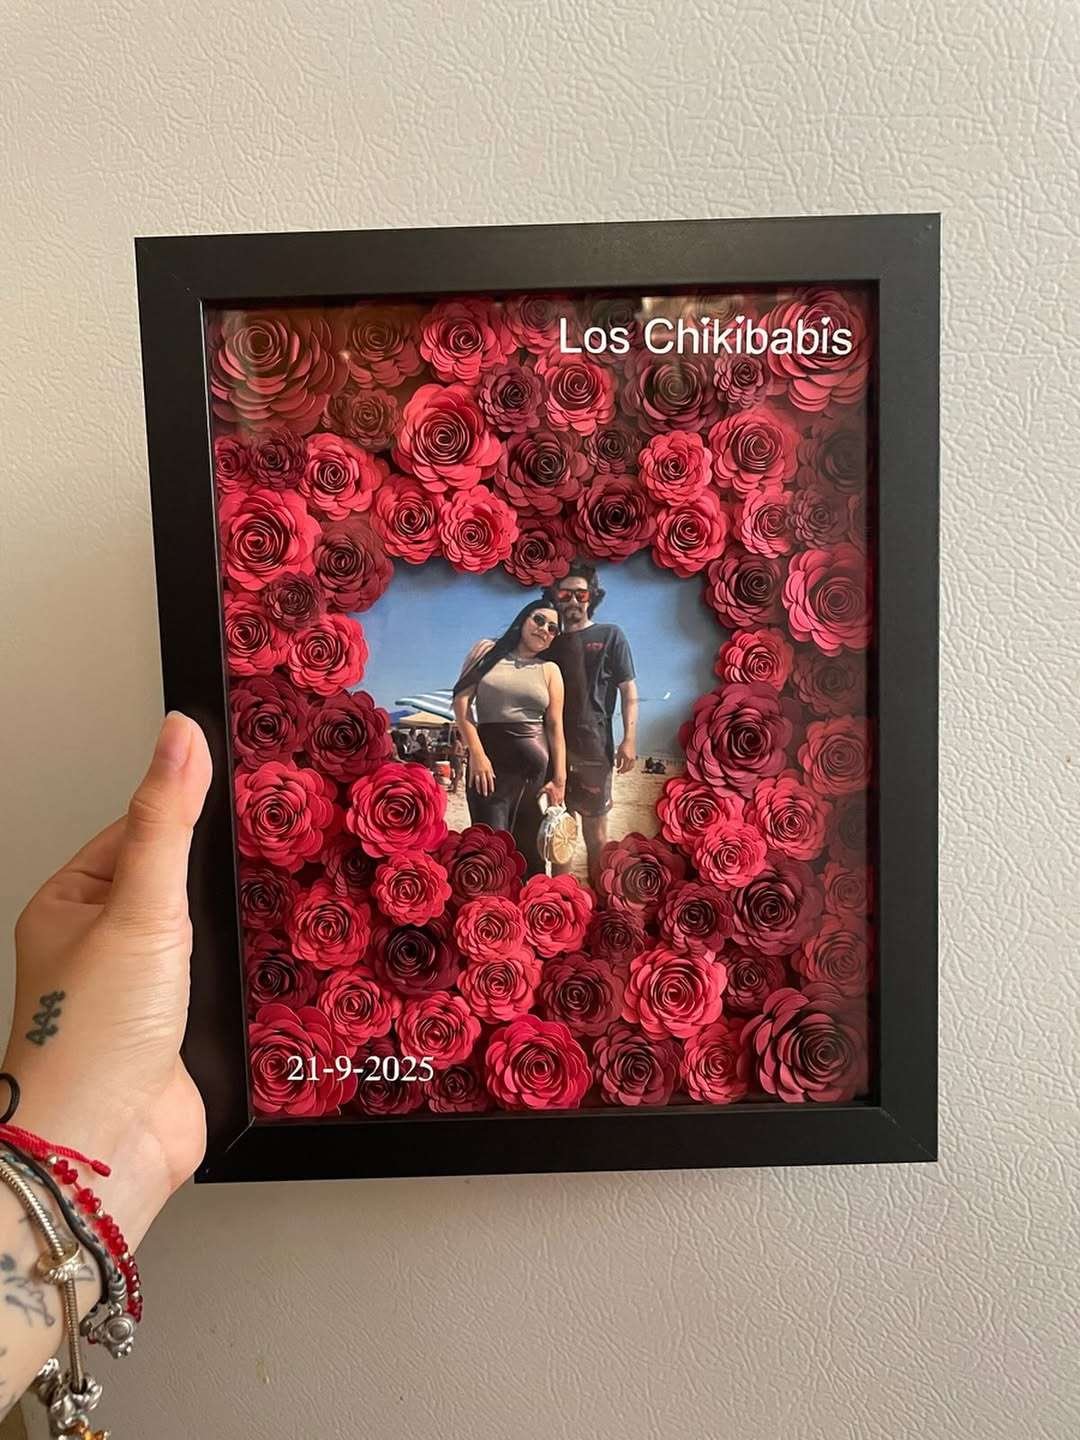
Image Credit: @thecoolist.com
10. Arrange Navy Blue Paper Flowers Into a Heart
For a simple but striking handmade decoration, arrange small navy blue paper flowers into a heart shape inside a white shadow box. The repeated floral shapes create a beautiful textured design, while the limited color palette gives the finished piece a clean, elegant appearance.
Cut or assemble small paper flowers from navy cardstock. Draw a heart outline lightly on the backing board, then begin arranging the flowers along the outline before filling the center. Attach a tiny pearl-style embellishment to the middle of each flower if you want a delicate decorative finish.
A bright white frame helps the dark blue flowers stand out beautifully. Keep the background plain and avoid adding unrelated ornaments, since the heart design already provides a strong focal point.
Styling idea: Change the flower color to dusty rose, burgundy, or cream to match a nursery, bedroom, or personalized gift theme.
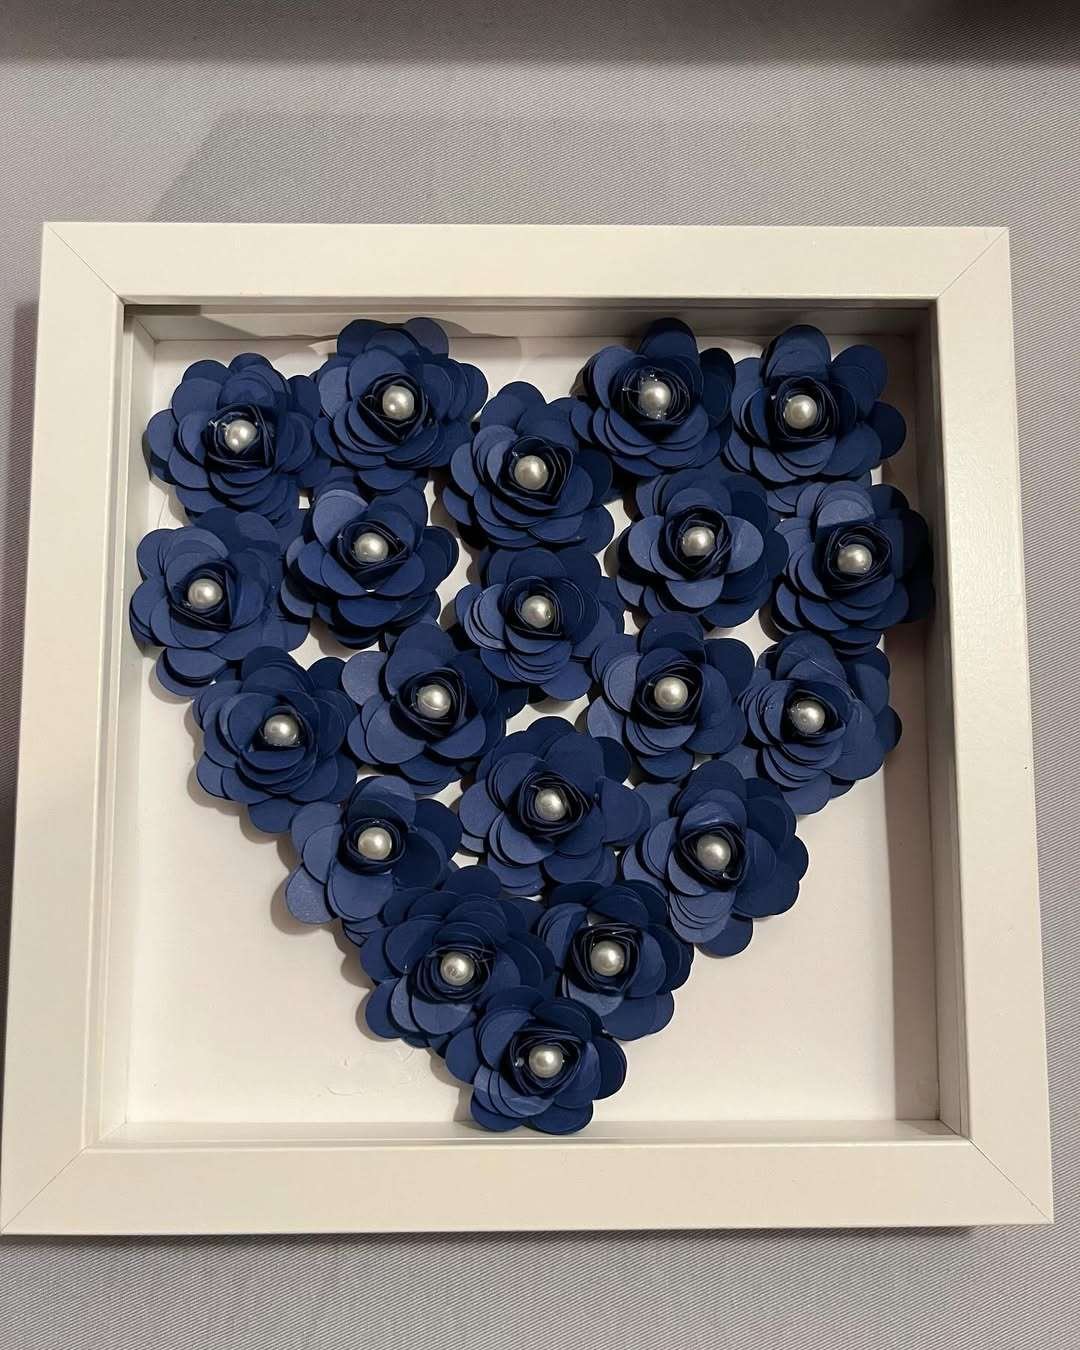
Image Credit: @thecoolist.com
11. Make a White Rose Wreath With a Personal Message
A circular wreath of tiny white paper roses creates a delicate background for a name, meaningful date, or short personal message. This style is particularly lovely for anniversaries, memorial keepsakes, and other occasions where you want a simple, sentimental design.
Prepare small white paper roses and arrange them into a circle on a cream or pale gray backing. Keep the center open for a printed message or neatly handwritten note. A few pale green paper leaves can soften the white flowers without introducing too much color.
Use a simple white frame and keep the flowers evenly spaced. For a more traditional appearance, add a small satin ribbon at the base of the wreath. Avoid covering the message with petals or decorative embellishments.
Crafting tip: Use a paper circle as a temporary placement guide while arranging the flowers, then remove the guide before attaching them permanently.
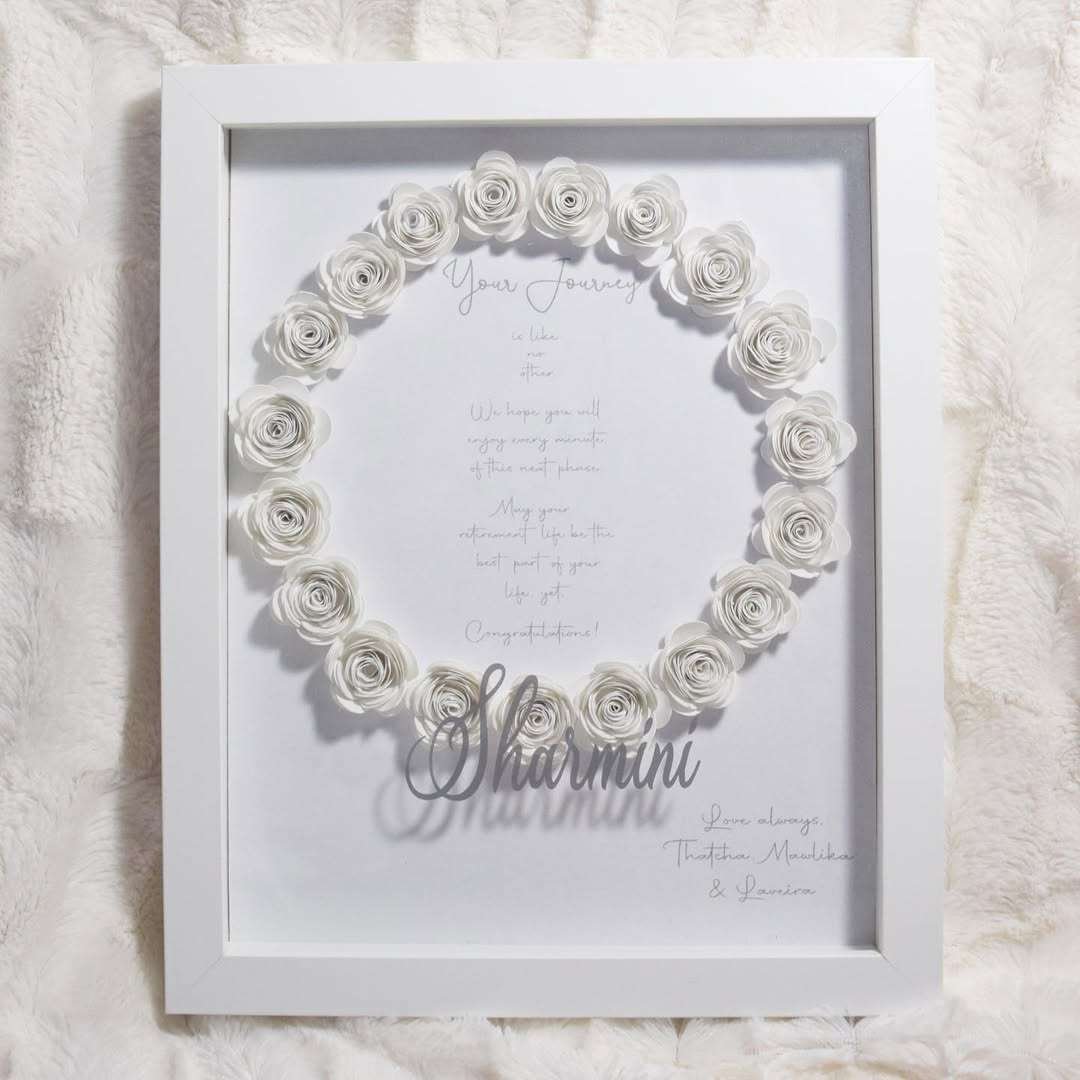
Image Credit: @thecoolist.com
12. Create a Thoughtful Teacher Appreciation Shadow Box
A handmade teacher appreciation shadow box is a thoughtful gift that can be displayed on a classroom shelf or desk. Bright paper flowers, school-themed shapes, and a personal message can create a cheerful design without requiring advanced crafting experience.
Choose a deep white or natural wood frame and fill the background with small purple or lavender paper flowers. Add a short printed thank-you message on the front backing layer, keeping the text large enough to read easily. A small apple cutout, pencil shape, or paper heart can provide a subtle school-inspired detail.
Try to keep the arrangement simple so the words remain the main focus. A combination of lavender flowers, white lettering, and a neutral frame creates a cheerful finished piece without using too many colors.
Personal touch: Include a short handwritten note from the student on a separate card inside the box.
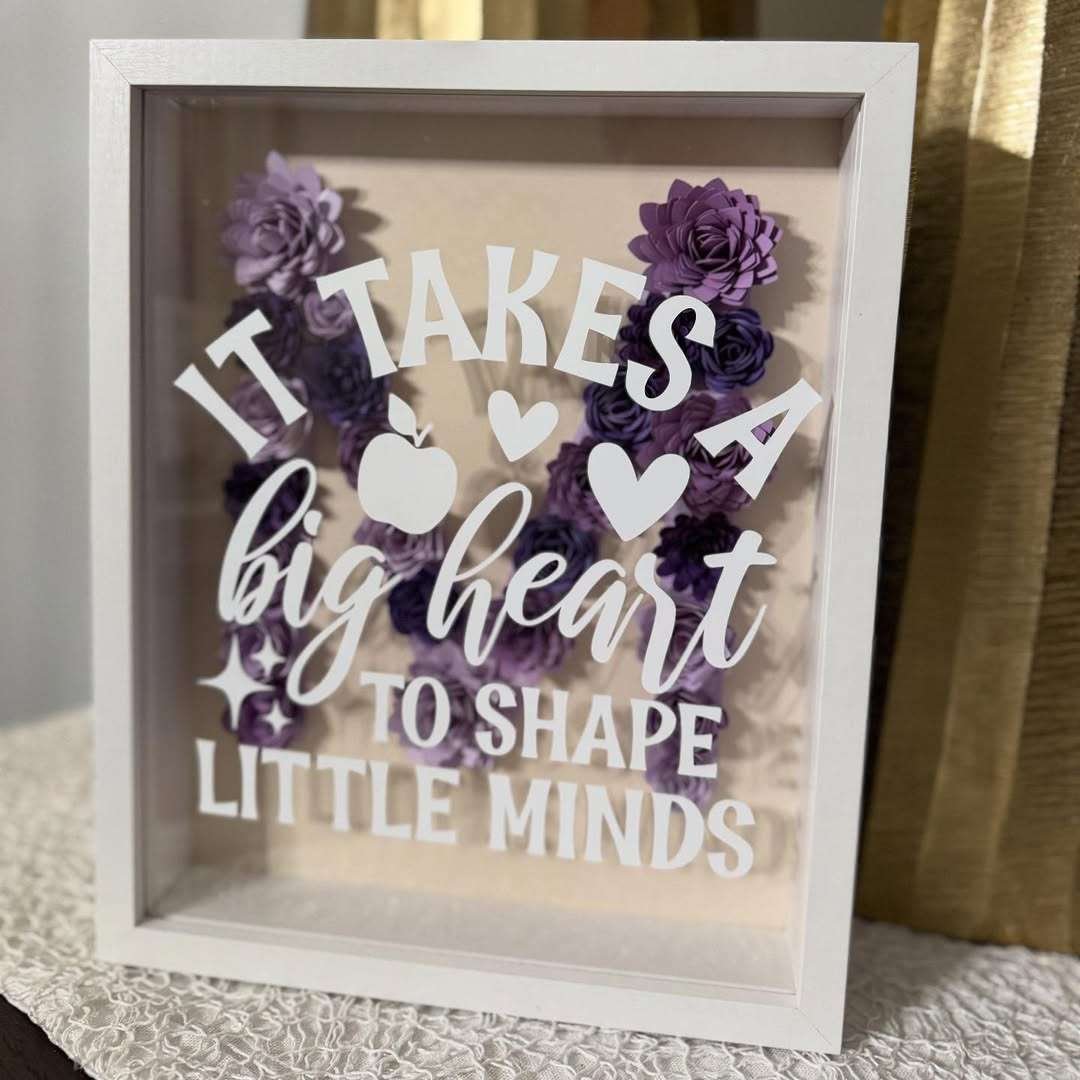
Image Credit: @thecoolist.com
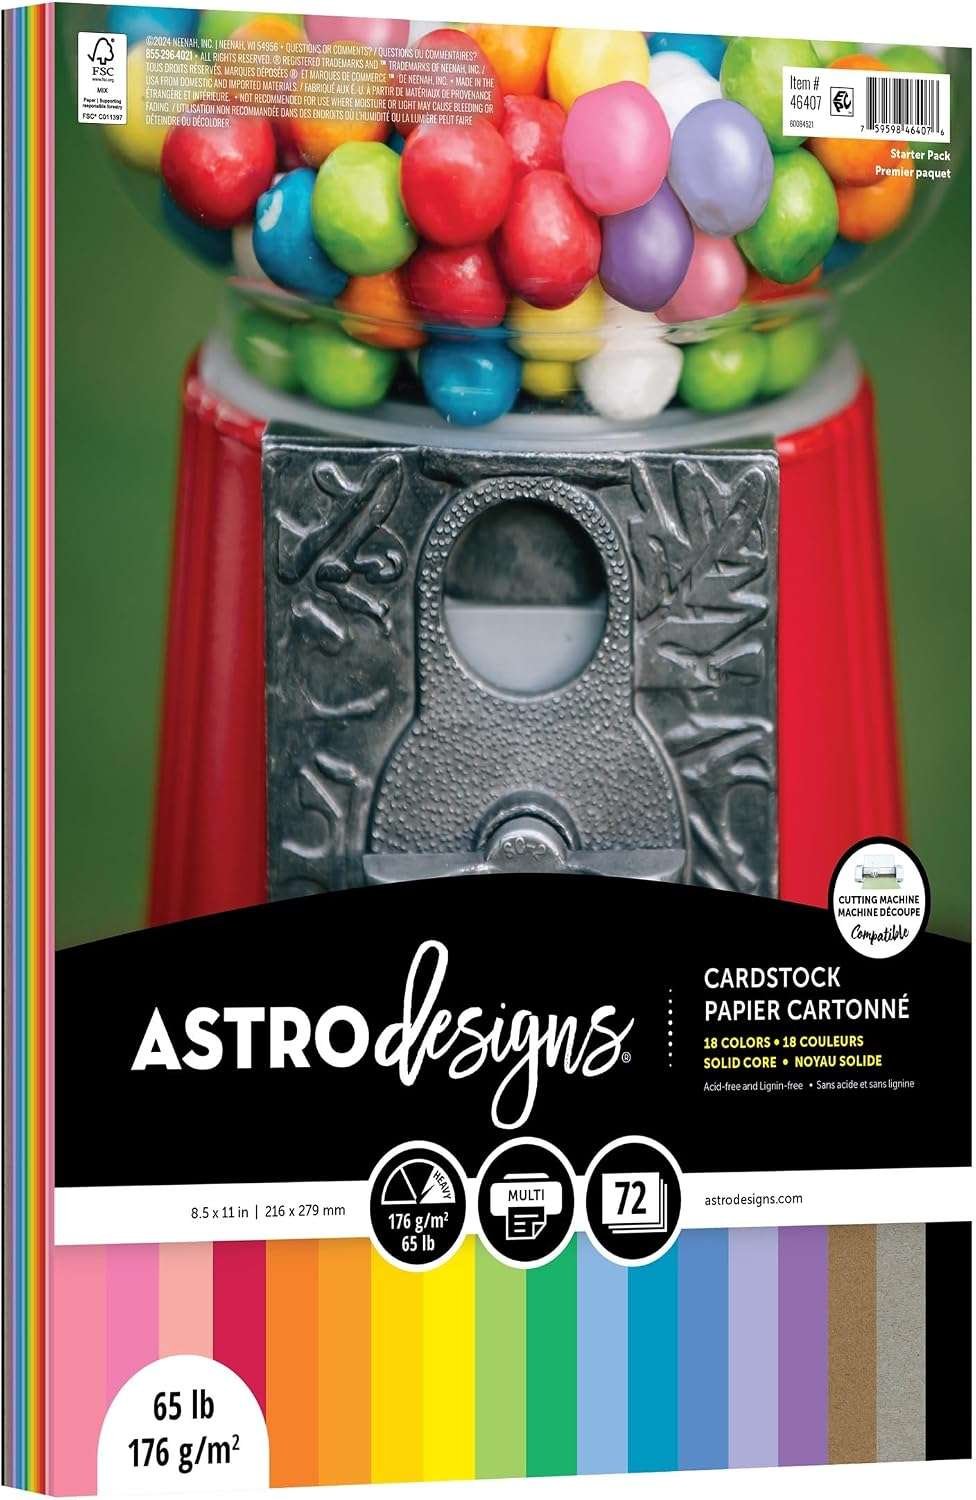
Amazon Find: Assorted Colored Cardstock Paper
Colored cardstock is useful for making rolled roses, floral hearts, decorative lettering, and layered backgrounds for personalized shadow box gifts.
13. Design a Colorful 3D Scrapbook Collage
If you love scrapbooking, a three-dimensional collage shadow box is a fun way to combine photographs, small decorations, and meaningful paper keepsakes. Unlike a traditional scrapbook page, the deep frame gives you room to create layers and little scenes around your favorite memories.
Start with a patterned paper background and arrange two or three small photographs across the backing. Add miniature paper flowers, colorful cutouts, and a few lightweight embellishments. Use foam adhesive squares between replaceable paper layers to create dimension without building bulky stacks.
Choose one main color and two supporting shades to connect the different objects. This project works especially well for birthday memories, friendship photos, family celebrations, or a child’s favorite moments.
Beginner tip: Leave small gaps around the photos so the faces remain easy to see. The decorations should support the memories rather than hide them.
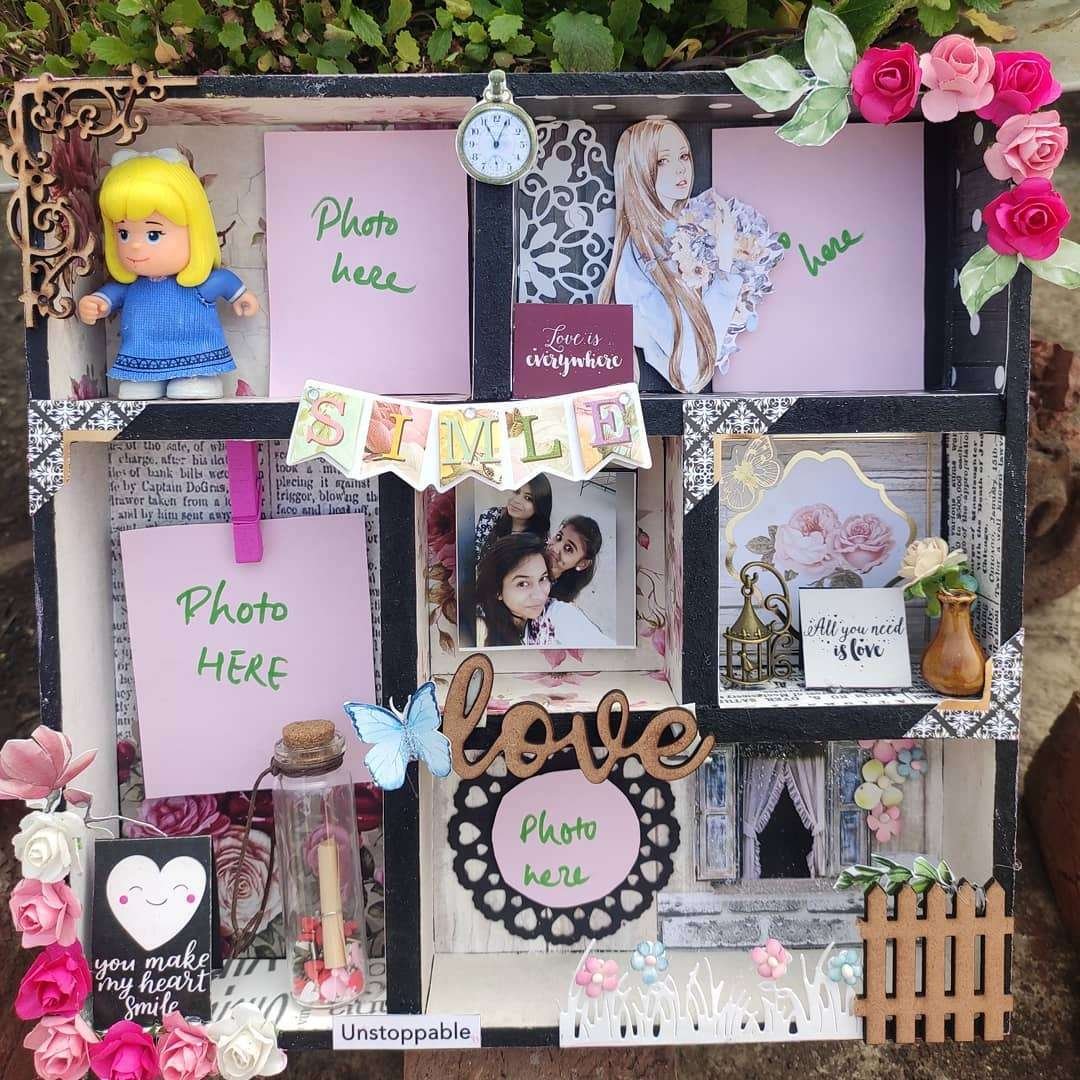
Image Credit: @thecoolist.com
14. Make a Red Rose Heart Shadow Box for Grandma
A heart-shaped arrangement of red paper roses makes a sweet handmade gift for Grandma, Mom, or another special family member. The combination of bright red flowers and a simple white background creates a loving message that feels personal and easy to display.
Create a large heart using rolled red cardstock roses, leaving a clear space in the center for a printed family message. Use a white shadow box with a pale background so the flowers remain the focal point. A few tiny green leaves can add contrast around the outer edge.
You can personalize the center with a name, short message, or a family photograph. For a softer version, combine burgundy and blush pink roses instead of using only bright red.
Budget idea: Make the flowers from leftover cardstock and print the message at home. The project can look polished without expensive embellishments.
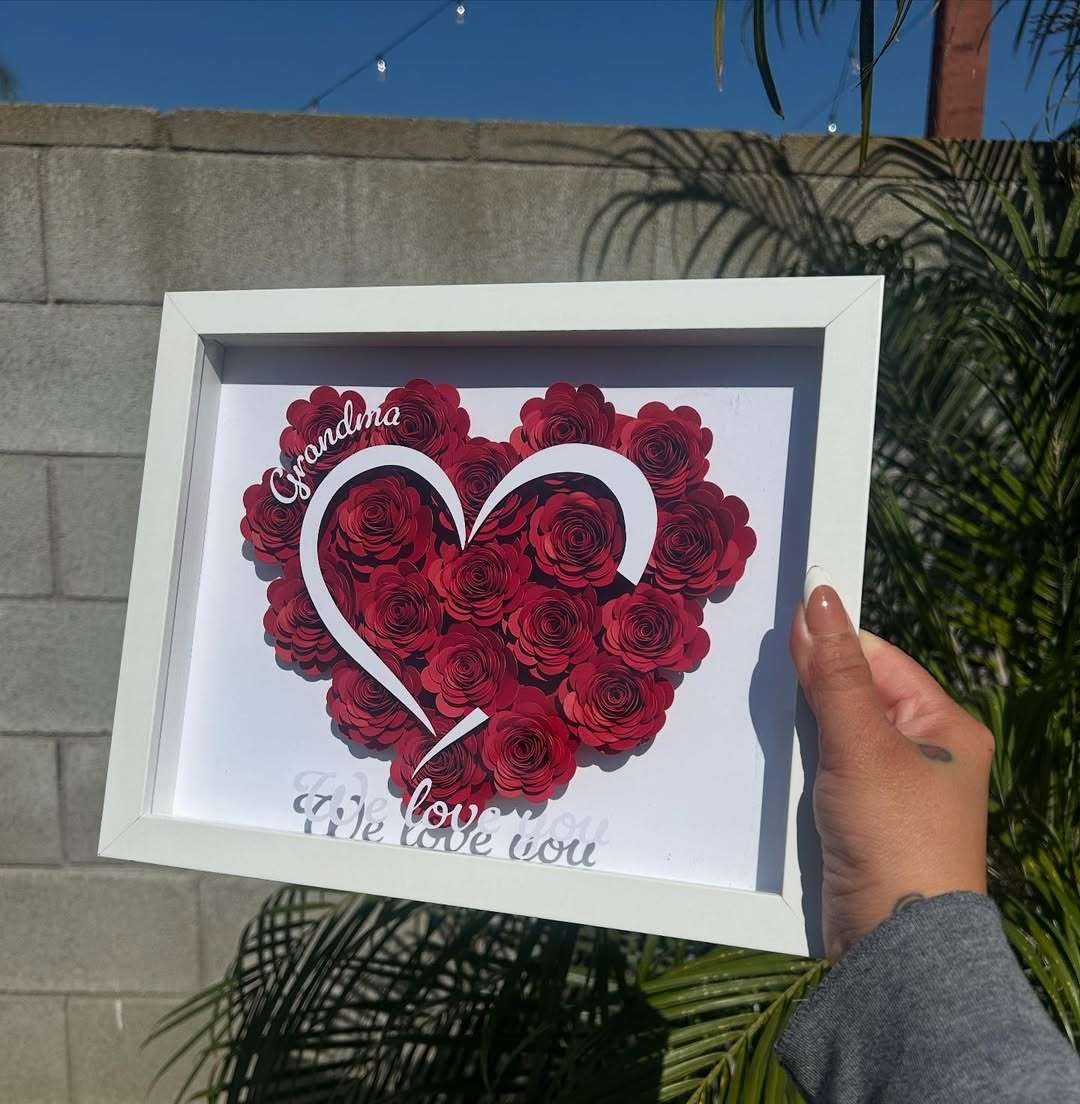
Image Credit: @thecoolist.com
15. Create Vintage Map Art With Flying Bird Silhouettes
A vintage map shadow box with flying bird silhouettes creates a beautiful piece of travel-inspired wall art. The aged map provides an interesting background, while the birds introduce movement and dimension, making the display feel more artistic than a simple framed print.
Begin with a printed vintage-style map or a reproduction map page. Attach it to the backing board and cut several small bird silhouettes from black, charcoal, or dark brown cardstock. Arrange the birds in a gentle upward path across the map, securing them with small foam spacers so some appear to float above the background.
Choose a weathered wood or dark walnut frame to complement the antique tones. The finished design works beautifully in a hallway, study, or travel-themed bedroom.
Styling tip: Use birds in slightly different sizes and directions to make the arrangement feel more natural. Keep the shapes simple so the vintage map remains visible.
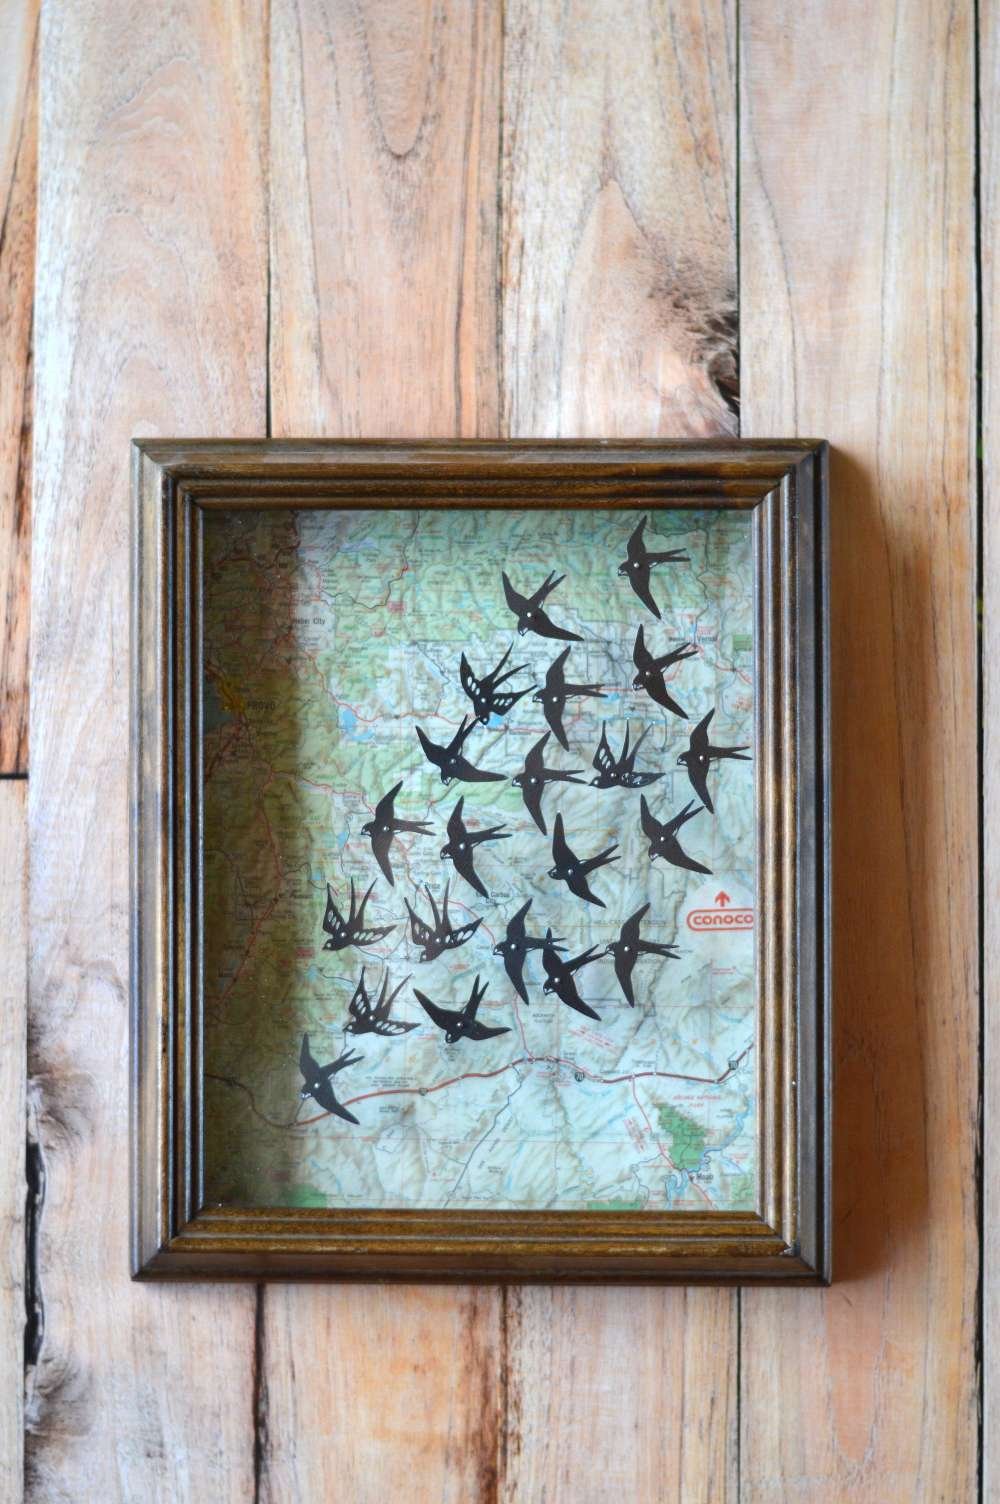
Image Credit: @pictureboxblue.com
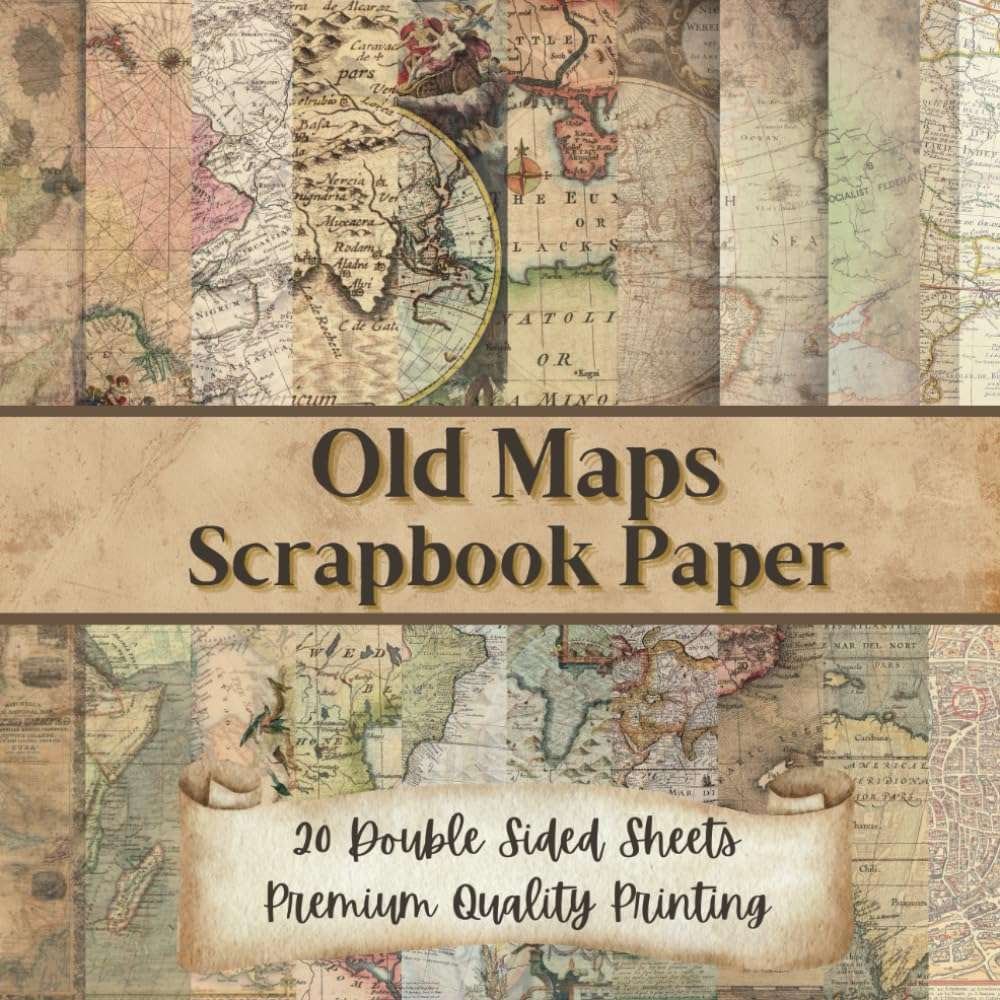
Amazon Find: Vintage Map Scrapbook Paper
Vintage map paper creates an attractive background for travel-inspired shadow boxes, bird silhouette art, and layered scrapbook displays.
16. Display Vintage Sewing Supplies and Notions
Old buttons, wooden thread spools, lace scraps, and vintage sewing labels can become a charming shadow box with a nostalgic handmade feel. This is a wonderful project for anyone who enjoys sewing, embroidery, quilting, or collecting old craft supplies.
Cover the backing with natural linen or subtle floral fabric. Arrange a few wooden spools, colorful buttons, ribbon pieces, and a small embroidery sample in an informal composition. Keep larger items toward the bottom and smaller labels or paper pieces above them to create visual balance.
A distressed wooden frame complements the vintage character, while a painted cream frame produces a softer cottage appearance. Reuse sewing supplies you already own rather than buying decorative replicas unnecessarily.
Practical tip: Remove or securely cover sharp needles and pins before closing the frame. Use archival supports for collectible labels or delicate inherited fabric.
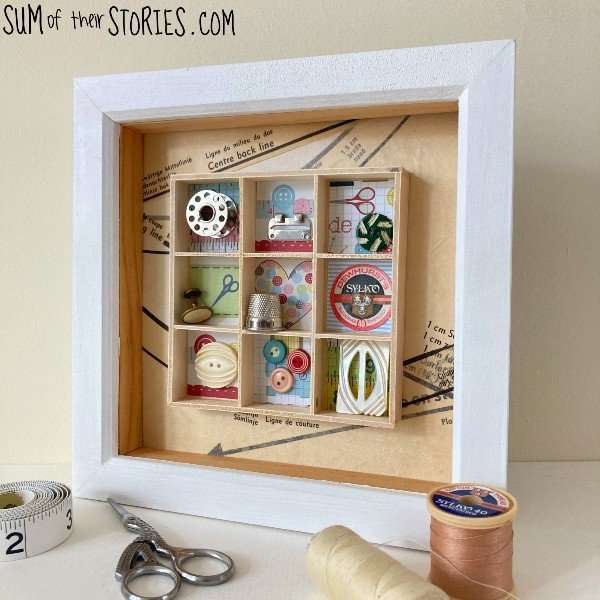
Image Credit: @pictureboxblue.com
17. Collect Concert Tickets and Special Event Memories
Concert tickets, movie stubs, festival wristbands, and theater programs often end up forgotten in drawers. A ticket memory shadow box gives these small souvenirs a dedicated place where you can enjoy them instead of throwing them away.
Choose a deep frame with a neutral background and arrange a few favorite tickets in overlapping rows. Add a small photograph from a concert or event to make the display more personal. If you collect tickets regularly, use a suitable top-loading memory box with an opening designed for adding new keepsakes.
For a decorative version, use a black frame with cream backing and a few colorful wristbands. Leave enough space for each ticket’s details to remain visible, and avoid covering them with strong adhesives.
Memory-saving idea: Print copies of digital tickets or screenshots from special events. Some original thermal-paper tickets fade with age, so scanning them first is a good precaution.
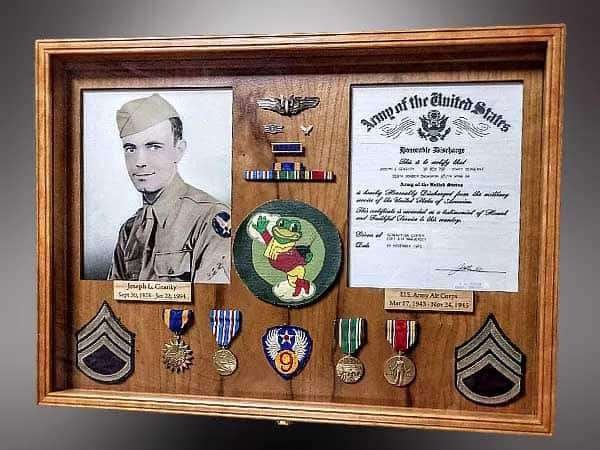
Image Credit: @pictureboxblue.com
18. Make a Vintage Halloween Shadow Box From Recycled Materials
A vintage Halloween shadow box is a fun seasonal project that turns ordinary recycled materials into a miniature spooky display. Old-fashioned illustrations, tiny paper decorations, and distressed finishes can create the atmosphere of a charming haunted antique shop.
Start with a small wooden frame or clean recycled metal container with smooth, safe edges. Paint the inside matte black or dark brown, then add a printed vintage-style Halloween illustration. Use small paper bats, miniature pumpkins, or a tiny decorative frame to add dimension.
Finish with a little aged-looking paper or decorative lace, keeping the arrangement simple enough for the vintage image to remain visible. Group the finished shadow box with a small pumpkin or lantern on a seasonal shelf.
Budget tip: Use leftover Halloween scrapbook paper and recycled craft materials. Avoid sharp metal edges, and choose battery-operated decorations rather than placing flames inside the display.
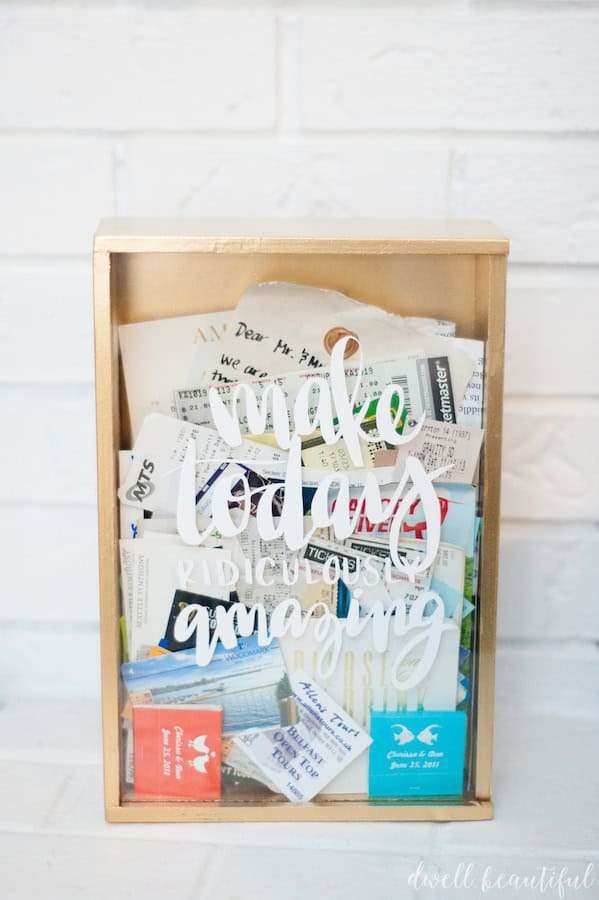
Image Credit: @pictureboxblue.com
19. Create a Miniature Day of the Dead Memory Shrine
A small shadow box can become a personalized Day of the Dead remembrance display inspired by Mexican ofrenda traditions. Bright paper flowers, meaningful photographs, and carefully chosen symbols can create a colorful tribute to a loved one or a thoughtful piece of cultural craft art.
Choose a wooden box with enough depth for a few layered objects. Line the back with vivid colored paper and place a photograph or printed memorial card in the center. Add miniature marigold-inspired paper flowers, small decorative papel picado details, and a few meaningful personal symbols around the image.
Keep the arrangement respectful and connected to the person or tradition it represents rather than combining unrelated decorations. If creating the project as a cultural learning activity, explore the significance of the symbols and remembrance customs before choosing materials.
Safety tip: Use battery-operated lights if you want a glowing detail. Never place a burning candle inside a wooden or paper-lined shadow box.
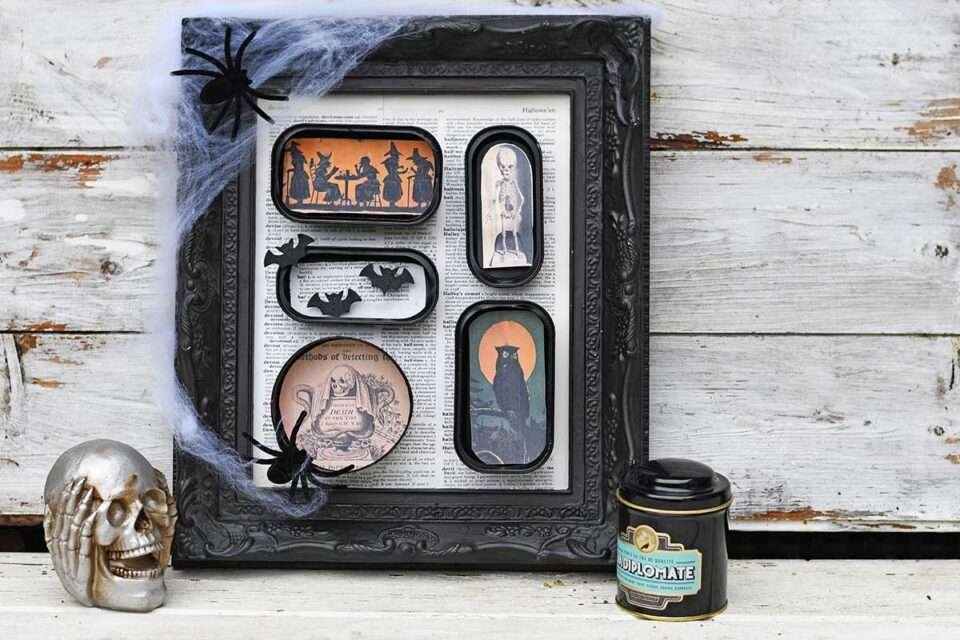
Image Credit: @pictureboxblue.com
20. Decorate a Vintage Printer’s Tray for Christmas
A vintage printer’s tray already has several small compartments, making it a wonderful foundation for a Christmas shadow box display. Each section can hold a tiny seasonal decoration, creating a charming collection that looks lovely on a mantel, bookcase, or entryway table.
Find a secondhand wooden printer’s tray or use a modern divided display box. Fill selected compartments with miniature bottle-brush trees, tiny ornaments, paper stars, wooden houses, and small decorative bells. Leave a few sections empty to prevent the arrangement from looking crowded.
For a rustic Christmas style, use cream, forest green, natural wood, and muted gold. A few small pieces of artificial greenery can introduce texture without requiring a full garland around the frame.
Styling tip: Vary the height and size of the decorations in neighboring compartments. Secure tiny ornaments and choose stable display hardware if hanging the tray on a wall.

Image Credit: @pictureboxblue.com
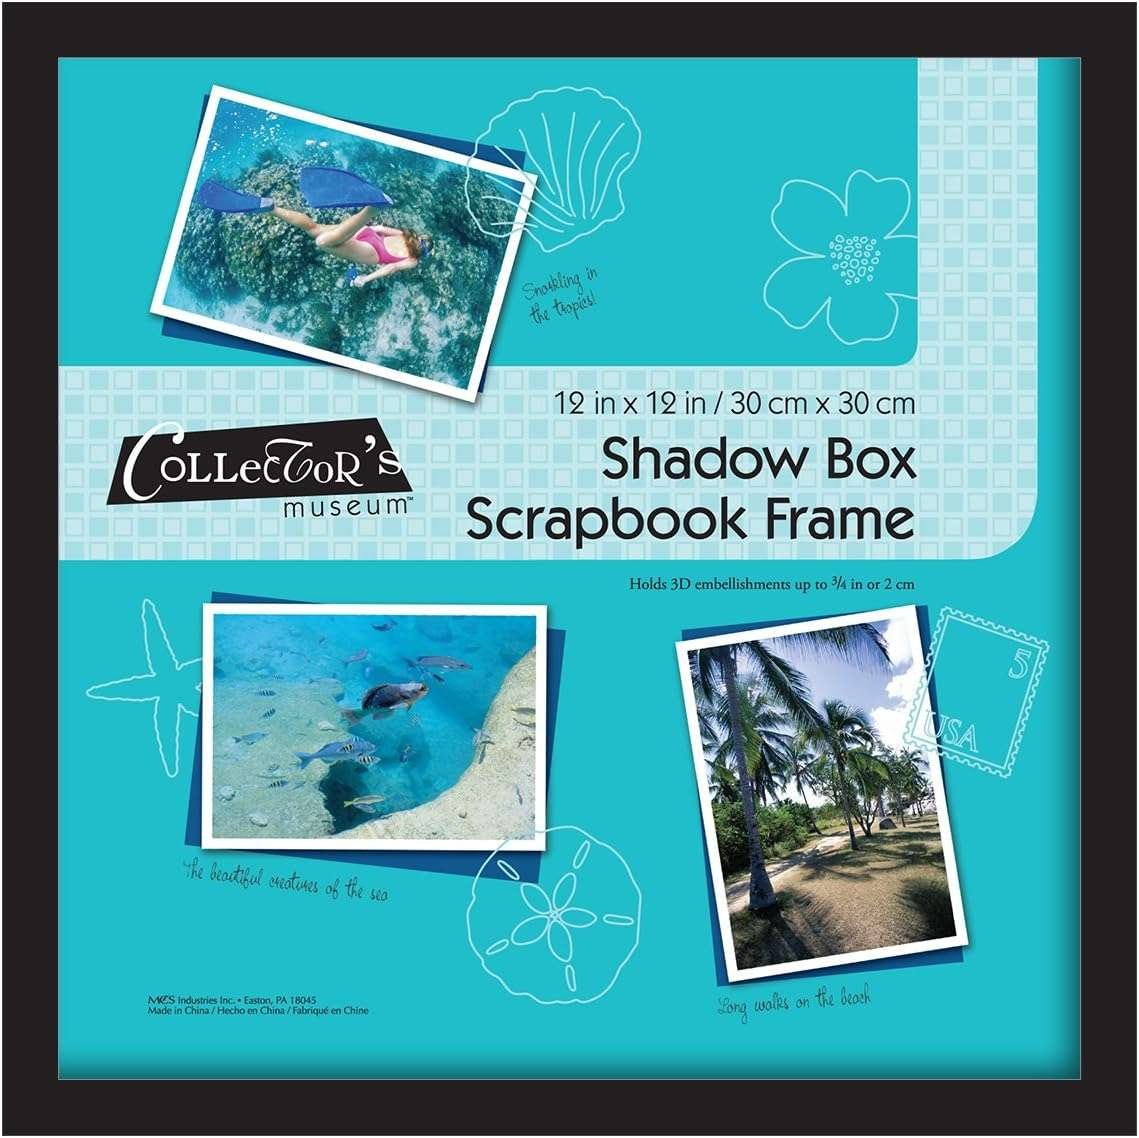
Amazon Find: Wooden Divided Display Shadow Box
A compartment-style wooden shadow box makes it easy to arrange miniature ornaments, collectibles, and seasonal decorations without building individual dividers from scratch.
DIY Shadow Box Shopping Checklist for Beginners
You don’t need every supply listed below. Choose the materials that suit your particular shadow box project and check your existing craft stash before purchasing anything new.
Essential Supplies
- Deep shadow box frame or suitable display box
- Cardstock, fabric, or decorative backing paper
- Scissors or a paper trimmer
- Ruler and pencil
- Suitable mounting materials for your chosen objects
- Lightweight craft decorations or keepsakes
- Appropriate picture-hanging hardware
Optional Decorative Extras
- Rolled paper flowers
- Small artificial greenery
- Miniature wooden shapes
- Ribbon, lace, or twine
- Decorative lettering or printed labels
- Pearl-style craft embellishments
- Foam adhesive spacers
- Battery-operated miniature lights
- Archival mounting supplies for delicate keepsakes
Smart shopping tip: Buy your frame only after choosing what you want to display. Measure the height, width, and depth of your largest object, then allow extra space for mounting and closing the frame comfortably.
Common DIY Shadow Box Mistakes to Avoid
Choosing a Frame That Is Too Shallow
A regular picture frame may not provide enough room for shells, flowers, medals, or miniature decorations. Measure the thickest object before buying your frame. The completed display should close easily without pressing delicate materials against the glass or acrylic front.
Overcrowding the Display
A shadow box doesn’t need to contain every souvenir or craft decoration you own. Too many items can make the layout difficult to understand. Choose one focal object, arrange supporting pieces around it, and leave visible background space between important details.
Using Permanent Glue on Valuable Keepsakes
Hot glue and ordinary tape can damage photographs, letters, textiles, and other meaningful objects. Use copies of delicate originals for craft projects or choose conservation-appropriate mounting methods. Irreplaceable heirlooms may benefit from professional preservation advice.
Enclosing Materials Before They Are Fully Dry
Pressed flowers, cleaned seashells, painted wood, and other materials should be completely dry before the frame is closed. Trapped moisture can damage paper backing, encourage mold growth, or affect the appearance of the display over time.
Forgetting About Safe Mounting and Display
Use hanging hardware appropriate for the combined weight of the frame and its contents. Heavy objects need secure internal support. Keep glass-fronted boxes and displays with small loose decorations out of reach of young children, and avoid placing delicate keepsakes in direct sunlight or damp locations.
Frequently Asked Questions About DIY Shadow Boxes
What can I put inside a DIY shadow box?
You can display photographs, tickets, dried flowers, seashells, small toys, paper crafts, vintage buttons, graduation keepsakes, and many other lightweight objects. Choose items that share a meaningful theme or color palette. The most attractive displays usually have one main focal point and several supporting details.
How do beginners make a shadow box at home?
Start with a ready-made deep frame and remove the backing. Cover the backing with paper or fabric, arrange your chosen decorations, and check that everything fits. Secure the objects using suitable mounts, close the frame, and display it with appropriate hanging hardware or on a stable shelf.
What is the best glue for making a shadow box?
The best adhesive depends on the materials you’re attaching. Craft glue can work for replaceable paper decorations, while suitable glue dots or foam adhesive may help with lightweight pieces. Valuable photographs, letters, and heirlooms should not be permanently glued; use appropriate archival mounting materials instead.
Can I make a shadow box without expensive supplies?
Yes. Look for thrifted frames, leftover scrapbook paper, ribbon scraps, old buttons, and recycled decorative materials. A simple arrangement of three to five objects can look just as charming as a complicated display. Reusing supplies you already own keeps the project affordable and personal.
How do I keep objects from falling inside a shadow box?
Choose secure mounting methods appropriate for each object’s weight, shape, and value. Lightweight craft pieces may be attached with suitable adhesive, while irregular objects can require custom supports. Test the arrangement gently before hanging and make sure the frame closes without pressing on the contents.
Recommended Finds for DIY Shadow Box Projects
If you’re preparing for your first shadow box craft, these supplies are useful for creating decorative backgrounds and layered arrangements.
- Deep Shadow Box Picture Frames: Provide room for three-dimensional decorations and keepsake arrangements.
- Decorative Scrapbook Paper: Useful for creating colorful backgrounds, vintage collages, and seasonal themes.
- Foam Adhesive Squares: Add dimension to replaceable paper decorations and lightweight scrapbook elements.
Final Thoughts: Turn Your Favorite Memories Into Beautiful Shadow Box Art
The beauty of DIY shadow boxes is that every project can be completely personal. A few seashells can remind you of a favorite vacation, paper flowers can become a thoughtful handmade gift, and a collection of family keepsakes can turn an ordinary frame into a meaningful display.
Start with one of these easy DIY shadow box ideas and use materials you already have at home. Choose a simple theme, arrange a few favorite objects, and leave enough space for each detail to stand out. With a little patience and creativity, you can make beautiful wall art that celebrates the memories, people, and moments that matter most.
